You’ve got a bibliography, a reference list, or maybe a works cited page staring at you. The second line needs to be indented, not the first. That’s a hanging indent, and Word makes it easier than most people realize.
Here’s the short answer: select your text, open the Paragraph dialog box, go to Indentation > Special, and choose Hanging. Done. But there’s more than one way to get there, and depending on your version of Word, the steps look slightly different. I’ll walk through all of them.
What Is a Hanging Indent?
A hanging indent flips the normal indentation logic. Instead of the first line being indented, the first line stays at the left margin and every line after it gets pushed inward.
It looks like this:
Smith, John. The Art of Writing Well. New York: Penguin, 2026.
This is where the second line starts, indented from the left.
You see this format constantly in:
- APA reference lists
- MLA works cited pages
- Chicago bibliography pages
- Annotated bibliographies
- Legal documents and scripts
If you’re writing an academic paper, your professor almost certainly wants this. If you’re formatting a document professionally, this is how proper citations look.
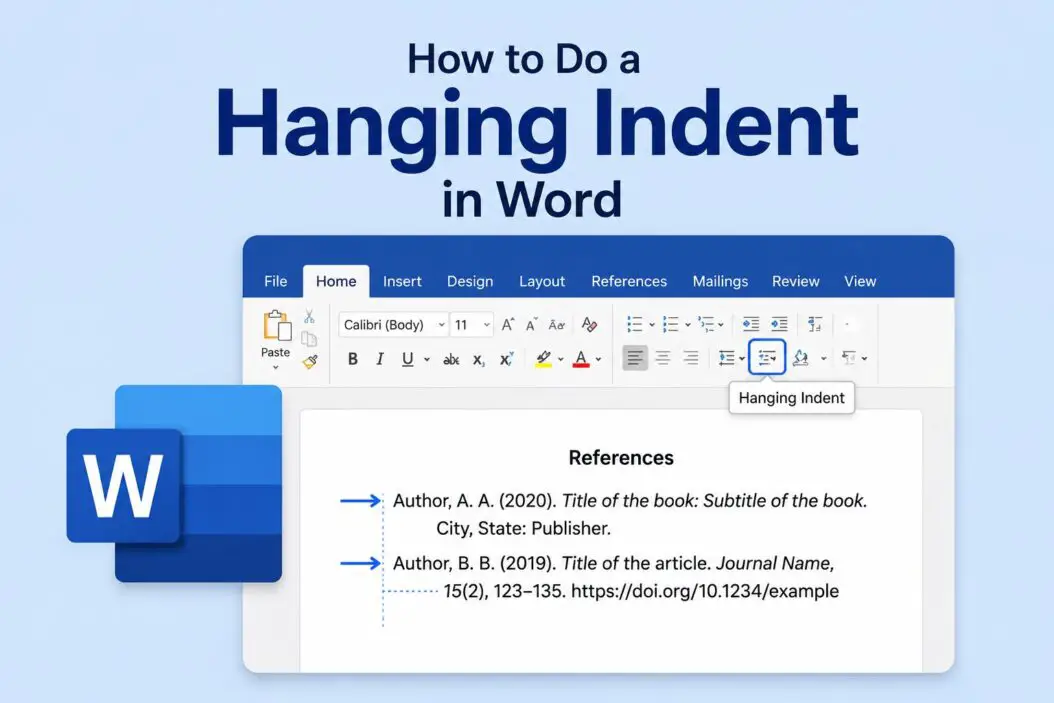
How to Do a Hanging Indent in Word Using the Paragraph Dialog Box
This is the most reliable method. It works in Word 2016, 2019, 2021, Microsoft 365, and the online version.
Step 1: Type your citation or select the text you already have. If you’re applying it to multiple paragraphs, select all of them at once.
Step 2: Right-click on the selected text. Click Paragraph from the menu that appears.
Step 3: In the Paragraph dialog box, look for the Indentation section in the middle.
Step 4: Under Special, click the dropdown menu. Select Hanging.
Step 5: The By box next to it will automatically show 0.5″. That’s the standard size for APA, MLA, and most academic formats. Leave it as is unless your professor or style guide asks for something different.
Step 6: Click OK.
That’s it. Your selected paragraphs now have a proper hanging indent.
Why 0.5 Inches?
Most style guides, including APA 7th edition and MLA 9th edition, specify half an inch. Word defaults to this, which is convenient. If you need a different size, like 0.25″ or 1″, just change the number in the By box.
How to Do It With the Ruler (Fastest Method)
If you can see the ruler at the top of your Word document, this takes about five seconds.
If the ruler isn’t visible, go to View and check Ruler.
Step 1: Select your text.
Step 2: Look at the ruler. You’ll see two small triangles and a rectangle at the left side.
- The top triangle points down. That controls the first line indent.
- The bottom triangle points up. That controls the left indent for all other lines.
- The rectangle below them moves both together.
Step 3: Grab the bottom triangle (just the triangle, not the rectangle beneath it) and drag it to the right. Drag it to the 0.5″ mark.
Step 4: Make sure the top triangle stays at 0. That keeps the first line at the margin.
The text updates in real time, so you can see exactly what it’ll look like before you let go.
This method is fast, but it requires a steady hand. If you accidentally move the rectangle instead of the triangle, both indents shift together. Undo with Ctrl + Z and try again.
Keyboard Shortcut for Hanging Indent in Word
Word doesn’t have a single built-in shortcut specifically for hanging indents, but there’s a workaround many people use.
Place your cursor at the end of the first line of your citation, then press Shift + Enter to create a line break (not a new paragraph). Then press Tab at the start of the second line.
This gives the visual appearance of a hanging indent, but it’s not a true hanging indent. It breaks down if the text wraps to a third line. So use it only for short, single-line entries.
For real multi-line citations, stick with the Paragraph dialog or the ruler.
How to Apply a Hanging Indent to Your Entire Reference List at Once
If you have 20 citations and don’t want to format them one by one, here’s how to handle all of them in one move.
Step 1: Click at the very beginning of your first citation.
Step 2: Hold Shift and click at the very end of your last citation. All citations are now selected.
Step 3: Open the Paragraph dialog box (right-click > Paragraph).
Step 4: Set Special to Hanging, keep the value at 0.5″, and click OK.
Every citation formats instantly. This saves a lot of time on long reference lists.
Setting Up a Hanging Indent Style in Word
If you write academic papers often, creating a custom paragraph style saves you from doing this manually every time.
Step 1: Format one paragraph with a hanging indent the way you want it.
Step 2: Select that paragraph.
Step 3: Go to the Home tab. In the Styles panel, click the small arrow in the bottom-right corner to open the Styles pane.
Step 4: Click New Style at the bottom.
Step 5: Give it a name like “Hanging Citation” or “APA Reference.”
Step 6: Click OK.
Now that style appears in your Styles panel. Any time you need a hanging indent, just click that style. This is especially useful if you use Word templates for academic writing.
Hanging Indent in Word Online (Browser Version)
Word Online is more limited than the desktop app, but hanging indents still work.
Step 1: Select your text in the browser-based Word.
Step 2: Go to the Home tab and look for the Paragraph section. Click the small dialog launcher (the arrow icon in the corner of the section).
Step 3: In the Paragraph settings, find Special indent and select Hanging.
Step 4: Set the value to 0.5″ and confirm.
If you don’t see the dialog launcher, try going to Format > Paragraph from the top menu bar.
Hanging Indent in Word for Mac
The process on Mac is nearly identical to Windows, with small visual differences.
Step 1: Select your text.
Step 2: Go to Format in the top menu bar (not the ribbon, the actual Mac menu at the very top of the screen).
Step 3: Click Paragraph.
Step 4: Under Indentation, find the Special dropdown and choose Hanging.
Step 5: Set the value to 0.5″ and click OK.
The ruler method also works on Mac the same way it does on Windows.
Common Hanging Indent Settings by Style Guide
| Style Guide | Hanging Indent Size | Line Spacing | Other Notes |
|---|---|---|---|
| APA 7th Edition | 0.5 inch | Double | All lines double-spaced |
| MLA 9th Edition | 0.5 inch | Double | No extra space between entries |
| Chicago 17th Edition | 0.5 inch | Double or single | Footnotes use regular indent |
| Turabian | 0.5 inch | Double | Same as Chicago |
| IEEE | Varies | Single | Often uses numbered references |
Most of the time, 0.5 inch is the correct answer. Check your specific style guide if you’re unsure.
For detailed APA formatting rules, the official APA Style website is the most accurate source. For MLA, Purdue OWL covers nearly every formatting question you’ll run into.
Troubleshooting: Why Your Hanging Indent Might Not Be Working
The whole paragraph is indenting, not just the second line
You probably moved the rectangle on the ruler instead of just the bottom triangle. Undo with Ctrl + Z and try again. Or use the Paragraph dialog box instead, which is more precise.
The indent looks right but disappears when I add a new line
You might have pressed Enter to start the next citation, which carries the formatting. But if the next paragraph resets, your style settings for that paragraph are overriding the indent. Apply the hanging indent to each new entry, or use a saved style.
I’m in Word Online and can’t find the Paragraph settings
Word Online hides some options. Try clicking Format from the top menu rather than looking in the ribbon tabs. Some features only appear there.
My citations are using a template and the indent won’t stick
The template style is overriding your manual formatting. You need to modify the style itself, not just the text. Right-click the style in the Styles pane and select Modify, then change the indentation there.
The indent is there but it’s too big or too small
Open the Paragraph dialog box and check the By value under Special. Change it to the exact amount you need.
Conclusion
A hanging indent in Word takes less than a minute once you know where to look. The Paragraph dialog box method is the most reliable across all versions of Word. The ruler is faster if you’re comfortable with it. And if you write a lot of papers, saving a custom style is the smartest long-term move.
The most important thing is making sure you’re applying a true hanging indent and not a manual workaround that breaks when text wraps. Use the built-in tools, set your indent to 0.5 inches, and your citations will look exactly the way your professor or style guide expects.
Frequently Asked Questions
Can I set a hanging indent as the default so I don’t have to apply it every time?
Yes. Format a paragraph with your preferred hanging indent settings, then right-click the paragraph style in the Styles pane (usually “Normal” or whatever you’re using), select Modify, update the indentation there, and check New documents based on this template. Every new document will start with that formatting built in.
Does a hanging indent affect how Word counts my page length?
Not directly. A hanging indent changes where text sits on the line but doesn’t add or remove pages on its own. However, if your indented lines wrap more than they would at the full margin width, you might end up with slightly more lines, which could push your document a little longer.
My professor said “use a hanging indent” but didn’t specify a size. What should I use?
Go with 0.5 inches. That’s what APA, MLA, and Chicago all use, and it’s Word’s default. Unless your professor gives a specific number, 0.5″ is the safe choice that fits every major academic style.
Is a hanging indent the same thing as a negative indent?
They’re related but not the same thing. A negative indent pulls the first line out past the left margin into the page margin. A hanging indent keeps the first line at the margin and pushes the rest inward. In Word’s Paragraph settings, a hanging indent is set through the Special dropdown, while a negative first-line indent would require manual adjustments to the first-line indent value.
Why does my hanging indent disappear when I copy the text into another document?
When you paste text into a new document, Word sometimes applies the destination document’s styles, which strips your custom formatting. To keep the formatting, use Paste Special > Keep Source Formatting, or reapply the hanging indent after pasting. If you use this format regularly, saving it as a named style and importing that style into the new document is a cleaner long-term fix.

- How to Find Printer IP Address in Under 2 Minutes - June 15, 2026
- 3 Best Ways to Create Custom Backgrounds in Microsoft Teams - June 15, 2026
- How to View Folder Size in Windows (All Versions) 2026 - June 15, 2026