Rotating your screen on Windows 10 or 11 takes about three seconds once you know where to look. The fastest way is pressing Ctrl + Alt + Arrow Key on your keyboard. That’s it. But if that doesn’t work, or you want more control, I’ll walk you through every method below.
Maybe you plugged in a second monitor that’s mounted vertically. Maybe you’re reading long documents and portrait mode is easier on your eyes. Or perhaps your screen randomly flipped sideways and you have no idea how that happened (spoiler: you probably hit the keyboard shortcut by accident).
The Fastest Method: Keyboard Shortcut
On most Windows systems with Intel graphics, these shortcuts work instantly:
| Rotation | Shortcut |
|---|---|
| Normal (landscape) | Ctrl + Alt + Up Arrow |
| Upside down | Ctrl + Alt + Down Arrow |
| Rotate left (portrait) | Ctrl + Alt + Left Arrow |
| Rotate right (portrait) | Ctrl + Alt + Right Arrow |
Just press the combo and your screen flips immediately. No menus, no settings, no restarting.
One thing to note: This shortcut is controlled by your graphics driver, not Windows itself. If you’re using an AMD or NVIDIA card without Intel integrated graphics, this shortcut might not work. In that case, use the Display Settings method below.
How to Rotate Screen in Windows 11 Display Settings
This method works on every Windows PC, no matter what graphics card you have.
Step 1: Right-click anywhere on your desktop.
Step 2: Click Display settings from the menu that appears.
Step 3: Scroll down until you see the Scale and layout section.
Step 4: Find the Display orientation dropdown. It will say “Landscape” by default.
Step 5: Click the dropdown and pick your preferred orientation:
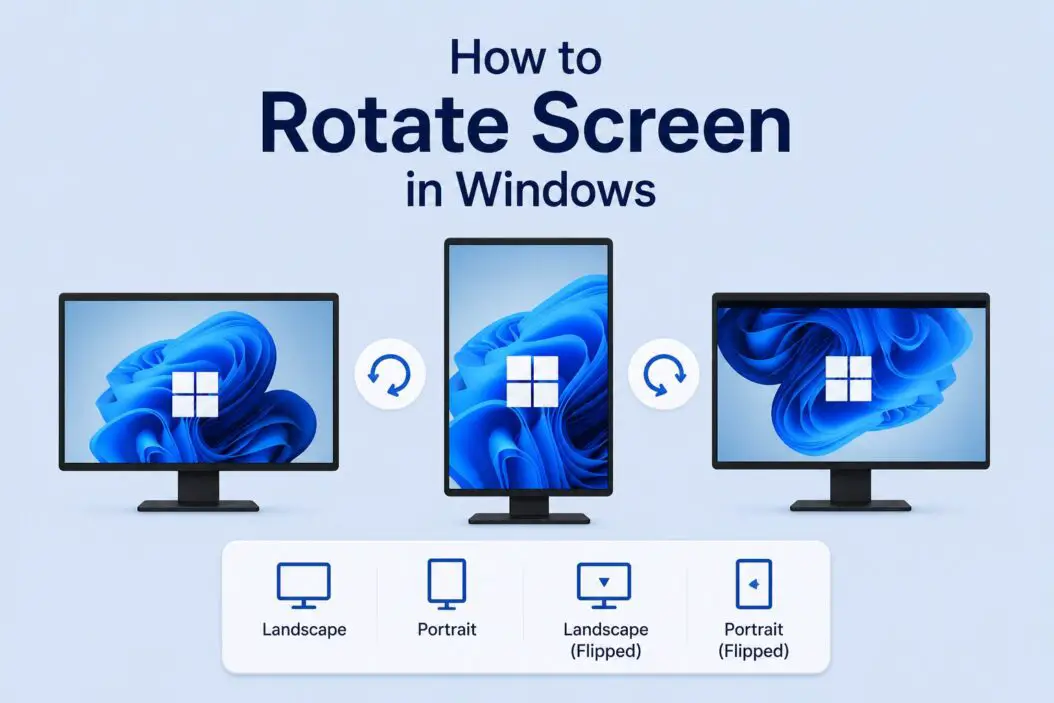
- Landscape (normal)
- Portrait (rotated 90 degrees)
- Landscape (flipped)
- Portrait (flipped)
Step 6: Windows will ask you to confirm the change within 15 seconds. Click Keep changes or it reverts automatically.
That last part is actually helpful. If you accidentally choose the wrong orientation and your screen goes black or weird, just wait and it snaps back.
How to Rotate Screen in Windows 10
The process on Windows 10 is nearly identical.
Step 1: Right-click on your desktop.
Step 2: Select Display settings.
Step 3: Under Scale and layout, look for Orientation.
Step 4: Use the dropdown to choose Landscape, Portrait, Landscape (flipped), or Portrait (flipped).
Step 5: Confirm your choice.
You can also get there through: Start Menu > Settings > System > Display.
Using Graphics Driver Software to Rotate Your Screen
If you use a dedicated GPU, the graphics software gives you rotation options too. Sometimes these offer more control, especially if you’re managing multiple monitors.
NVIDIA Control Panel
Step 1: Right-click your desktop and open NVIDIA Control Panel (or search it in Start).
Step 2: In the left panel, go to Display > Rotate display.
Step 3: Select your monitor if you have more than one.
Step 4: Choose your rotation angle: 0, 90, 180, or 270 degrees.
Step 5: Click Apply.
AMD Radeon Software
Step 1: Right-click your desktop and open AMD Radeon Software.
Step 2: Go to Display tab.
Step 3: Find the GPU Scaling or Display options and look for rotation settings.
Step 4: Select the angle you want and apply.
Intel Graphics Command Center
Step 1: Search for Intel Graphics Command Center in Start.
Step 2: Click on Display.
Step 3: Find Rotation and pick your angle.
Intel’s app is also what enables the Ctrl + Alt + Arrow shortcut mentioned earlier.
Rotating a Second Monitor Without Affecting the Main One
If you have a dual-monitor setup, Windows lets you rotate each screen independently. This is useful when one monitor is mounted vertically.
Step 1: Open Display Settings (right-click desktop).
Step 2: At the top, you’ll see numbered boxes representing each monitor. Click the one you want to rotate.
Step 3: Scroll down and change the Display orientation just for that selected monitor.
Step 4: Confirm the change.
The other monitor stays exactly as it is. Windows handles each display separately, which is exactly what you want in a mixed-orientation setup.
What to Do If Screen Rotation Is Greyed Out or Not Working
Sometimes the orientation dropdown is completely greyed out and you can’t click it. Here’s why that happens and how to fix it.
Update your display driver. An outdated or corrupted driver is the most common cause. Go to Device Manager, find your display adapter, right-click it, and select Update driver. Or download the latest driver directly from NVIDIA or AMD’s site.
Check if rotation lock is on. On tablets and 2-in-1 laptops running Windows, there’s a rotation lock in the Action Center (the notification panel in the bottom right). If it’s enabled, your screen won’t rotate automatically or manually through settings.
To disable rotation lock:
- Click the notification icon in the taskbar (or press Win + A)
- Look for Rotation lock tile
- Click it to toggle it off
Restart graphics services. Press Ctrl + Shift + Win + B. This restarts your graphics driver without restarting the PC. It sometimes fixes orientation issues caused by a driver glitch.
Check if your monitor supports rotation. Some older external monitors or cheap display adapters don’t support portrait mode through software. The option will be greyed out because the hardware physically can’t do it (or the driver doesn’t allow it).
Rotating Screen in Windows on a Laptop vs Desktop
The experience is a bit different depending on your device type.
| Device Type | Notes |
|---|---|
| Desktop PC | Full rotation options in Display Settings, driver software works |
| Laptop | Rotation lock may appear; auto-rotate available on touchscreen models |
| 2-in-1 / Tablet | Auto-rotate based on physical orientation; toggle via Action Center |
| External monitor | Rotate independently; physical pivot support depends on monitor model |
On 2-in-1 laptops like the Surface Pro, Windows detects when you flip the device and asks if you want to rotate. You can also let it rotate automatically. That auto-rotate sensor is called an accelerometer, and Windows uses it to match your physical orientation.
How to Enable or Disable Auto-Rotation on Windows Tablets and 2-in-1s
If you’re on a touchscreen device and want the screen to rotate automatically:
Step 1: Open Settings > Display.
Step 2: Look for Rotation lock near the top. If it’s on, turn it off.
Step 3: Physically rotate your device. Windows should detect the change and rotate the display.
If auto-rotation stopped working after an update, it’s often a driver issue. Check Windows Update or reinstall the sensor driver from Device Manager under Sensors.
Microsoft’s own documentation on display settings in Windows covers this in detail if you need official reference.
Rotating Screen for Specific Apps vs the Entire Display
Windows doesn’t have a built-in way to rotate just one app window independently while keeping the rest of the screen normal. Rotating through Display Settings affects the entire display.
If you need app-level rotation (like rotating a video player without rotating your whole screen), that’s handled inside the app itself. For example:
- VLC Media Player has a rotation filter under Tools > Effects and Filters > Video Effects > Geometry
- Photos app lets you rotate images directly
- PDF readers often have page rotation built in
For the full-screen rotation experience on a physical monitor, you’d need a monitor that supports pivot (physical 90-degree rotation) along with software rotation matched to the same angle.
Conclusion
Screen rotation on Windows is one of those things that sounds complicated until you’ve done it once. I’ve covered every route here: keyboard shortcuts, Display Settings, GPU software, and fixing it when nothing seems to work. The settings haven’t changed dramatically between Windows 10 and 11, so both are nearly identical in practice.
Rotating your screen on Windows 10 or 11 is simple once you know the right path:
- Fastest: Ctrl + Alt + Arrow Key (Intel graphics only)
- Most reliable: Right-click desktop > Display Settings > Display Orientation
- For dedicated GPU users: NVIDIA/AMD/Intel driver apps have rotation built in
- For tablets/2-in-1s: Turn off Rotation Lock in Action Center
- Greyed out option: Update your display driver or check rotation lock
Pick the method that matches your setup. Most people will be sorted in under a minute using Display Settings.
If your screen flipped sideways and you just want it back to normal, press Ctrl + Alt + Up Arrow right now. If that doesn’t work, go to Display Settings and set it to Landscape. Done.
Frequently Asked Questions
Why does my screen keep rotating back to the wrong orientation on its own?
This usually happens on laptops and tablets when auto-rotate is enabled and the device’s accelerometer is picking up movement. Open Action Center (Win + A) and turn on Rotation Lock. That pins your screen in its current orientation and stops it from flipping unexpectedly.
Can I rotate just one monitor in a dual-monitor setup without touching the other?
Yes. In Display Settings, click on the monitor you want to change at the top of the page. Only that monitor’s settings show below. Change the orientation there and it won’t affect the other screen at all.
I rotated my screen and now everything is sideways including my cursor movement. How do I fix it fast?
If the keyboard shortcut works, press Ctrl + Alt + Up Arrow to go back to normal landscape immediately. If your mouse feels inverted or sideways, that’s because Windows remaps cursor movement to match the rotated display. Getting the screen back to landscape fixes the cursor too.
Does rotating the screen affect gaming performance or refresh rate?
Rotating through Display Settings doesn’t reduce your refresh rate or affect GPU performance. However, most games won’t launch properly in portrait mode because they’re built for landscape resolutions. Stick to landscape for gaming.
My rotation lock button isn’t showing in Action Center. Where did it go?
On some systems, the Rotation Lock tile only appears in Action Center when Windows detects a supported sensor (accelerometer). If your device doesn’t have one, or you’re on a standard desktop, the tile won’t show. You can still rotate manually through Display Settings. If the tile disappeared after an update, go to Settings > System > Notifications and Actions and check if it’s been removed from quick actions.

- How to Find Printer IP Address in Under 2 Minutes - June 15, 2026
- 3 Best Ways to Create Custom Backgrounds in Microsoft Teams - June 15, 2026
- How to View Folder Size in Windows (All Versions) 2026 - June 15, 2026