
Microsoft Planner is a task management tool built into Microsoft 365. If you’ve been handed a project and someone says “just use Planner,” this article walks you through exactly how to use Microsoft Planner from creating your first plan to tracking work across your team.
I’ll cover the core features, the practical stuff most guides skip, and how Planner fits into the broader Microsoft 365 ecosystem now that it’s been merged with Microsoft To Do and Project for the web.
What Microsoft Planner Actually Is (And What Changed Recently)
Planner used to be a standalone Kanban-style task board. In 2024 and into 2026, Microsoft consolidated everything under a single “Planner” app. That means:
- The old Planner boards are still there
- Microsoft To Do tasks now live inside Planner
- You can access basic project timelines and goals (previously only in Project for the web) depending on your license
If you open Planner today and it looks different from older tutorials you’ve seen, that’s why. The interface is unified now. You still get the same core functionality, just in a cleaner, more connected space.
Getting Started with Microsoft Planner
How to Access Planner
You don’t need to install anything. Planner is part of Microsoft 365.
- Go to Microsoft 365 and sign in
- Click the app launcher (the nine-dot grid in the top left)
- Select Planner
- Or open it directly inside Microsoft Teams under the Apps section
If your organization uses Teams, I’d recommend using Planner from within Teams. It keeps everything in one place and makes it easier to link tasks to conversations.
Creating Your First Plan
When you open Planner, you’ll see a left sidebar with:
- My Day – tasks you’ve flagged for today
- My Tasks – everything assigned to you
- My Plans – all plans you’ve created or joined
To create a new plan:
- Click New Plan in the left sidebar
- Give your plan a name (keep it specific, like “Website Redesign Q3” not just “Project”)
- Choose whether it’s private or public within your organization
- Add a description if needed
- Click Create
Planner automatically creates a Microsoft 365 Group for each new plan. This means your plan gets its own shared mailbox, SharePoint site, and Teams channel if you connect it.
The Planner Interface
The Board View
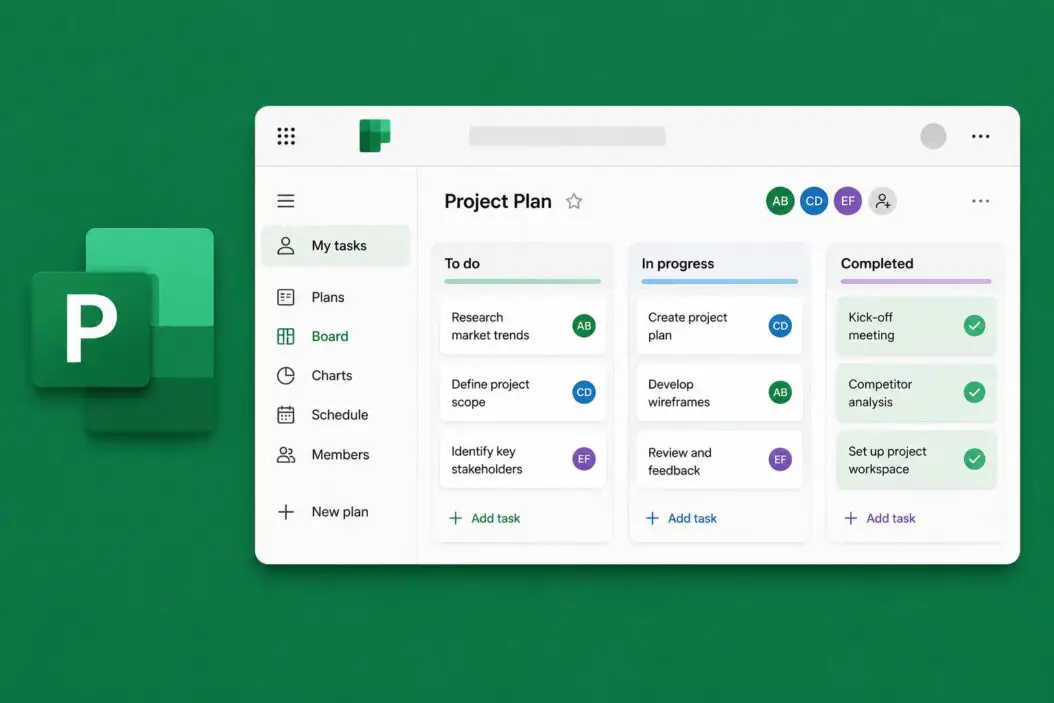
The Board view is the default. It shows tasks as cards arranged in columns called Buckets.
Think of buckets as categories or stages. Common setups include:
- To Do / In Progress / Done
- Backlog / This Sprint / Review / Complete
- By team member name
- By project phase
You can rename buckets, add new ones, and drag tasks between them. Tasks move left to right as work progresses, which gives you a clear visual of where things stand.
The My Tasks View
This is personal. It shows everything assigned to you across all your plans. You can filter by:
- Plan
- Due date
- Priority
This is the view I’d use at the start of each day. It removes the noise and shows exactly what’s on your plate.
The Grid View
Grid view shows tasks in a spreadsheet-style layout. It’s useful when you want to see many tasks at once with details like due dates, assignments, and progress all in a row.
It’s less visual than the board but easier for bulk editing. You can change due dates, priorities, and assignees directly in the grid without opening each task.
The Schedule View
Schedule view shows tasks on a calendar. If a task has a due date, it appears on that date. If it has both a start and end date, it appears as a bar spanning those days.
Use this when you need to check for deadline conflicts or plan workload across a week.
The Chart View
Charts give you a quick progress snapshot. You’ll see:
- Tasks by status (not started, in progress, late, completed)
- Tasks by bucket
- Tasks by priority
- Tasks by member
It’s useful for weekly standups or when you need to quickly report on project health.
Creating and Managing Tasks
How to Add a Task
In Board view, click Add task at the bottom of any bucket. Type a name and hit Enter. That’s the minimum.
To add more detail, click on the task card to open it. You’ll see:
| Field | What It Does |
|---|---|
| Title | Name of the task |
| Assigned to | Team member responsible |
| Due date | When it should be done |
| Start date | When work begins |
| Priority | Urgent / Important / Medium / Low |
| Progress | Not started / In progress / Completed |
| Notes | Free text for instructions or context |
| Checklist | Sub-tasks within the task |
| Attachments | Files from your device or SharePoint |
| Labels | Color-coded tags for filtering |
| Comments | Team discussion on the task |
Using Checklists Inside Tasks
Checklists are one of Planner’s most practical features. If a task has multiple steps, add them as checklist items instead of creating separate tasks.
For example, a task called “Write Blog Post” might have checklist items like:
- Research keywords
- Write draft
- Add images
- Internal review
- Publish
You can mark each item complete independently. The task card shows a progress indicator like “3 of 5” so you can see how far along it is at a glance.
Labels and How to Use Them
Labels are color-coded tags. Each plan has six label slots. By default they just show colors, but you can name them.
Click on a colored label dot inside a task, then click the pencil icon next to a label to name it. Good label examples for a marketing team:
- Red: Urgent
- Orange: Client-facing
- Green: Content
- Blue: Design
- Yellow: Waiting on approval
Labels help you filter the board quickly. If you want to see only design tasks, filter by the blue label.
Setting Priority
Priority works well alongside due dates. A task can be due next week but still be urgent because a client is waiting on it.
Priority levels in Planner:
- Urgent – red flag
- Important – orange flag
- Medium – blue flag
- Low – no visual indicator
Sort or filter by priority in My Tasks to find what needs attention first.
Working with Buckets
Organizing Buckets for Real Work
Most teams start with simple buckets like To Do, In Progress, Done. That works fine for small projects. For larger ones, think about what information you actually need at a glance.
A software team might use:
| Bucket | Purpose |
|---|---|
| Backlog | Ideas not yet scheduled |
| This Sprint | Active work this week |
| In Review | Waiting on feedback |
| Blocked | Stuck, needs action |
| Done | Completed this sprint |
A content team might organize by content type:
| Bucket | Purpose |
|---|---|
| Blog Posts | All blog content |
| Social Media | Platform-specific posts |
| Email Campaigns | Newsletter and drip content |
| Video | Scripts and production tasks |
There’s no universal right answer. Set up buckets that match how your team actually thinks about work.
Reordering and Renaming Buckets
Click the three dots next to a bucket name. You can:
- Rename it
- Delete it (tasks inside are not deleted, they move to an unassigned state)
- Move tasks to another bucket first, then delete
Drag the bucket header left or right to reorder buckets on the board.
Assigning Tasks to Team Members
How Assignment Works
You can assign one task to multiple people. Each person sees that task in their own My Tasks view. This is useful for tasks that require collaboration.
Click inside a task, then click the Assigned to field. Search for a name. You can add multiple people.
Planner sends an email notification to the assigned person when you assign them a task. They also see it appear in their My Tasks view immediately.
Assigning Tasks to Yourself
If you’re using Planner solo or want to track personal tasks alongside team ones, just assign tasks to yourself. They show up in My Tasks and My Day the same way.
Filtering the Board by Person
In the board view, click Filter in the top right. Select a team member’s name. The board instantly shows only their tasks. This is useful during standups or one-on-ones.
Using Microsoft Planner in Microsoft Teams
Adding Planner as a Tab in Teams
This is the most common way teams use Planner. You add it directly to a Teams channel.
- Open the Teams channel
- Click the + icon next to the existing tabs
- Search for Planner
- Choose to create a new plan or add an existing one
- Click Save
Now your team sees the Planner board without leaving Teams. Task updates, comments, and completions all happen in context.
Planner Notifications in Teams
When someone assigns you a task in Planner, you get a notification in Teams. When a task is completed or commented on, the relevant people are notified.
You can manage notification preferences in your Teams settings under Notifications > Planner.
The New Planner and Microsoft Project Integration
Since Microsoft rolled Planner into a unified app in 2024, users with Microsoft 365 Business or Enterprise licenses can access more advanced features directly in Planner.
Goals
Goals let you set high-level objectives and link tasks to them. Think of goals as the “why” behind the tasks. You can see progress toward a goal as the linked tasks get completed.
Premium Plans
If your organization has the right license (Project Plan 3 or Project Plan 5), you can create premium plans inside Planner. These add:
- Gantt chart / Timeline view (more powerful than the basic schedule)
- Dependencies between tasks
- Baseline tracking
- Resource management
For teams that have been using Project Online or Project for the web, this integration means you can manage complex projects from the same Planner interface everyone else uses.
For a deeper comparison of plans and licensing, Microsoft’s official Microsoft Planner documentation covers current feature availability by license type.
Copying, Moving, and Exporting Tasks
Copying a Plan
If you run similar projects repeatedly, you can copy an existing plan instead of starting from scratch.
- Go to the plan’s three-dot menu
- Click Copy plan
- Name the new plan
- Choose which elements to copy: tasks, assignments, dates, labels, descriptions, checklists
This saves significant setup time for recurring projects.
Exporting to Excel
Planner lets you export your task list to Excel.
- Open the plan
- Click the three-dot menu at the top right
- Select Export plan to Excel
You get a spreadsheet with all tasks, assignees, due dates, labels, and status. Useful for reports, archiving, or sharing with stakeholders who don’t have Planner access.
Moving Tasks Between Plans
Open a task. Click the three-dot menu inside the task. Select Move task. Choose the destination plan and bucket.
Note: When you move a task, it leaves the original plan entirely. If you want to keep it in both places, you’ll need to duplicate it manually.
Planner vs Other Tools: When to Use What
| Situation | Best Tool |
|---|---|
| Simple team task board | Microsoft Planner (Basic) |
| Personal to-do lists | Microsoft To Do (inside Planner) |
| Complex project with dependencies | Planner Premium (Project Plan license) |
| Spreadsheet-style tracking | Export to Excel |
| Deep reporting and analytics | Power BI connected to Planner |
For teams already inside the Microsoft 365 ecosystem, Planner is the natural starting point.
Tips That Actually Help
Use due dates consistently. Tasks without due dates get lost. Make it a team rule: every task gets a due date before it goes on the board.
Don’t create too many buckets. Five to seven buckets is usually the max before the board becomes hard to read on a normal screen.
Add notes to tasks, not just titles. A task called “Update homepage” means nothing in three weeks. Add a note with context: what needs to change, why, and any relevant links.
Use the checklist for anything with more than one step. Breaking tasks into checklist items keeps them from getting too vague.
Review My Tasks every morning. The My Day view inside Planner is where you flag what you’ll focus on today. Spend two minutes there each morning and you’ll rarely miss a deadline.
Archive completed plans. Completed plans stay in your sidebar and create noise. Close or archive them so your sidebar stays clean.
Planner for Recurring Projects
Planner doesn’t have a built-in recurring task feature for automatically creating tasks on a schedule. The workaround most teams use is Power Automate.
You can build a simple flow in Power Automate that creates a task in a specific Planner bucket on a set schedule. For example, every Monday morning, a “Weekly report” task appears in the team bucket automatically.
To do this:
- Open Power Automate
- Create a new Scheduled cloud flow
- Set the recurrence (daily, weekly, monthly)
- Add the Create a task action under Microsoft Planner
- Fill in the plan, bucket, title, and assignee
This covers the gap in Planner’s native feature set for teams that run the same processes repeatedly.
Conclusion
Microsoft Planner works well when you use it consistently. The basics are genuinely easy to get up with: create a plan, set up buckets, add tasks, assign them, set due dates. From there, the chart view, label filtering, and checklist features do the heavy lifting for team visibility.
The 2024 consolidation into a single Planner app made things cleaner. If you’re on a Microsoft 365 plan, everything is already available. If your team needs Gantt charts or task dependencies, check whether your license includes Project Plan features inside Planner before looking at other tools.
Start with one project. Keep the board simple. Add structure as your team grows into it.
FAQs
Can I use Microsoft Planner without a Microsoft Teams account?
Yes. Planner is accessible directly at planner.microsoft.com with any Microsoft 365 account. You don’t need Teams to use it. That said, using it inside Teams adds convenience if your team is already there, since everything stays in one workspace and notifications flow naturally through Teams.
How do I see all tasks across multiple plans in one view?
Go to My Tasks in the left sidebar of Planner. This view pulls together every task assigned to you from every plan you’re part of. You can filter by plan, due date, or priority from there. It’s the single best view if you’re juggling several projects at once.
What happens to a plan when a team member leaves the organization?
Tasks assigned to that person remain in the plan. They stay assigned to the departing user’s name. You’ll need to manually reassign those tasks to someone else. The plan itself stays intact. A plan owner can go through and update assignments after the person leaves.
Is there a limit to how many tasks or plans I can create in Planner?
Microsoft doesn’t publish a hard cap on the number of tasks per plan, but very large plans (thousands of tasks) can get slow to load and hard to navigate. In practice, splitting a massive plan into smaller, phase-based plans works better. Each Microsoft 365 group can have one associated plan, and an organization can have many groups, so plan limits are tied to your overall Microsoft 365 tenant limits.
Can I attach files from SharePoint or OneDrive to a Planner task?
Yes. Inside any task, click the Attach button and choose from your device, a link, or your SharePoint or OneDrive files. Attached files from SharePoint don’t get copied. Planner creates a link to the original file, so the task always points to the latest version. This is one of the strongest reasons to use Planner inside the Microsoft 365 ecosystem rather than a standalone tool.

- How to Create a Presentation with AI (Step-by-Step) - June 19, 2026
- How to Restore Your Favorites List (Edge, Chrome, Firefox, Safari and More) - June 18, 2026
- How to Make Money with AI in 2026 (Real Methods That Actually Work) - June 18, 2026