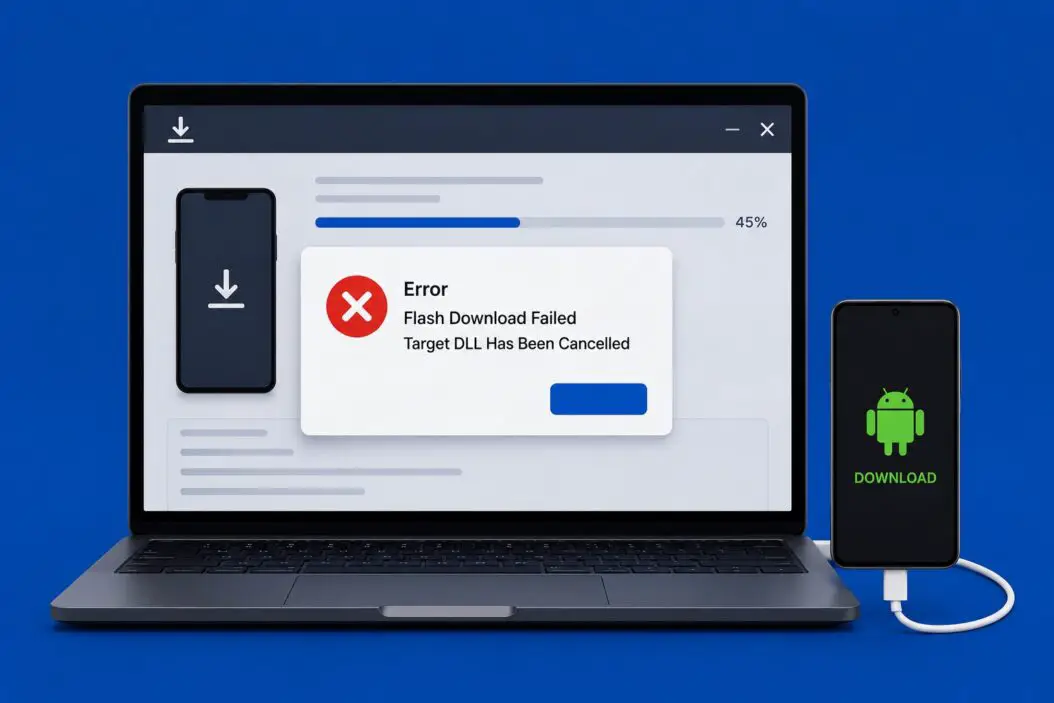
You’re flashing firmware to a microcontroller or embedded device, everything looks fine, and then boom. The progress bar stops dead. The error reads something like: “Flash download failed. Target DLL has been cancelled.” Your device is not bricked. Your tool is not broken. This is a fixable error, and I’m going to walk you through exactly what’s happening and how to sort it out.
Let me give you the short answer first: this error almost always means the debug session between your IDE or flash programmer and the target device was interrupted or never properly established. The “Target DLL” is the debug driver that communicates with your hardware, and when that connection drops or fails to initialize, the flash process gets cancelled mid-way.
Why This Error Actually Happens
The “Target DLL has been cancelled” message is most common in Keil MDK (uVision), IAR Embedded Workbench, and STM32CubeIDE when using debug probes like ST-Link, J-Link, or ULINK. The flash download process depends on a live, stable connection between your PC and the target microcontroller through the debug probe.
When that connection is interrupted, the DLL (dynamic link library) responsible for managing that communication throws a cancellation signal, and the flash operation stops.
Here’s a breakdown of what causes it:
| Cause | Frequency | Likely Tool Affected |
|---|---|---|
| Unstable USB connection to debug probe | Very common | All tools |
| Wrong debug interface selected (SWD vs JTAG) | Common | Keil, IAR |
| Power supply issue on target board | Common | All |
| Incorrect clock speed in debugger settings | Moderate | Keil, IAR |
| Stale/corrupt driver installation | Moderate | J-Link, ST-Link |
| Target in low-power or sleep mode during flash | Moderate | STM32, Nordic |
| Firewall or antivirus blocking DLL execution | Less common | Windows |
| Wrong device selected in project settings | Less common | All |
Fix It Step by Step
I’m going to go through these from most likely to least likely. Start at the top and work down.
Step 1: Check Your Physical Connections First
This sounds too simple, but it fixes the problem more often than anything else.
- Unplug the USB cable from the debug probe and plug it back in
- Try a different USB port, preferably a USB 2.0 port directly on your PC, not a hub
- Check that the target board is properly powered, either from the probe’s 3.3V pin or an external supply
- Inspect the SWD or JTAG ribbon cable or jumper wires for loose contacts
- If you’re using Dupont wires, swap them out, they fail silently all the time
Step 2: Verify the Debug Interface Settings
In Keil uVision:
- Go to Options for Target > Debug
- Under the debug adapter dropdown, confirm you’ve selected the right probe (ST-Link, J-Link, etc.)
- Click Settings next to the probe
- Check whether SWD or JTAG is selected. Most modern ARM Cortex devices default to SWD. If JTAG is selected and your board only has SWD pins, the connection will fail every time.
- Lower the Max Clock speed. Try 1 MHz or even 500 kHz if you’re having issues. High clock speeds over noisy or long wires cause communication errors.
In IAR Embedded Workbench:
- Go to Project > Options > Debugger
- Check the interface tab under your selected driver
- Same principle applies: switch to SWD if you’re on JTAG, reduce the interface speed
In STM32CubeIDE:
- Open Run Configurations or Debug Configurations
- Go to the Debugger tab
- Confirm the debug probe type and interface match your hardware
Step 3: Update or Reinstall the Probe Drivers
Outdated or corrupted drivers are a real cause of this error.
For ST-Link:
- Download the latest ST-Link utility or STSW-LINK009 driver from st.com
- Uninstall the existing driver from Device Manager first
- Reinstall cleanly, then reboot
For J-Link:
- Download the latest J-Link software pack from SEGGER
- Run the installer, it will update the DLL files that Keil and IAR use
- After installation, confirm the DLL path in your IDE points to the updated version
For ULINK:
- Reinstall the Keil MDK pack that includes ULINK support
- Check Keil’s pack manager for the Keil::MDK-Middleware update
Step 4: Reset the Target Before Flashing
Sometimes the target MCU is stuck in a low-power state, a bootloader mode, or has code running that locks the debug port. You need to force it into a receptive state.
In Keil:
- In the Settings dialog for your debug probe, enable Connect & Reset under the reset strategy
- Set it to SYSRESETREQ or Autodetect
In STM32CubeIDE for STM32 devices:
- Hold the RESET button on your board, click flash/download, then release RESET as the process begins
- This is a manual “connect under reset” trick that works when software reset fails
For Nordic nRF devices using nRF Connect:
- Use the Recover option in nRF Connect for Desktop before trying to program again
- A locked chip will always produce this kind of error
Step 5: Check the Project’s Device Configuration
A project configured for the wrong MCU will fail to flash because the flash algorithm doesn’t match the actual chip.
In Keil:
- Go to Options for Target > Device
- Confirm the exact part number matches your physical chip
- Check Options for Target > Utilities > Settings > Flash Download
- Make sure the correct flash programming algorithm is added and the address ranges are correct
In IAR:
- Project > Options > General Options > Target > Device
- Verify this matches your actual chip
Step 6: Check for DLL Path or Antivirus Issues
On Windows, antivirus software sometimes quarantines or blocks .dll files that debug tools rely on. This is more common after a Windows Defender update.
- Open Windows Security > Virus & threat protection > Protection history
- Look for any recently blocked items related to Keil, IAR, SEGGER, or ST
- Add exceptions for your IDE’s installation directory
Also check the DLL path directly:
In Keil, go to Options for Target > Debug > Settings and look at the DLL file being referenced. If the path is wrong or the file doesn’t exist, Keil will fail silently before throwing this error. The typical correct DLL for ST-Link is STSW_LINK007.DLL or ST-LINKIII-KEIL_SWO.DLL depending on your version.
Step 7: Try a Different Flashing Tool Entirely
If nothing above works, try flashing outside your IDE to isolate whether the problem is the IDE or the hardware.
- For STM32: use STM32CubeProgrammer standalone
- For Nordic: use nRF Connect for Desktop Programmer
- For generic ARM: use OpenOCD from the command line
- For J-Link users: use J-Flash Lite
If the standalone tool flashes successfully, the problem is your IDE configuration, not the hardware. If it also fails, the issue is the probe, cable, or target board itself.
Common Scenarios and What They Mean
Scenario A: It Was Working Yesterday, Now It Fails
This is almost always a driver or USB issue. A Windows Update often reinstalls or modifies driver versions. Reinstall your probe driver and check Device Manager for any yellow exclamation marks on your debug probe.
Scenario B: New Project, Never Worked
Check your device selection and flash algorithm. A brand new project that was never working points to a configuration mismatch, not a driver problem.
Scenario C: Fails on One PC but Works on Another
This is a driver version or USB power delivery issue. The PC that fails might have an older driver, stricter USB power limits, or a different USB controller that doesn’t play well with your probe.
Scenario D: Intermittent Failure
Intermittent failures scream hardware. Loose cables, cold solder joints on the target board, or a faulty USB connector on the probe. Check everything physically, and if possible, test with a different probe unit.
Preventing This Error in the Future
A few habits that save you from dealing with this again:
- Always use a quality USB cable with proper shielding, not the thin throwaway cables
- Use a USB port directly on the motherboard, not a USB hub, for debug probes
- Keep your IDE, probe firmware, and drivers updated together. A Keil update without a J-Link firmware update can create version mismatches
- When working with boards in low-power designs, always implement “connect under reset” as your default flash strategy
- Document your working clock speed settings per project. Different targets behave differently
For developers working with STM32 devices specifically, ST maintains detailed troubleshooting guidance for ST-Link issues in their community knowledge base, which is a solid resource when you’re dealing with edge cases.
Quick Reference Checklist
Use this when you hit the error and need to work through it fast:
- USB connection checked and re-seated
- Correct debug interface selected (SWD vs JTAG)
- Clock speed reduced in probe settings
- Driver updated and reinstalled
- Connect under reset enabled
- Correct device and flash algorithm in project settings
- Antivirus exclusion checked
- Tested with standalone flashing tool
- Tried different USB port or cable
- Checked target board power supply
Conclusion
The “Flash download failed, Target DLL has been cancelled” error looks intimidating but it follows a predictable pattern. It’s almost always a connection problem, a configuration mismatch, or a driver issue. Start with the physical stuff: cables, ports, power. Move to settings: interface type, clock speed, reset strategy. Then look at software: drivers, DLL paths, device configuration.
The reason I structured it this way is that most people lose hours chasing software problems that are actually caused by a wobbly jumper wire or a wrong USB port. Check the simple stuff first, always.
Once you’ve flashed successfully, note exactly what settings worked in your project README or a comment in your build file. Future you will thank past you the next time this pops up.
FAQs
My debug probe shows up in Device Manager but the flash still fails. Why?
Device Manager showing the probe just means the USB driver is loaded. It does not mean the probe firmware can communicate with your target MCU. The actual DLL that handles the debug protocol is separate from the USB driver. You may have a correct USB connection but a broken SWD/JTAG signal path between the probe and your board. Check the signal wires and try reducing the interface clock speed in your IDE’s probe settings.
Can a locked or read-protected chip cause this error?
Yes. If your microcontroller has read-out protection (RDP) enabled, some debugger configurations will refuse to connect cleanly and cancel the DLL session. On STM32, this shows up as exactly this kind of error. You need to perform a mass erase or chip unlock operation using the manufacturer’s standalone tool (like STM32CubeProgrammer) before the normal flash workflow will function again. Be aware that unlocking erases all existing flash content.
I updated Keil MDK and now I get this error on a project that was working before. How do I fix it?
Keil updates sometimes change the default DLL paths or reset the debug probe settings to defaults. Go into Options for Target > Debug > Settings and recheck your interface type, clock speed, and reset strategy. Also confirm that the DLL file referenced in the debug configuration still exists at the listed path. Sometimes a Keil update reorganizes its installation directory and the old path becomes invalid.
Does the target voltage matter for this error?
It does. Most debug probes use the target’s VCC reference pin to calibrate signal levels. If that pin is not connected or if the target voltage is unstable, the probe cannot match signal thresholds and the debug session fails. Make sure the VREF or VCC reference pin on your probe is connected to the target’s operating voltage, not left floating.
Can I use a different DLL version than what my IDE installed?
In Keil specifically, yes. You can point the debug configuration to a different DLL by modifying the DLL path in the project settings. This is sometimes useful if your probe manufacturer has released a newer DLL than what Keil bundled. However, mixing DLL versions can cause instability, so only do this if the IDE-bundled version is confirmed to be the problem, and always test on a non-critical project first.

- How to Host a Successful LinkedIn Live: Step-by-Step Guide - June 14, 2026
- How to Type the @ Symbol on Any Keyboard (Every Device Covered) - June 14, 2026
- Error Flash Download Failed Target DLL Has Been Cancelled: Full Fix Guide - June 14, 2026