Mail merge lets you send personalized emails, letters, or documents to hundreds of people at once without typing each one manually. You write one template, connect it to a spreadsheet or contact list, and the tool fills in each person’s name, address, or any other detail automatically.
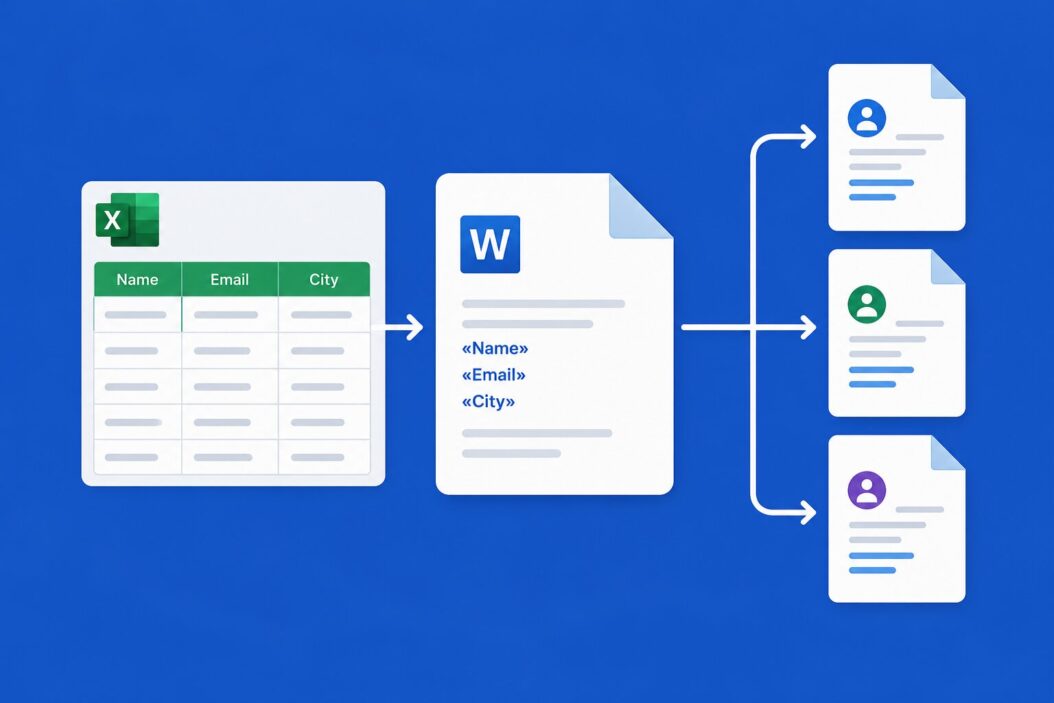
Mail merge combines a template document with a data source. The template has placeholders like {{First Name}} or <<Company>>. The data source is usually a spreadsheet with one row per person. The tool reads each row and produces a unique document or email for each contact.
You need it when you’re sending invoices to clients, holiday cards to a mailing list, job offer letters to new hires, event invitations, or any situation where the content is mostly the same but a few details change per person.
If you’re sending to fewer than 10 people, just write them manually. Mail merge pays off at scale.
How to Do a Mail Merge in Microsoft Word (With Excel)
This is the most common setup. Word handles the template. Excel holds the data.
Step 1: Prepare Your Excel Spreadsheet
Open Excel and set up your data with column headers in the first row. Keep them clean and simple.
| First Name | Last Name | Company | City | |
|---|---|---|---|---|
| Sara | Ahmed | sara@example.com | Nexgen | Lahore |
| James | Patel | james@example.com | Techdot | Karachi |
Rules to follow:
- No blank rows between records
- No merged cells
- Column headers should have no spaces if possible (or use underscores)
- Save it as a regular
.xlsxfile
Step 2: Write Your Template in Word
Open a new Word document. Write your letter or document the way you’d write it for one person. Leave gaps where the personalized details will go. You’ll insert the merge fields in the next step.
Go to the Mailings tab at the top.
Step 3: Connect Word to Your Excel File
In the Mailings tab, click Select Recipients, then choose Use an Existing List.
Browse to your Excel file and select it. Word will ask which sheet to use. Pick the one with your data and click OK.
Your spreadsheet is now connected to your document.
Step 4: Insert Merge Fields
Click where you want a name to appear in your document. Then click Insert Merge Field from the Mailings tab. A dropdown appears showing your column headers. Click the one you want.
It inserts something like «First Name» into your document. That’s the placeholder. Do this for every field you need.
A simple letter might look like:
Dear
«First_Name»,We’re reaching out to
«Company»because we have an offer specifically for teams in«City».
Step 5: Preview Your Results
Click Preview Results in the Mailings tab. Word shows you the actual merged content from your first row. Use the arrows to flip through contacts and catch any formatting issues.
Step 6: Finish and Merge
Click Finish and Merge. You get three choices:
- Edit Individual Documents creates a single Word file with all merged documents separated by page breaks. Good for printing.
- Print Documents sends them directly to your printer.
- Send Email Messages sends emails directly if you have Outlook configured.
If you choose email, Word asks which column contains email addresses and what the subject line should be. It sends through Outlook in the background.
How to Do a Mail Merge with Gmail (Using Google Sheets)
Microsoft Word is great for printed letters. For email at volume, many people use Gmail with Google Sheets. The native approach uses a Google Apps Script or a third-party add-on.
Using Google Sheets + Gmail with Apps Script
This method is free and surprisingly simple.
Step 1: Create a Google Sheet with your contact data. Include a column called Email.
Step 2: Add a column called Email Sent and leave it blank. The script will mark rows as sent to avoid duplicates.
Step 3: In Google Sheets, go to Extensions > Apps Script.
Step 4: Paste this script:
function sendEmails() {
  var sheet = SpreadsheetApp.getActiveSpreadsheet().getActiveSheet();
  var data = sheet.getDataRange().getValues();
  var headers = data[0];

  for (var i = 1; i < data.length; i++) {
    var row = data[i];
    var emailSent = row[headers.indexOf("Email Sent")];
    if (emailSent === "Sent") continue;

    var email = row[headers.indexOf("Email")];
    var firstName = row[headers.indexOf("First Name")];

    var subject = "A quick note for " + firstName;
    var body = "Hi " + firstName + ",\n\nYour personalized message goes here.\n\nThanks!";

    GmailApp.sendEmail(email, subject, body);
    sheet.getRange(i + 1, headers.indexOf("Email Sent") + 1).setValue("Sent");
  }
}
Step 5: Click Run. Google will ask for permissions to access Gmail. Approve them. The script sends each email and marks the row.
For more sophisticated Gmail-based mail merges with HTML templates and tracking, tools like Yet Another Mail Merge (YAMM) are worth looking at. It connects directly to your Google Sheet and handles formatting, open tracking, and scheduling.
Mail Merge in Google Docs (For Letters and PDFs)
If you need formatted letters or PDFs instead of emails, Google Docs has a built-in mail merge feature now.
Step 1: Open Google Docs and click Tools > Mail merge.
Step 2: Choose your Google Sheet as the data source.
Step 3: Insert placeholders using the Insert merge field option in the sidebar.
Step 4: Click Preview to check output, then Merge to create a new document or send emails.
This works well for one-off batches where design matters, like formal letters or certificates.
Common Mail Merge Problems and How to Fix Them
Dates and Numbers Look Wrong
Excel stores dates as serial numbers internally. When Word pulls them, they sometimes display as 45678 instead of June 1, 2026.
Fix: In Word, right-click the merge field and choose Toggle Field Codes. Add a date format switch like this:
{ MERGEFIELD Date \@ "MMMM d, yyyy" }
For currency, use \# "$#,##0.00" after the field name.
Emails Go to Spam
If you’re sending through Outlook or Gmail Apps Script at volume, some emails will land in spam. This happens because of sending velocity and lack of proper authentication.
Solutions:
- Send in smaller batches (under 100 per hour from personal accounts)
- Warm up your domain if using a custom one
- Set up SPF and DKIM records for your domain
- Avoid spam trigger words in subject lines
Wrong Contacts Got the Wrong Data
This usually means your Excel rows shifted or you had blank rows in your data. Always sort your data, remove blank rows, and preview before sending.
Merge Fields Show as Plain Text
If you see «First Name» in the final output instead of an actual name, the field link broke. Go back to Mailings, click Select Recipients again, and reconnect your spreadsheet.
Choosing the Right Mail Merge Tool
| Situation | Best Tool |
|---|---|
| Printed letters or formal documents | Word + Excel |
| Bulk emails via Gmail | YAMM or Apps Script |
| Simple emails via Outlook | Word + Excel |
| Formatted PDFs from Google Docs | Google Docs Mail Merge |
| Large-scale email campaigns | Mailchimp, Brevo, or similar |
| CRM-based outreach | HubSpot, Salesforce built-in |
For marketing emails above 500 recipients, dedicated platforms like Brevo (formerly Sendinblue) handle deliverability, unsubscribes, and analytics far better than a word processor ever will.
Tips That Save You Time
Test with one contact first. Before sending to 500 people, merge just one row and review it carefully. Check spacing around merge fields. A missing space between «First_Name» and «Last_Name» produces SaraAhmed.
Use a consistent naming format in your spreadsheet. If some cells have SARA AHMED and others have sara ahmed, your emails look inconsistent. Standardize capitalization before starting.
Save your template. Once you’ve built a working template, keep it. You’ll use it again.
BCC yourself on a test email. Always send a test to yourself before the full run so you can see exactly what recipients receive.
Back up your data source. If something goes wrong mid-merge, you need to know which rows were already processed.
Conclusion
Mail merge is one of the most practical productivity tools available, and it costs nothing if you’re already using Word, Excel, or Google Workspace. The setup takes about 15 minutes the first time. After that, you can run the whole process in under five.
The key steps are: clean data in a spreadsheet, a solid template with properly inserted fields, a test preview before sending, and then the final merge. Everything else is just choosing which tool fits your situation.
Start small, test thoroughly, and you’ll never go back to copy-pasting emails one by one.
FAQs
Can I attach a different file to each person in a mail merge?
Not natively in Word or Gmail. Each email gets the same attachment unless you use a specialized tool. For unique attachments per recipient (like personalized invoices), tools like Docupilot or PDF Mail Merger can generate and attach unique PDFs per row before sending.
Does mail merge work with conditional content, so some people see different paragraphs?
Yes, but it takes a bit of setup. In Word, you use IF fields inside your template. For example: { IF «City» = "Lahore" "Visit our Lahore office." "Contact us online." }. In Apps Script, you handle this with standard JavaScript if/else logic in your message body.
How many emails can I send at once through Gmail mail merge?
Gmail personal accounts allow around 500 emails per day. Google Workspace accounts can send up to 2,000. If you exceed these limits, emails bounce or your account gets flagged. For higher volumes, use a dedicated email sending service with proper domain authentication.
Will recipients know I used mail merge?
No, as long as the merge fields are correct and the content reads naturally. The only time it becomes obvious is when something goes wrong, like “Dear [First Name]” appearing literally, or mismatched data. Always preview before sending.
Can I undo a mail merge email send?
No. Once sent, emails are gone. There’s no recall feature in Gmail. In Outlook, message recall works only if the recipient hasn’t opened it yet and you’re both on the same Exchange server. This is why testing matters so much.

- How to Do a Mail Merge in 2026 (Step-by-Step Guide for Any Tool) - June 2, 2026
- How to Hard Reset iPhone: A Simple Guide - June 2, 2026
- How to Block Spam Emails (And Actually Keep Them Out in 2026) - May 30, 2026