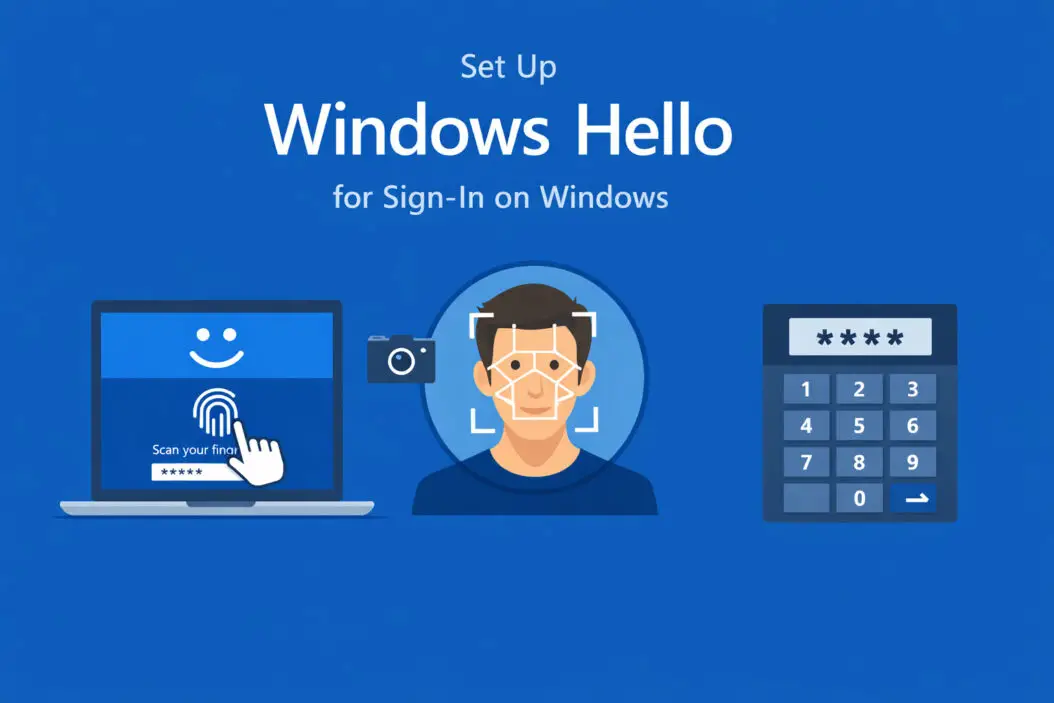
Windows Hello lets you unlock your computer with your face, fingerprint, or a PIN instead of typing a password. It’s faster, more secure, and eliminates the frustration of forgotten passwords.
This guide shows you exactly how to set up Windows Hello for sign-in on your Windows PC. Whether you want facial recognition, fingerprint scanning, or just a simple PIN, I’ll walk you through each option step by step.
What Is Windows Hello and Why Use It?
Windows Hello is Microsoft’s biometric authentication system built into Windows 10 and Windows 11. Instead of entering a password every time you sign in, you can use:
- Your face (requires an infrared camera)
- Your fingerprint (requires a fingerprint reader)
- A PIN (works on any device)
Why switch to Windows Hello?
Windows Hello is more secure than traditional passwords. Biometric data stays on your device and never gets sent to Microsoft’s servers. Hackers can’t steal what they can’t access remotely.
It’s also convenient. A quick glance at your laptop or a finger tap gets you logged in within seconds. No more typing complex passwords or resetting them when you forget.
Check If Your Device Supports Windows Hello
Before setting up Windows Hello, verify your hardware supports it.
For Face Recognition:
- You need an infrared (IR) camera, not a standard webcam
- Most newer laptops like Surface devices, Dell XPS, and Lenovo ThinkPads include IR cameras
- External IR cameras like the Logitech Brio work with desktop PCs
For Fingerprint:
- You need a fingerprint reader built into your device or an external USB fingerprint scanner
- Many laptops have fingerprint sensors integrated into the power button or keyboard
For PIN:
- Any Windows 10 or Windows 11 device supports PIN setup
- No special hardware required
How to check your device capabilities:
- Press Windows key + I to open Settings
- Go to Accounts > Sign-in options
- Look under the Windows Hello section
- Available options will appear (Face, Fingerprint, or PIN)
If Face or Fingerprint options are grayed out or missing, your device lacks the required hardware.
Requirements Before You Start
Make sure you have:
- Windows 10 (version 1809 or later) or Windows 11
- A Microsoft account or local account signed in
- Administrator access to your PC
- Compatible hardware for your chosen method
- Latest Windows updates installed
Update Windows first:
- Open Settings (Windows key + I)
- Click Windows Update
- Click Check for updates
- Install any available updates and restart
Outdated drivers can cause Windows Hello to malfunction, so keeping your system updated prevents setup issues.
How to Set Up Windows Hello PIN
A PIN is the easiest Windows Hello option to configure. It works on every Windows device and takes less than two minutes.
Step-by-step PIN setup:
- Open Settings (Windows key + I)
- Navigate to Accounts
- Click Sign-in options in the left sidebar
- Find PIN (Windows Hello) and click Set up (or Add on some versions)
- Click Next when prompted
- Enter your current Microsoft account password to verify your identity
- Create a new PIN (minimum 4 digits, but longer is better)
- Confirm your PIN by entering it again
- Click OK
Your PIN is now active. The next time you sign in, Windows will ask for your PIN instead of your password.
PIN tips:
- Use at least 6 digits for better security
- Avoid obvious combinations like 1234 or your birth year
- You can include letters and symbols by checking the box during setup
- Your PIN only works on the specific device where you created it
How to Set Up Windows Hello Face Recognition
Face recognition offers hands-free sign-in. Look at your screen and you’re in.
Requirements:
- An infrared camera compatible with Windows Hello
- Good lighting in your workspace
Setup process:
- Open Settings (Windows key + I)
- Go to Accounts > Sign-in options
- Under Windows Hello Face, click Set up
- Click Get started
- Enter your PIN when prompted (you must set up a PIN first)
- Position your face in front of the camera
- Look directly at the screen while Windows scans your face
- Stay still for 10 to 15 seconds during scanning
- Click Close when setup completes
Windows Hello Face now recognizes you. When you wake your computer, it will scan your face and sign you in automatically.
Improve recognition accuracy:
If Windows Hello struggles to recognize you, improve recognition by setting up enhanced sign-in:
- Go to Settings > Accounts > Sign-in options
- Under Windows Hello Face, click Improve recognition
- Follow the same scanning process
- This captures additional facial data in different lighting conditions
Wear your glasses during setup if you normally wear them. You can add a second scan with and without glasses for flexibility.
How to Set Up Windows Hello Fingerprint
Fingerprint authentication is fast and works even in the dark.
Requirements:
- A fingerprint reader (built-in or external USB)
- Clean, dry fingers
Setup steps:
- Open Settings (Windows key + I)
- Navigate to Accounts > Sign-in options
- Find Fingerprint recognition (Windows Hello) and click Set up
- Click Get started
- Enter your PIN for verification
- Place your finger on the fingerprint sensor
- Lift and place your finger repeatedly (usually 5 to 10 times)
- Follow the on-screen guidance to cover different parts of your fingerprint
- Click Close when finished
You can register multiple fingers for convenience.
Add more fingerprints:
- Go to Settings > Accounts > Sign-in options
- Under Fingerprint recognition, click Add a finger
- Enter your PIN
- Scan your new finger following the same process
Register your index finger and thumb on both hands. This gives you options if one finger is injured or dirty.
Troubleshooting Common Windows Hello Issues
Windows Hello options are grayed out:
Your device doesn’t have the necessary hardware. For facial recognition, you need an IR camera. For fingerprints, you need a compatible reader. PIN should always be available.
Check Device Manager to ensure your camera or fingerprint reader is detected:
- Right-click the Start button
- Select Device Manager
- Expand Cameras or Biometric devices
- Look for your hardware
- If you see a yellow triangle, update the driver
Face recognition doesn’t work in dim lighting:
Infrared cameras work in darkness, but extremely poor lighting can still affect performance. Turn on a desk lamp or move closer to a window.
Fingerprint reader won’t recognize your finger:
Make sure your finger is clean and dry. Moisture, dirt, or lotion blocks accurate scanning. Try a different finger or re-register your fingerprint.
Windows Hello stopped working after an update:
Updates sometimes reset drivers. Reinstall your camera or fingerprint reader driver:
- Open Device Manager
- Find your biometric device
- Right-click and select Uninstall device
- Restart your computer
- Windows will reinstall the driver automatically
- Reconfigure Windows Hello if needed
Error: “We couldn’t find a camera compatible with Windows Hello Face”:
Your camera might not support infrared. Standard webcams don’t work with Windows Hello Face. You need an IR camera. Check your device specifications or consider an external Windows Hello compatible camera.
Security Best Practices for Windows Hello
Windows Hello is secure, but following these practices maximizes protection:
Keep your PIN private: Your PIN is the backup authentication method. Don’t share it with anyone or write it down where others can see it.
Use a complex PIN: While 4 digits work, longer PINs with letters and symbols offer stronger protection. Set a 6+ character PIN with mixed characters.
Enable BitLocker: Combine Windows Hello with BitLocker drive encryption for complete device security. This protects your data even if someone removes your hard drive.
Update your biometric data: If your appearance changes significantly (new hairstyle, facial hair, glasses), update your facial recognition data using the “Improve recognition” option.
Remove old fingerprints: If you’ve registered multiple fingers and no longer use some, remove them:
- Go to Settings > Accounts > Sign-in options
- Under Fingerprint recognition, click Remove
- Select the fingerprint to delete
Sign out when leaving your device: Windows Hello makes signing in quick, so there’s no excuse to leave your PC unlocked. Lock your screen (Windows key + L) when you step away.
Windows Hello vs Traditional Passwords
Here’s how Windows Hello compares to standard password authentication:
| Feature | Windows Hello | Traditional Password |
|---|---|---|
| Speed | 1 to 2 seconds | 5 to 10 seconds |
| Security | Biometric data stays local | Can be phished or stolen |
| Convenience | No typing required | Must remember complex strings |
| Device-specific | Yes, tied to your hardware | No, works anywhere |
| Offline capability | Works without internet | Works without internet |
| Recovery options | PIN backup required | Password reset available |
Both methods work offline, but Windows Hello offers superior security because your face or fingerprint can’t be guessed or intercepted by hackers.
Managing Multiple Sign-In Options
You don’t have to choose just one method. Windows lets you enable multiple sign-in options simultaneously.
Recommended setup:
- Set up a PIN (required for other methods)
- Add face or fingerprint recognition
- Keep your password as a backup
This layered approach gives you flexibility. Use biometrics for daily sign-ins and fall back to your PIN if biometrics fail.
Switch between sign-in methods:
At the login screen, click Sign-in options to choose between available methods:
- Face icon for facial recognition
- Fingerprint icon for fingerprint
- Key icon for PIN
- Password icon for traditional password
Windows Hello for Business vs Personal Use
Windows Hello works differently in enterprise environments versus personal devices.
Personal Windows Hello:
- Simple setup through Windows Settings
- Biometric data stored locally on your device
- Works with Microsoft accounts and local accounts
- Managed by you
Windows Hello for Business:
- Configured by IT administrators
- Integrated with Active Directory or Azure AD
- Additional security policies enforced
- Centralized management tools
- Certificate-based authentication
If you’re setting up Windows Hello on a work computer, check with your IT department first. They may have specific policies or requirements.
For personal devices, the setup process described in this guide applies. You have complete control over your Windows Hello configuration.
Remove or Disable Windows Hello
If you want to stop using Windows Hello, you can remove it anytime.
Remove PIN:
- Open Settings > Accounts > Sign-in options
- Under PIN (Windows Hello), click Remove
- Confirm by entering your Microsoft account password
- Your PIN is deleted
Remove facial recognition:
- Go to Settings > Accounts > Sign-in options
- Under Windows Hello Face, click Remove
- Confirm the removal
Remove fingerprint:
- Navigate to Settings > Accounts > Sign-in options
- Under Fingerprint recognition, click Remove
- Select which fingerprints to delete or remove all
After removing Windows Hello, you’ll sign in with your traditional password.
Privacy Considerations
Windows Hello raises valid privacy questions. Here’s what actually happens with your biometric data:
Your biometric data never leaves your device: Facial scans and fingerprints are converted into mathematical templates and stored in a secure hardware component called the Trusted Platform Module (TPM). This data stays encrypted on your PC.
Microsoft doesn’t receive your biometrics: Unlike cloud-based systems, Windows Hello processes everything locally. Microsoft never sees or stores your face or fingerprints on their servers.
You can delete your biometric data: Removing Windows Hello from Settings deletes all stored biometric information from your device. The data doesn’t linger in backups or cloud storage.
Biometric data isn’t searchable: Your facial recognition template can’t be reverse-engineered back into a photo of your face. It’s a one-way mathematical representation.
For detailed privacy information, review Microsoft’s Windows Hello privacy statement.
Advanced Windows Hello Settings
Power users can customize Windows Hello behavior through additional settings.
Require sign-in after sleep:
- Open Settings > Accounts > Sign-in options
- Under “Require sign-in,” select When PC wakes up from sleep
This forces authentication every time your device wakes, preventing unauthorized access if you leave your PC in sleep mode.
Dynamic lock:
Automatically lock your PC when you walk away using your phone’s Bluetooth connection:
- Pair your phone via Bluetooth with your PC
- Go to Settings > Accounts > Sign-in options
- Scroll to Dynamic lock
- Check Allow Windows to automatically lock your device when you’re away
Your PC detects when your phone moves out of range and locks itself within 30 seconds.
Show account details on sign-in screen:
Control whether your account picture and name appear at the login screen:
- Open Settings > Accounts > Sign-in options
- Under Privacy, toggle Show account details on sign-in screen
Disable this on shared devices for additional privacy.
Windows Hello on Multiple Devices
Each device requires separate Windows Hello setup. Your facial recognition data on your laptop doesn’t transfer to your desktop.
Why Windows Hello is device-specific:
Biometric data is locked to the TPM chip in each device. This security measure prevents someone from copying your biometric template to another computer.
Setting up Windows Hello on a new device:
When you get a new Windows PC:
- Sign in with your Microsoft account password initially
- Follow the setup process outlined earlier in this guide
- Register your biometrics on the new device
- Your old device keeps its own Windows Hello configuration
This device-specific approach means losing or replacing a device doesn’t compromise your biometric security elsewhere.
Conclusion
Setting up Windows Hello for sign-in takes just a few minutes but delivers lasting benefits. You’ll sign in faster, secure your device better, and eliminate password frustration.
Start with a PIN, then add facial recognition or fingerprint scanning if your hardware supports it. The combination provides flexibility and robust security.
Windows Hello works reliably on compatible hardware. If you encounter issues, updating drivers and Windows itself solves most problems. For devices without biometric hardware, the PIN option still offers significant advantages over traditional passwords.
Your biometric data stays private and secure on your device. Microsoft never sees it, and you control when to use or remove Windows Hello.
Take five minutes today to enable Windows Hello. Your future self will thank you every time you sign in.
Frequently Asked Questions
Is Windows Hello secure enough to replace my password completely?
Yes, Windows Hello provides enterprise-grade security. Your biometric data is stored in the TPM chip using hardware encryption, making it more secure than passwords which can be phished or stolen. However, you should still maintain your Microsoft account password as a recovery option. Microsoft and security experts recommend Windows Hello as a primary authentication method for daily use.
Can someone unlock my PC with a photo of my face?
No. Windows Hello Face requires an infrared camera that detects depth and heat signatures. A photo or video of your face won’t work because it lacks the 3D depth information and infrared signature that the system verifies. This anti-spoofing technology prevents unauthorized access through pictures or masks.
What happens if my fingerprint reader or camera stops working?
You can always sign in using your PIN or password as backup methods. Windows Hello automatically falls back to alternative sign-in options when biometric hardware fails. This is why setting up a PIN is mandatory before enabling face or fingerprint recognition. Keep your PIN secure and memorable as your failsafe authentication method.
Does Windows Hello work without an internet connection?
Yes, Windows Hello works completely offline. All authentication happens locally on your device using the TPM chip. You don’t need internet connectivity to sign in with your face, fingerprint, or PIN. This makes Windows Hello reliable even when traveling or experiencing network outages.
Can I use Windows Hello if I share my computer with family members?
Yes, each user account on a shared PC can set up their own Windows Hello credentials. Each person registers their own face or fingerprints under their individual Windows account. The system distinguishes between users and signs each person into their respective account. However, for maximum security on shared devices, ensure each user has their own Windows account rather than sharing one.
