Launching an NFT collection on a single blockchain limits your audience. Multi-chain deployment reaches more collectors, reduces transaction costs for different user groups, and protects your project from network congestion. This guide shows you exactly how to launch your NFT collection on multiple blockchains without duplicating work or creating security issues.
The core process involves creating your collection once, then using tools to deploy smart contracts and mint tokens across different chains. You’ll need to understand basic blockchain concepts, choose your platforms, prepare your artwork, and execute the launch systematically.
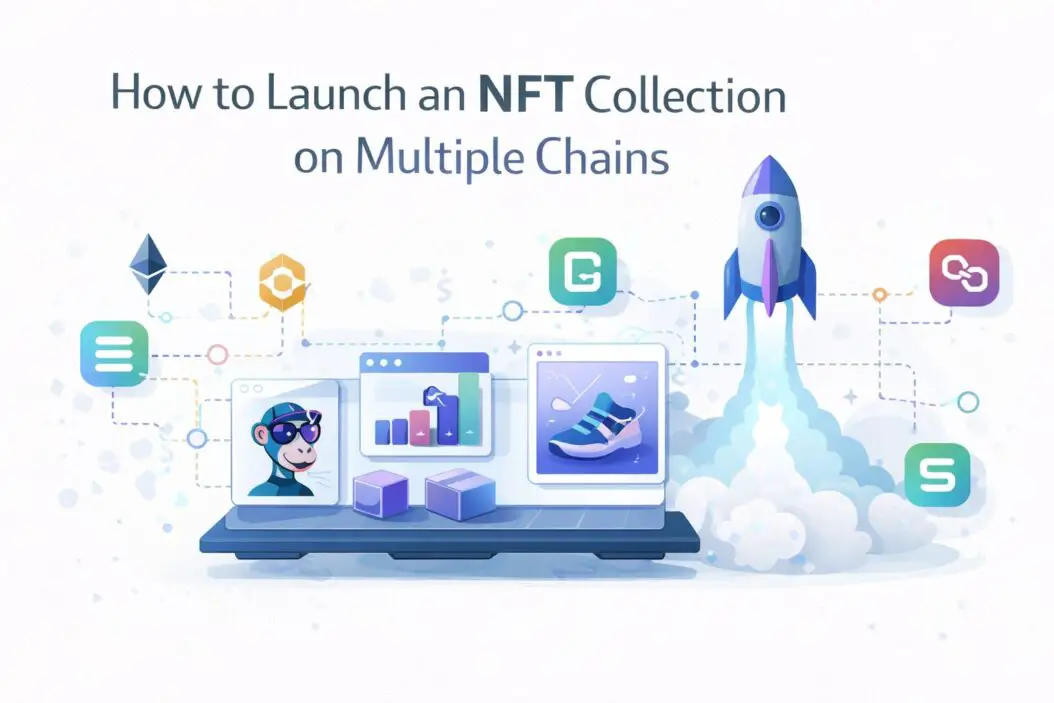
What Does Multi-Chain NFT Launching Mean?
Launching on multiple chains means publishing your NFT collection on different blockchains simultaneously or sequentially. Instead of having your art live only on Ethereum, you’d also deploy on Polygon, Base, Arbitrum, or other networks.
This approach offers real benefits. Collectors on cheaper networks avoid Ethereum’s high gas fees. Your collection reaches people already invested in different ecosystems. You increase total trading volume across platforms. Network outages don’t completely stop your project.
The tradeoff is complexity. You manage multiple smart contracts. Metadata must sync across chains. Your community spreads across different marketplaces. Liquidity fragments instead of concentrating on one platform.
Step 1: Choose Your Target Blockchains
Not all chains make sense for your collection. Consider these factors when selecting networks.
Transaction costs matter most. Ethereum remains the flagship but charges $50 to $300+ per transaction during peak times. Polygon costs $0.01 to $0.10 per transaction. Arbitrum and Optimism cost $0.10 to $2.00. Base offers similarly low costs. Choose networks where your target audience actually operates.
Community size and trader activity determine success. Ethereum has the largest NFT market and most experienced collectors. Polygon attracts budget-conscious creators and traders. Solana appeals to gaming and community-focused projects. Each network has different trader preferences and price expectations.
Marketplace support affects visibility. OpenSea supports most EVM chains. Magic Eden dominates Solana. Some collectors use only specific marketplaces. Your collection must be tradeable where your audience shops.
Technical compatibility simplifies development. EVM-compatible chains like Polygon, Arbitrum, Base, and Optimism let you deploy the same contract code with minimal changes. Solana requires completely different smart contract logic. Choose 2 to 4 chains maximum when starting out.
Recommended beginner combination: Ethereum for prestige, Polygon for accessibility, and one Layer 2 like Arbitrum or Base for moderate adoption.
Step 2: Prepare Your NFT Assets and Metadata
Your artwork and metadata must be production-ready before deploying any contracts.
Create consistent artwork. Each NFT needs high-resolution images. Standard dimensions are 2000×2000 pixels or 3000×3000 for higher quality. Save as PNG with transparent backgrounds or JPG. Avoid huge file sizes over 10MB per image.
Organize your collection structure. Decide total supply. Determine if you have one image per NFT or randomized traits. Plan rarity distributions. Document everything clearly so you don’t make mistakes during minting.
Write metadata for each NFT. Metadata is the text description and properties associated with each image. Standard format uses JSON files following the ERC721 metadata standard.
Example metadata structure:
{
  "name": "Blue Celestial #1",
  "description": "A rare blue celestial entity from the cosmos collection",
  "image": "ipfs://QmYourImageHash",
  "attributes": [
    {"trait_type": "Color", "value": "Blue"},
    {"trait_type": "Rarity", "value": "Rare"},
    {"trait_type": "Size", "value": "Large"}
  ]
}
Use IPFS for permanent storage. Upload your images and metadata to IPFS through services like Pinata or NFT.storage. IPFS creates a unique hash for each file. You cannot change the file later without changing the hash. This immutability proves authenticity. Never store files on centralized servers that could delete your work.
Test metadata thoroughly. Download your JSON files and verify they match your images correctly. Check that all links work. Ensure trait names are spelled consistently. Bad metadata causes problems during minting that waste time and money to fix.
Step 3: Select Smart Contract Development Tools
You need smart contract code to mint your NFTs on each chain. Most creators don’t write code from scratch.
Thirdweb simplifies multi-chain deployment. Their platform lets you create and deploy ERC721 contracts without coding. Connect your wallet, upload metadata, and deploy to your chosen chains from one dashboard. Thirdweb handles contract verification automatically. Support is excellent for beginners. Learn more at https://thirdweb.com/explore/solana.
OpenZeppelin provides secure contract templates. If you prefer customization or need advanced features, use OpenZeppelin’s contracts library. These are audited, production-tested contracts that developers trust. You’ll need basic Solidity knowledge or hire a developer.
Use remix IDE for testing and deployment. Remix is free and browser-based. You can write contracts, test them, and deploy directly without setup. Perfect for learning and small projects.
Difference between approaches: Thirdweb abstracts complexity away. OpenZeppelin gives control and customization. Remix suits experimentation. Choose based on your technical comfort level.
For non-technical creators, Thirdweb saves weeks of learning and eliminates common mistakes. For ambitious projects with unique requirements, OpenZeppelin plus a developer is better.
Step 4: Deploy Smart Contracts to Each Chain
This is where your collection actually goes live on each blockchain.
Prepare your wallet with native tokens. Each chain needs its native token for gas fees. You need ETH for Ethereum, MATIC for Polygon, ARB for Arbitrum, BASE for Base. Start with small amounts to test. You can buy these on any major exchange.
Use Thirdweb dashboard for straightforward deployment.
- Go to Thirdweb’s dashboard
- Click “Create Contract”
- Select “NFT Collection“
- Choose your network
- Fill in collection name, symbol, primary sale recipient
- Review and click deploy
- Approve the transaction in your wallet
- Wait for confirmation on chain
This takes about 30 seconds per chain once you’re ready.
Verify your contracts on block explorers. After deployment, your contract appears on Etherscan (Ethereum), PolygonScan (Polygon), Arbiscan (Arbitrum), or BaseScan (Base). Verification makes the contract code publicly readable and builds trust. Thirdweb verifies automatically usually within an hour.
Document your contract addresses. Save the contract address from each chain in a spreadsheet. You’ll need these to mint NFTs, manage royalties, and handle future updates. Format: [Chain Name] [Contract Address] [Deployment Date]
Common deployment issues and fixes:
Insufficient gas: Purchase more of the native token for that chain Transaction pending too long: Check the network’s status. Wait or resubmit with higher gas Wrong network selected: Verify your wallet is connected to the right chain before deploying
Step 5: Upload Your Collection to Each Chain
Now your contracts exist, but they’re empty. You need to upload your images and metadata.
If using Thirdweb, upload directly through the dashboard.
- Navigate to your deployed contract
- Click “Lazy Mint” or “Upload Batch”
- Select all your metadata JSON files
- Verify the images link correctly
- Review total supply
- Confirm and upload
Lazy minting defers actual minting until purchase, saving gas costs initially.
For direct contract interaction, use ethers.js or web3.js libraries. These JavaScript libraries let you interact with your contracts programmatically. You can batch upload metadata, set prices, and manage permissions automatically. This requires coding knowledge but offers maximum control.
Verify upload success. Check your contract on the chain’s block explorer. Look for the metadata URI in the contract data. Test by calling the tokenURI function with an NFT ID to confirm metadata loads correctly.
Sync metadata across chains carefully. If you use the same base URI on different chains, all chains point to the same IPFS data. This works fine. If you prefer separate metadata on each chain, upload separately and adjust the base URI per chain.
Step 6: Set Pricing and Mint Details
You decide how your NFTs are released and priced on each chain.
Fixed price minting. You set one price per NFT. Simple for collectors but less dynamic. Works best for equal-value collections.
Allowlist and public mint phases. Release first to a whitelist of early supporters at lower prices. Open public minting later at higher prices. This rewards loyal community members and generates initial momentum. Create your allowlist by collecting wallet addresses from your community beforehand.
Pricing strategy across chains. Don’t charge the same price on every chain. Set prices in each network’s preferred currency. If Ethereum price is 1 ETH and Polygon is 350 MATIC, adjust for market conditions and gas costs. Expensive gas environments warrant lower prices to keep total transaction cost reasonable.
| Chain | Typical Gas Cost | Suggested Price Approach | Example |
|---|---|---|---|
| Ethereum | $50 to $300+ | Premium pricing | 1 to 5 ETH |
| Polygon | $0.01 to $1 | Budget friendly | 50 to 500 MATIC |
| Arbitrum | $0.10 to $5 | Mid-range | 0.05 to 0.5 ARB |
| Base | $0.05 to $2 | Budget friendly | 0.1 to 1 BASE |
| Solana | $0.005 to $0.05 | Lowest friction | 1 to 10 SOL |
Schedule your minting phases strategically. Don’t mint everything simultaneously on all chains. Start with your primary chain, validate the setup works, then roll out to secondary chains. This reduces risk if something goes wrong.
Step 7: Prepare for Collection Launch Day
The actual launch requires coordination across multiple fronts.
Create a launch checklist.
Check off before going live: All contracts deployed and verified. Metadata uploaded and verified on each chain. Prices set correctly per network. Collection visible on major marketplaces. Social media announcements scheduled. Community notification sent. Support channels active for questions.
Test everything on test networks first. Use Sepolia for Ethereum, Mumbai for Polygon, Goerli for Arbitrum. Deploy test versions of your contracts and mint 1 or 2 NFTs to verify the entire flow works. This takes 30 minutes and prevents costly mistakes.
Coordinate marketplace listings. OpenSea automatically detects new contracts on supported networks. Collections appear automatically within minutes usually. Some networks take 24 hours. Manually add your collection to Magic Eden if launching on Solana.
Set up your website and media. Create a landing page with basic info: what your collection is, how to buy, which chains it’s on. Add images showing your NFTs. Include links to all marketplace pages. Make social profiles ready for launch announcements.
Communicate clearly with your community. Explain why you’re multichain. Tell them which network to use based on their situation. Provide step-by-step purchase guides. Budget time for support questions.
Step 8: Monitor and Manage After Launch
Your work doesn’t end at launch. Active management improves results.
Track sales across all chains. Use dashboard tools or manual spreadsheets to monitor how many NFTs sell on each network. Identify which chains drive volume. Adjust marketing spend accordingly.
Respond to community questions quickly. Collectors will ask how to buy on their preferred chain. Answer purchase questions within hours. Happy collectors become repeat buyers and ambassadors.
Manage liquidity carefully. If only 2 NFTs sell on one chain but 50 on another, your collection fragments. Consider whether the low-performing chain is worth maintaining. Some creators eventually consolidate to 1 or 2 networks if adoption is uneven.
Keep metadata accurate and permanent. Never update your metadata after NFTs are minted. Changes break the immutability promise. If you find errors before launch, fix them. After launch, live with minor issues or issue updated editions.
Plan for secondary market support. Your NFTs might be listed on marketplaces you don’t control. That’s normal and good. Monitor secondary sales to understand true value and collector interest.
Advanced Considerations
Crosschain bridges allow collected movement. Tools like Wormhole, LayerZero, or Rainbow Bridge let collectors move NFTs between chains. This adds complexity but increases utility. Usually done after your initial launch stabilizes.
Royalties across chains require configuration. Most platforms let you set royalty percentages to receive fees when NFTs resell. Configure royalties on each marketplace individually. Ethereum and some Layer 2s support on-chain royalties. Check your specific chain’s standards. More details on implementing proper royalties can be found at https://ethereum.org/en/developers/docs/smart-contracts/royalties/.
Gas optimization matters as you scale. If you’re minting thousands of NFTs, optimized contracts reduce deployment costs by 20 to 40 percent. Use tools like Hardhat to minimize contract size. This is an optimization for established projects, not essential for launches under 1000 NFTs.
Community feedback improves future releases. Ask collectors which chains they prefer. Ask what prices felt fair. Ask what features they wanted. Use this feedback for your next collection or updates to this one.
Common Mistakes to Avoid
Minting identical NFTs on all chains without distinguishing them. Collectors expect unique chains to have unique benefits or properties. A duplicated collection looks lazy and loses value. Add chain-specific traits or keep collections truly distinct.
Launching on too many chains too fast. Five chains is overwhelming at launch. Stick to 2 or 3. Expand after proving the model works. Spreading thin across many chains means poor support on each one.
Forgetting to test beforehand. Always test contracts and the full mint flow on testnets. One missed step costs hours of troubleshooting later.
Setting prices without researching market conditions on each chain. Charging 1 ETH on Polygon is absurd. It shows you don’t understand the networks you’re deploying to.
Ignoring gas fees in total cost calculations. A $500 minting cost plus gas can hit collectors with $600 or $700 total. Price accordingly or lose sales to sticker shock.
Frequently Asked Questions
Do I need different artwork for each chain?
No. The same artwork and metadata work across all chains. Your NFT is identical on Ethereum and Polygon. What differs is the blockchain it’s recorded on and the gas fees collectors pay.
How long does deployment actually take?
Contract deployment takes 5 to 30 minutes per chain depending on network congestion. Metadata upload is instant if you batch upload. Marketplace discovery is automatic within 24 hours typically. Total time from start to tradeable collection is 2 to 6 hours of active work.
What if I make a mistake during launch?
Most mistakes are recoverable. If metadata is wrong, you can issue a corrected collection. If prices were too low, next collection uses better pricing. If one chain underperforms, you pause promotion there. Only immutable errors are deployed contract bugs, but proper testing prevents this.
Should I launch all chains simultaneously or sequentially?
Sequential is safer. Launch your primary chain first, verify everything works, monitor for 24 hours, then roll out to secondary chains. This catches problems before scaling to all networks.
How do I handle royalties on multiple chains?
Configure royalties separately on each marketplace. Ethereum supports on-chain royalties through contract standards. Most other chains don’t, so marketplace settings handle royalties. OpenSea lets you set royalty percentages per collection. Different marketplaces may have different royalty systems, so check each one’s current implementation.
Conclusion
Launching an NFT collection on multiple chains is straightforward with modern tools. Choose 2 to 4 networks based on your target audience. Prepare your assets and metadata carefully. Deploy contracts using Thirdweb or OpenZeppelin. Upload your collection. Set prices strategically per network. Test everything first. Launch methodically. Monitor and support afterward.
The key is avoiding haste and duplicate effort. Your artwork gets created once. Your metadata gets created once. Your smart contract template gets deployed to different networks, not rewritten each time. This efficiency is why multichain launching is increasingly standard practice.
Start with Ethereum and Polygon if you’re unsure. These two networks represent the full spectrum from premium to accessible. Add a Layer 2 like Arbitrum for collectors seeking even lower costs. This combination reaches the widest audience without overwhelming your support capacity.
Your collection benefits from being discoverable on multiple platforms, tradeable for different communities, and resilient against single-network problems. The modest extra effort to deploy across chains multiplies your potential reach and appeal. Execute systematically, test thoroughly, and your multichain launch succeeds.
