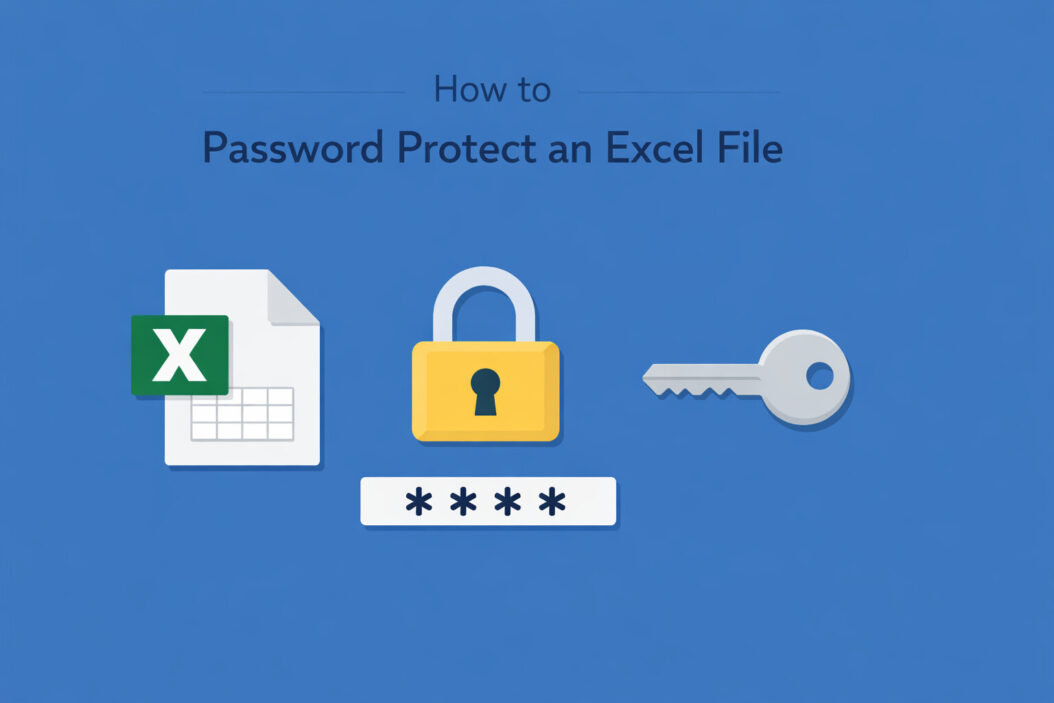
You need to secure your Excel file right now. Maybe it contains salary information, financial data, or client details. Whatever the reason, protecting your spreadsheet with a password takes just a few minutes.
This guide shows you exactly how to password protect Excel files on Windows, Mac, and Excel Online. You’ll learn multiple protection methods, understand their differences, and discover which one fits your situation.
Why Password Protection Matters
Excel files travel everywhere. You email them to colleagues, store them in cloud drives, and keep them on USB sticks. Without protection, anyone who gets the file can open it, read everything inside, and make changes.
Password protection stops unauthorized access. It encrypts your data so only people with the correct password can view or edit your work.
Common scenarios where you need Excel password protection:
- Sharing financial reports with specific team members
- Storing personal budgets with sensitive bank information
- Sending client lists to external contractors
- Protecting formulas from accidental changes
- Securing HR data like employee salaries
Understanding Excel’s Protection Options
Excel offers different types of password protection. Each serves a specific purpose.
File-Level Encryption
This encrypts the entire workbook. Nobody can open the file without the password. The strongest option for confidential data.
Workbook Protection
This prevents structural changes like adding or deleting sheets. People can open the file but can’t modify its structure.
Worksheet Protection
This locks specific sheets or cells. Users can view the data but can’t edit protected areas. Useful when you want people to enter data in specific cells only.
Read-Only Recommendation
This suggests a password when opening but doesn’t enforce it. Weak protection that most people skip.
Quick comparison:
| Protection Type | Prevents Opening | Prevents Editing | Encryption Level |
|---|---|---|---|
| File Encryption | Yes | Yes | Strong (AES) |
| Workbook | No | Structure only | None |
| Worksheet | No | Sheet content | None |
| Read-Only | No (optional) | No (suggested) | None |
How to Password Protect an Excel File on Windows
This method encrypts your entire file using AES-256 encryption. Works on Excel 2016, 2019, 2021, and Microsoft 365.
Step-by-Step Instructions
Step 1: Open your Excel file.
Step 2: Click the File tab in the top left corner.
Step 3: Select Info from the left sidebar (usually selected by default).
Step 4: Click Protect Workbook. A dropdown menu appears.
Step 5: Choose Encrypt with Password.
Step 6: Type your password in the dialog box. Make it strong. Use a mix of uppercase letters, lowercase letters, numbers, and symbols.
Step 7: Click OK.
Step 8: Excel asks you to reenter the password. Type it exactly the same way.
Step 9: Click OK again.
Step 10: Save your file. Press Ctrl+S or click the save icon.
Your file is now encrypted. The next time anyone opens it, Excel will demand the password.
Important Password Tips
Create a strong password. Weak passwords like “password123” or “excel2026” get cracked easily. Aim for at least 12 characters.
Write it down somewhere safe. Microsoft cannot recover lost Excel passwords. If you forget it, your data is gone forever. Consider using a password manager like Microsoft’s recommended security practices.
Avoid obvious patterns. Don’t use birthdays, names, or sequential numbers.
Use a passphrase. Something like “Coffee!Morning$Desk#9” works better than random characters you’ll forget.
How to Password Protect an Excel File on Mac
The Mac version of Excel uses the same encryption but the menu looks different.
Step 1: Open your Excel file in Excel for Mac.
Step 2: Click File in the menu bar at the top of your screen.
Step 3: Select Passwords from the dropdown menu.
Step 4: A dialog box appears with two options. Focus on the Password to open field.
Step 5: Type your password.
Step 6: Type it again in the Verify field below.
Step 7: Click Set Password or OK.
Step 8: Save your file using Command+S.
Done. Your Mac Excel file now requires a password to open.
The Mac version also shows a “Password to modify” option. This creates a read-only file that people can open without a password but need a different password to edit. Most people leave this blank and only use “Password to open.”
How to Password Protect an Excel File in Excel Online
Excel Online (the web version) offers limited protection options. You cannot encrypt files directly in the browser.
Workaround Method
Option 1: Use Desktop Excel
Download the file, protect it using Windows or Mac Excel, then upload it back to OneDrive or SharePoint. When someone tries to open it online, Excel prompts for the password.
Option 2: Use OneDrive Sharing Permissions
Instead of password protection, control access through OneDrive:
- Right-click your file in OneDrive
- Select Share
- Choose Specific people
- Enter email addresses of allowed users
- Set permissions to “Can view” or “Can edit”
This method works well for teams but requires recipients to have Microsoft accounts.
Option 3: Download, Protect, Upload
- Open your file in Excel Online
- Click File > Save As > Download a Copy
- Protect the downloaded file using desktop Excel
- Upload the protected file back to OneDrive
Microsoft continues improving Excel Online, but full encryption still requires desktop applications.
How to Set a Password to Modify an Excel File
Sometimes you want people to view your data but not change it. The “modify password” feature handles this.
Windows Method:
- Click File > Info > Protect Workbook
- Choose Encrypt with Password
- Wait, go back. Instead select File > Save As
- Click Tools (next to the Save button) > General Options
- Enter a password in Password to modify field
- Leave Password to open blank if you want anyone to view it
- Click OK and save
Mac Method:
- Click File > Passwords
- Enter a password only in Password to modify
- Leave Password to open blank
- Click Set Password
Now people can open and view your file freely. But if they try to edit anything, Excel asks for the modify password. They can still use “Open as read-only” to view without the password.
Protecting Specific Worksheets in Excel
Sheet protection locks individual worksheets while keeping the file accessible. Perfect for templates or forms where you want users to fill specific cells only.
How to Protect a Worksheet
Step 1: Click the sheet tab you want to protect at the bottom of your workbook.
Step 2: Go to the Review tab in the ribbon.
Step 3: Click Protect Sheet.
Step 4: A dialog box shows options for what users can do:
- Select objects
- Format cells
- Insert rows
- Delete rows
- Sort data
- Use filters
Step 5: Check the boxes for actions you want to allow.
Step 6: Enter a password (optional but recommended).
Step 7: Click OK.
If you set a password, type it again to confirm.
Step 8: Save your workbook.
Unlocking Specific Cells
Before protecting the sheet, you can mark certain cells as editable:
- Select the cells users should edit
- Right-click and choose Format Cells
- Go to the Protection tab
- Uncheck Locked
- Click OK
- Now protect the sheet using the steps above
Excel locks all cells by default. By unlocking specific ones first, you create forms or templates where users can only type in designated areas.
Unprotecting a Worksheet
- Click the protected sheet tab
- Go to Review > Unprotect Sheet
- Enter the password if you set one
- The sheet becomes editable again
Protecting Workbook Structure
Workbook protection prevents adding, deleting, hiding, or renaming sheets. The content remains editable but the structure stays fixed.
How to protect workbook structure:
- Click Review tab
- Select Protect Workbook
- Check Structure (and Windows if available)
- Enter a password
- Confirm the password
- Click OK
Users can still edit cells and data. They just cannot mess with your sheet organization.
This helps when you have complex workbooks with multiple interconnected sheets. You don’t want someone accidentally deleting a sheet that other sheets reference.
Password Protection Limitations
Excel password protection is strong but not perfect. Understanding its limits helps you make informed decisions.
What Excel Passwords Can’t Stop
Screen recording: Someone can record their screen while viewing your file.
Screenshots: Anyone with access can capture images of your data.
Physical security: If someone accesses your unlocked computer, they can open already-open files.
Determined attackers: Specialized password cracking tools exist. They take time but can eventually break weak passwords.
VBA macro access: Advanced users can sometimes access unencrypted VBA code even in protected files.
Encryption Strength
Modern Excel versions (2007 and later) use AES-256 encryption. This is military-grade security when combined with a strong password. Older Excel versions (2003 and earlier) used weaker encryption that breaks easily.
If you still use Excel 2003 files (.xls format), convert them to modern format (.xlsx) for better security:
- Open the old file
- Click File > Save As
- Choose Excel Workbook (.xlsx) from the format dropdown
- Save the file
- Apply password protection to the new version
Recovery Tools
Password recovery software companies claim they can unlock Excel files. Some work on old Excel versions. Modern versions with strong passwords remain very difficult to crack.
Never rely on third-party recovery tools as a backup plan. The time and cost involved make them impractical. Plus, if you can recover your password this way, so can someone else.
Microsoft explicitly states they cannot recover passwords. There is no master key or backdoor. This protects your security but means forgotten passwords result in permanent data loss.
Removing Password Protection
Changed your mind? Removing password protection is straightforward if you know the current password.
Remove File Encryption
Windows:
- Open the password-protected file (enter password when prompted)
- Click File > Info
- Click Protect Workbook > Encrypt with Password
- Delete the password from the box (leave it blank)
- Click OK
- Save the file
Mac:
- Open the file with the password
- Click File > Passwords
- Delete the password from Password to open field
- Click Set Password
- Save the file
Remove Sheet or Workbook Protection
- Open the file
- Go to Review tab
- Click Unprotect Sheet or Protect Workbook
- Enter the password
- Save the file
The protection is gone. Anyone can now open and edit freely.
Best Practices for Excel Password Security
Follow these guidelines to maintain strong security:
Use unique passwords. Don’t reuse passwords across multiple Excel files or other accounts. If one gets compromised, all your files remain safe.
Update passwords regularly. Change passwords every 6-12 months for highly sensitive files.
Share passwords securely. Never email passwords in the same message as the file. Use a separate communication channel like phone, text, or encrypted messaging apps.
Store backups carefully. Keep backup copies of important files in encrypted folders or secure cloud storage.
Audit file access. For shared drives, regularly review who has access to sensitive Excel files.
Consider additional layers. Combine Excel passwords with folder encryption, VPNs, or secure file sharing services for extra protection.
Document your passwords. Keep a secure record of which files use which passwords. A password manager helps organize this information.
Train your team. Make sure everyone handling sensitive Excel files understands security protocols.
Use digital rights management. For enterprise environments, explore Azure Information Protection or similar tools that add persistent protection even after files leave your network.
Troubleshooting Common Password Issues
Problems happen. Here’s how to solve them.
“Password is incorrect” Error
You’re certain your password is right but Excel keeps rejecting it:
- Check Caps Lock. Passwords are case-sensitive.
- Verify your keyboard language settings. Different layouts change key positions.
- Try copy-pasting the password if you stored it somewhere.
- Check for extra spaces before or after the password.
- Make sure you’re opening the right file version.
Forgot Your Password
Unfortunately, you have limited options:
- Check your password manager or notes.
- Ask anyone else who might know it.
- Look for unprotected backup copies.
- For worksheet protection only (not file encryption), third-party tools might help.
- For file encryption, the data is likely unrecoverable.
File Won’t Open After Protection
The file seems corrupted after adding password protection:
- Try opening on a different computer.
- Check if you have an earlier version in AutoRecover or OneDrive history.
- Attempt to open in Excel’s safe mode: Hold Ctrl while launching Excel.
- Look for temporary files in your temp folder.
Password Protection Grayed Out
You can’t click the protection options:
- The file might already be protected. Try unprotecting it first.
- You might be in protected view. Click “Enable Editing” first.
- The file could be opened as read-only. Save a copy and try again.
- Check if you have permission to modify the file.
Slow Performance After Encryption
Large files take longer to open and save when encrypted:
- This is normal. Encryption adds processing time.
- Reduce file size by removing unnecessary formatting or data.
- Upgrade to a newer Excel version for better performance.
- Consider splitting very large files into smaller workbooks.
Alternative Security Methods
Password protection works well but other options exist.
Windows BitLocker
Encrypts your entire drive. Every file on your computer becomes encrypted, including Excel files. Requires Windows Pro or Enterprise.
Pros: Automatic, applies to everything, very strong.
Cons: Only protects files on your computer. Once you share a file, BitLocker protection doesn’t travel with it.
OneDrive/SharePoint Permissions
Control access through Microsoft’s cloud services instead of passwords.
Pros: Easy to manage, can revoke access anytime, audit trails available.
Cons: Requires internet, recipients need Microsoft accounts, files aren’t encrypted at rest with personal passwords.
Third-Party Encryption Software
Tools like 7-Zip, VeraCrypt, or AxCrypt create encrypted archives.
Pros: Very strong encryption, works with any file type.
Cons: Extra software required, more complex workflow, files less convenient to use.
PDF Conversion
Convert your Excel file to password-protected PDF.
Pros: Recipients don’t need Excel, cannot easily edit data.
Cons: Loses Excel functionality, harder to update data.
Each method serves different needs. For most people sharing Excel files directly, built-in Excel encryption provides the best balance of security and convenience.
Summary
Protecting your Excel files with passwords prevents unauthorized access to sensitive data. The encryption feature in modern Excel versions provides strong security when you use robust passwords.
Key points to remember:
- File encryption (Encrypt with Password) provides the strongest protection
- Always use strong, unique passwords with mixed characters
- Write down passwords securely because Microsoft cannot recover them
- Sheet and workbook protection lock structure but don’t encrypt data
- Excel Online requires desktop Excel for full encryption features
- Modern Excel uses AES-256 encryption, which is very secure
- Forgotten passwords on encrypted files mean permanent data loss
Choose the right protection level for your situation. Highly confidential financial data needs full file encryption. Worksheets where you want to prevent accidental changes only need sheet protection. Templates where users fill specific cells benefit from selective cell locking.
Start protecting your important Excel files today. The few minutes spent setting passwords now saves potential disasters later.
Frequently Asked Questions
Can I password protect only certain cells in Excel?
Yes, but it requires two steps. First, unlock the cells you want people to edit by selecting them, right-clicking, choosing Format Cells, going to the Protection tab, and unchecking “Locked.” Then protect the entire worksheet using Review > Protect Sheet. Now only the unlocked cells remain editable while others are protected.
Is Excel password protection secure enough for financial data?
Excel 2007 and newer versions use AES-256 encryption, which is very secure when combined with a strong password. This same encryption protects military and government data. However, security also depends on password strength, how you share files, and who has access to your computer. For extremely sensitive financial data, consider additional security layers like encrypted folders or secure file sharing services.
What happens if I forget my Excel password?
Microsoft cannot recover passwords from encrypted Excel files. If you forget the password, your data becomes permanently inaccessible. For worksheet or workbook protection (not file encryption), some third-party tools might help, though success isn’t guaranteed. Always store passwords in a secure password manager or written record to prevent this situation.
Can someone crack my Excel password?
Weak passwords can be cracked using specialized software, especially if someone has unlimited time and computing power. However, strong passwords with 12+ characters mixing uppercase, lowercase, numbers, and symbols make cracking extremely difficult and time-consuming. Modern Excel encryption (AES-256) combined with strong passwords provides excellent security against typical threats. The weakest link is usually password strength, not Excel’s encryption.
How do I share a password-protected Excel file safely?
Never email the password in the same message as the protected file. Instead, share the password through a different communication channel like a phone call, text message, or encrypted messaging app. For team collaboration, consider using OneDrive or SharePoint with permission-based access instead of passwords. If you must use passwords, change them after sharing periods end or when team members leave your organization.
