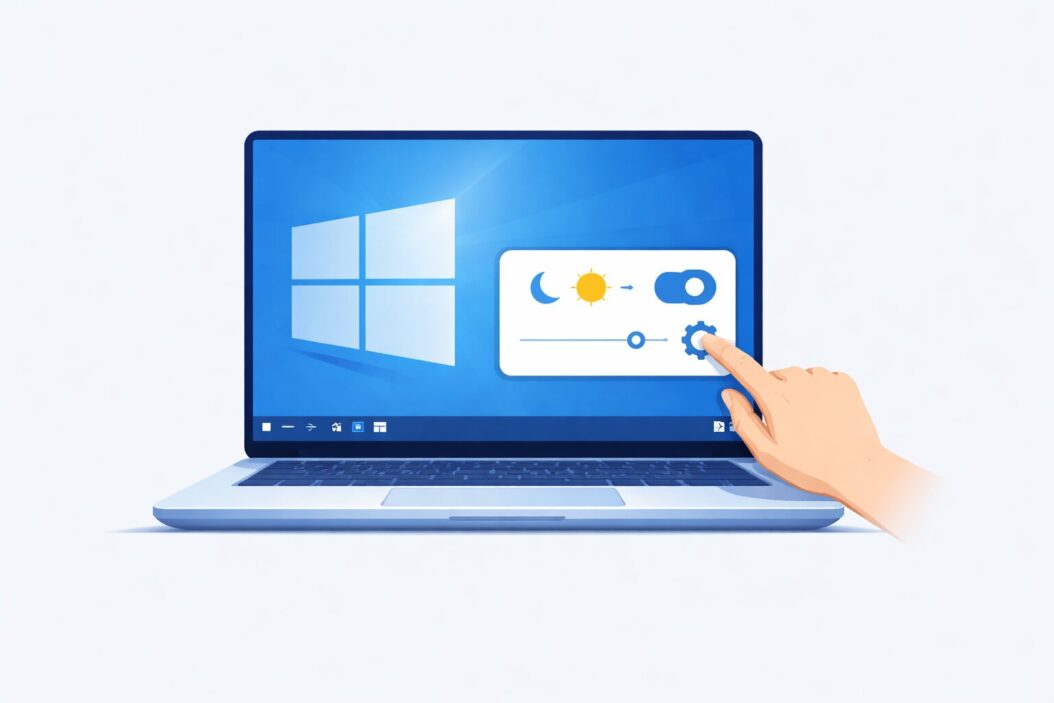
Your Windows screen keeps turning off while you’re reading, watching, or working. This interruption breaks your focus and wastes time. The good news: you can fix this in under two minutes.
Windows 11 and Windows 10 automatically turn off your screen to save power. This default setting helps laptop batteries last longer, but it becomes annoying when you need your display to stay active. Whether you’re presenting slides, following a recipe, or monitoring live data, you need control over when your screen sleeps.
Why Windows Screens Turn Off Automatically
Windows uses power management to extend battery life and reduce energy consumption. Your operating system includes several sleep timers:
- Screen timeout (turns off display)
- Sleep mode (puts entire computer to sleep)
- Hard disk timeout (stops disk activity)
These settings work together. Your screen typically turns off first, followed by full system sleep if you remain inactive. On desktops, the default screen timeout ranges from 10 to 30 minutes. Laptops use shorter intervals, often 5 to 15 minutes, to preserve battery.
The screen timeout counter resets when Windows detects:
- Mouse movement
- Keyboard input
- Touch screen interaction
- Active video playback (sometimes)
Understanding these triggers helps you choose the right solution for keeping your screen active.
Method 1: Change Power Settings Through Windows Settings
This is the most straightforward way to adjust your screen timeout. The process differs slightly between Windows 11 and Windows 10.
Windows 11 Steps
- Click the Start button or press Windows key
- Type “power settings” in the search box
- Select “Power & battery” from results
- Scroll down to “Screen and sleep” section
- Click the dropdown next to “When plugged in, turn off my screen after”
- Select “Never” or choose a longer duration
- Repeat for “On battery power, turn off my screen after” if using a laptop
Windows 10 Steps
- Right-click the Start button
- Choose “Settings” from the menu
- Click “System”
- Select “Power & sleep” from the left sidebar
- Under “Screen,” find two dropdown menus
- Set “When plugged in, turn off after” to “Never”
- Set “On battery, turn off after” to your preferred time
Important consideration: Setting screen timeout to “Never” on a laptop drains your battery faster. Choose a balanced approach. Set “Never” for plugged-in use, but keep a reasonable timeout (15-30 minutes) for battery power.
Checking Your Changes Work
After adjusting settings, test them:
- Leave your computer idle for your old timeout period
- Watch if the screen stays on
- If it still turns off, check for additional power plans
Your changes take effect immediately. No restart needed.
Method 2: Adjust Advanced Power Plan Settings
Windows uses power plans that contain dozens of detailed settings. Sometimes the basic Settings app doesn’t expose all options. The Control Panel method gives you deeper control.
Access Advanced Power Options
- Press Windows + R to open Run dialog
- Type “powercfg.cpl” and press Enter
- This opens the classic Power Options window
- Click “Change plan settings” next to your active power plan
- Click “Change advanced power settings”
- A new window opens with expandable categories
Key Settings to Modify
Look for these categories in the advanced settings window:
Display settings:
- Expand “Display” category
- Find “Turn off display after”
- Set both “On battery” and “Plugged in” values
- Use 0 minutes for never, or specific minute values
Sleep settings:
- Expand “Sleep” category
- Set “Sleep after” to Never or a high value
- This prevents full system sleep
PCI Express settings:
- Expand “PCI Express”
- Find “Link State Power Management”
- Set to “Off” for both battery and plugged in
- This prevents graphics card power saving that might dim screens
Processor power management:
- Sometimes aggressive CPU power saving triggers display dimming
- Under “Processor power management”
- Set “Minimum processor state” to at least 50%
After making changes, click “Apply” then “OK”. Your computer implements these settings immediately.
Method 3: Use Presentation Mode
Windows includes a built-in feature called Presentation Mode (or Presentation Settings). This temporarily overrides all power settings to keep your screen and system awake.
Enable Presentation Mode in Windows 11
- Click the system tray (bottom-right corner)
- Click the “Notifications” icon
- Look for a tile labeled “Focus assist” or “Presentation mode”
- Click to enable
- Your screen stays on until you disable this mode
Enable Presentation Mode in Windows 10
Windows 10 doesn’t have a quick toggle. Instead:
- Open Action Center (Windows + A)
- Look for “Project” tile
- Or use Windows Mobility Center:
- Press Windows + X
- Select “Mobility Center” (laptops only)
- Find “Presentation Settings”
- Click “Turn on”
Presentation mode prevents:
- Screen timeout
- System sleep
- Screensaver activation
- System notifications (in some modes)
This works perfectly for temporary needs. Giving a presentation? Enable this mode. Finished? Turn it off to restore normal power saving.
Method 4: Keep Screen Active with PowerToys
Microsoft PowerToys is a free utility collection that adds powerful features to Windows. One tool, called Awake, prevents your screen from sleeping.
Install PowerToys
- Visit the official Microsoft PowerToys GitHub page at https://github.com/microsoft/PowerToys
- Download the latest installer
- Run the installer and follow prompts
- Launch PowerToys from your Start menu
Configure Awake Tool
- Open PowerToys settings
- Click “Awake” in the left sidebar
- Toggle “Enable Awake” to On
- Choose your preferred mode:
- Keep awake indefinitely: Screen never sleeps
- Keep awake temporarily: Set hours and minutes
- Keep awake until expiration time: Choose specific end time
- Additional options:
- “Keep screen on”: Check this box
- “Mode”: Choose whether to prevent screen timeout, system sleep, or both
PowerToys Awake runs in the background. You’ll see a small icon in your system tray showing its status. Click the icon to quickly toggle awake mode or adjust settings.
Why use PowerToys instead of changing Windows settings?
PowerToys gives you quick on/off control. You can temporarily keep your screen on without permanently changing power settings. This flexibility helps when you occasionally need your screen active, but usually want power saving enabled.
Method 5: Use Third-Party Applications
Several lightweight applications prevent screen timeout. These tools simulate user activity or override Windows power settings.
Recommended Tools
Caffeine (Free)
This simple app adds a coffee cup icon to your system tray. Click it to prevent sleep. Click again to allow sleep. No complex settings. Download from the developer’s website.
Mouse Jiggler (Free)
Mouse Jiggler simulates tiny mouse movements. Windows thinks you’re active, so the screen stays on. Useful for:
- Remote desktop sessions
- Monitoring dashboards
- Time-tracking software that detects inactivity
Don’t Sleep (Free)
A German-developed tool with more options:
- Prevent system sleep
- Prevent monitor standby
- Block screensaver
- Prevent logout
- Prevent shutdown
Download from SoftwareOK at https://www.softwareok.com (official source).
Choosing the Right Tool
Pick based on your needs:
- Quick toggle: Use Caffeine
- Remote work: Use Mouse Jiggler
- Maximum control: Use Don’t Sleep or PowerToys
All these tools are lightweight. They use minimal system resources (under 5MB RAM typically).
Method 6: Disable Screensaver
Screensavers can activate even when screen timeout is disabled. Windows treats screensavers as separate from display sleep settings.
Turn Off Screensaver
- Right-click on your desktop
- Select “Personalize”
- In Windows 11: Click “Lock screen” then scroll to “Screen saver”
- In Windows 10: Click “Lock screen” then “Screen saver settings”
- In the dropdown menu, select “(None)”
- Click “Apply” then “OK”
If you see a screensaver but set timeout to “Never,” the screensaver runs separately from power management. Disable it using these steps.
Method 7: Adjust Group Policy Settings (Windows Pro/Enterprise)
Windows Pro, Enterprise, and Education editions include Group Policy Editor. This tool provides the most granular control over power settings.
Note: Windows Home edition lacks Group Policy Editor. Use previous methods instead.
Access Group Policy Editor
- Press Windows + R
- Type “gpedit.msc” and press Enter
- Navigate to: Computer Configuration > Administrative Templates > System > Power Management > Video and Display Settings
Modify Display Timeout Policies
You’ll find several policies:
Turn Off the Display (plugged in)
- Double-click this policy
- Select “Enabled”
- Set timeout value in seconds (0 = never)
- Click “Apply”
Turn Off the Display (on battery)
- Repeat the same process
- Set different value for battery operation
Group Policy settings override user preferences. This proves useful in business environments where administrators need consistent power settings across many computers.
Additional Useful Policies
Under Power Management section:
Require a password when a computer wakes
- Set to “Disabled” if screen dimming triggers lock screen
Select an active power plan
- Force specific power plan across all users
- Prevents users from changing to power-saving modes
After changing policies, run gpupdate /force in Command Prompt to apply changes immediately.
Method 8: Create a Custom Power Plan
Rather than modifying existing power plans, create a custom plan optimized for keeping your screen active.
Steps to Create Custom Power Plan
- Open Control Panel (Windows + R, type “control,” press Enter)
- Click “Power Options”
- Click “Create a power plan” in the left sidebar
- Select “High performance” as the starting point
- Name your plan “Always On” or “Presentation Mode”
- Click “Next”
- Set “Turn off the display” to “Never” for both battery and plugged in
- Set “Put the computer to sleep” to “Never”
- Click “Create”
Your new power plan appears in the Power Options list. Select it when you need your screen to stay on. Switch back to “Balanced” for normal use.
Making Power Plan Switching Quick
Windows doesn’t offer an easy built-in way to switch power plans quickly. Use this workaround:
- Create desktop shortcuts using command-line tools
- Or use PowerToys (mentioned earlier) which includes quick power plan switching
- Or create a simple batch script
This lets you switch between power-saving and always-on modes with a single click.
Method 9: Use Command Prompt or PowerShell
Advanced users can modify power settings through command-line tools. This method works well for automation or remote management.
Change Screen Timeout with PowerCfg
Open Command Prompt or PowerShell as administrator:
powercfg /change monitor-timeout-ac 0
powercfg /change monitor-timeout-dc 0
Explanation:
monitor-timeout-ac: Screen timeout when plugged in (AC power)monitor-timeout-dc: Screen timeout on battery (DC power)0: Zero minutes means never turn off- Replace
0with any number of minutes
View Current Power Settings
Check your current settings:
powercfg /queryThis displays all power configuration details. The output is lengthy but comprehensive.
Create Power Scheme via Command Line
powercfg /duplicatescheme SCHEME_BALANCEDThis creates a copy of the balanced power plan. You can then modify it using additional commands.
Command-line methods help when:
- Configuring multiple computers
- Automating setup with scripts
- Managing remote systems
- Creating deployment packages
Method 10: Registry Editor Method (Advanced)
The Windows Registry stores low-level system settings. Modifying registry values changes power behavior directly.
Warning: Incorrect registry changes can cause system problems. Back up your registry before making changes.
Backup Registry First
- Press Windows + R
- Type “regedit” and press Enter
- Click “File” > “Export”
- Save backup file to safe location
Modify Display Timeout in Registry
Navigate to:
HKEY_LOCAL_MACHINE\SYSTEM\CurrentControlSet\Control\Power\PowerSettings\7516b95f-f776-4464-8c53-06167f40cc99\3C0BC021-C8A8-4E07-A973-6B14CBCB2B7ELook for these values:
- Attributes: Change to 2 (makes setting visible in Power Options)
- Registry modifications require restart in some cases
This method rarely proves necessary. The GUI methods above handle most scenarios. Use registry editing only when other methods fail or for automated deployment.
Troubleshooting: Screen Still Turns Off
If your screen continues turning off after trying these methods, check these common issues:
Check for Multiple Power Plans
Windows might have multiple active plans:
- Open PowerShell as administrator
- Run:
powercfg /list - Look for the plan marked with an asterisk (*) – this is active
- Run:
powercfg /setactive SCHEME_GUIDto switch plans - Replace SCHEME_GUID with the GUID of your preferred plan
Investigate Monitor Settings
Some monitors have built-in power-saving features:
- Check your monitor’s physical buttons
- Access the monitor’s on-screen display (OSD) menu
- Look for “Eco mode” or “Power saving” options
- Disable monitor-level sleep features
Check Graphics Driver Settings
GPU control panels override Windows settings:
NVIDIA Control Panel:
- Right-click desktop > NVIDIA Control Panel
- Navigate to Manage 3D Settings
- Find “Power management mode”
- Set to “Prefer maximum performance”
AMD Radeon Settings:
- Right-click desktop > AMD Radeon Settings
- Click “System” > “Power”
- Adjust power settings
Intel Graphics Settings:
- Right-click desktop > Intel Graphics Settings
- Look for power options
- Disable aggressive power saving
Review Third-Party Software
Some applications force power management:
- Battery optimization tools
- Laptop manufacturer utilities (Dell Power Manager, HP Command Center)
- Gaming software (some games force power settings)
- Remote desktop software
Check these applications’ settings or temporarily disable them to test.
Disable Dynamic Brightness
Adaptive brightness adjusts screen based on ambient light. This can look like power management:
Windows 11:
- Settings > System > Display
- Scroll to Brightness
- Toggle off “Change brightness automatically when lighting changes”
Windows 10:
- Settings > System > Display
- Uncheck “Change brightness automatically when lighting changes”
Also check:
- Power Options > Change plan settings
- Change advanced power settings
- Display > Enable adaptive brightness
- Set both battery and plugged in to “Off”
Check for Windows Updates
Microsoft occasionally changes power management behavior:
- Open Settings
- Go to Windows Update
- Check for updates
- Install any pending updates
- Restart and test again
Sometimes updates introduce bugs. Sometimes they fix bugs. Either way, staying current helps.
Understanding Different Sleep States
Windows uses multiple sleep states. Understanding them helps you configure the right settings.
Sleep State Comparison
| State | What Happens | Power Usage | Wake Time |
|---|---|---|---|
| Screen Off | Display powers down, PC runs | Medium | Instant |
| Sleep (S3) | RAM stays powered, rest sleeps | Low | 2-5 seconds |
| Hibernate | RAM saved to disk, full shutdown | None | 30-60 seconds |
| Hybrid Sleep | Combination of sleep and hibernate | Very Low | 2-5 seconds |
| Fast Startup | Windows hybrid shutdown/hibernate | None when off | 10-20 seconds |
When you prevent “screen timeout,” you only stop the display from powering down. The computer continues running normally.
When you prevent “sleep,” you stop the system from entering S3/S4 states.
Configure these separately based on your needs:
- Watching videos: Prevent screen timeout only
- Running long tasks: Prevent both screen timeout and system sleep
- Downloading large files: Prevent system sleep, screen can turn off
Power Consumption Considerations
Keeping your screen on affects energy use and hardware lifespan.
Desktop Computers
Modern LCD monitors use 20-60 watts when active. Running 24/7:
- 30-watt monitor: ~22 kWh per month
- At $0.12/kWh: ~$2.64 per month
- Annual cost: ~$32
This assumes continuous use. Real-world usage varies based on your active hours.
Laptop Computers
Laptop screens consume less power (5-15 watts typically), but battery drain becomes the concern:
- Preventing screen timeout drains battery 20-30% faster
- Lithium batteries have limited charge cycles (300-500 full cycles)
- Constant charging while preventing sleep can stress battery
Best practice for laptops:
Set different rules for battery vs. plugged-in operation:
- Plugged in: Never turn off screen
- On battery: 10-15 minute timeout
This balances usability with battery preservation.
Environmental Impact
One monitor running unnecessarily for one year produces roughly 50-100 lbs of CO2 (depending on electricity source).
If keeping your screen on serves a legitimate purpose, the impact is justified. But don’t forget to revert settings when that purpose ends.
Security Implications
Preventing screen timeout can create security risks:
Lock Screen Bypass
Screen timeout often works with lock screen timers. When you extend screen timeout, adjust lock screen separately:
- Settings > Accounts > Sign-in options
- Under “Additional settings”
- Set “If you’ve been away, when should Windows require you to sign in again?”
- Choose appropriate time (1-5 minutes recommended)
This ensures your screen stays on while you’re present but locks when you step away.
Screensaver Password Protection
If you disabled screensaver to keep screen on, you lost a security layer:
Alternative: Keep screensaver but set it to trigger after lock screen timer:
- Set screen timeout to Never
- Set screensaver to activate after 10 minutes
- Enable “On resume, display logon screen”
- Set lock screen timer to 5 minutes
Windows locks before screensaver starts. The screensaver becomes a visual indicator of locked status.
Public or Shared Computers
Never disable screen timeout on shared computers. This exposes:
- Your open documents
- Email messages
- Browser sessions with saved passwords
- File explorer windows with personal data
Use temporary solutions (PowerToys Awake, Caffeine) that you can quickly disable.
Use Case-Specific Recommendations
Different scenarios need different approaches:
Giving Presentations
Best method: Windows Presentation Mode
- Temporary
- Easy to enable/disable
- Prevents notifications too
Reading Long Documents or Tutorials
Best method: PowerToys Awake with time limit
- Set for 1-2 hours
- Automatically returns to power saving
- No permanent configuration changes
Video Playback or Streaming
Good news: Most video players prevent sleep automatically
- VLC, Windows Media Player, YouTube (in most browsers)
- No configuration needed usually
- If video still stops: Use presentation mode
Monitoring Systems or Dashboards
Best method: Custom power plan or third-party tool
- Create “Monitoring” power plan
- Switch to it during monitoring
- Or use Don’t Sleep with specific settings
Software Development or Long Compiles
Best method: Prevent system sleep, allow screen timeout
- Advanced power settings
- Set screen to reasonable timeout (30 min)
- Set sleep to “Never”
- Screen can turn off without stopping compilation
Working from Home with Time-Tracking Software
Best method: Mouse Jiggler or similar
- Prevents artificial “away” status
- Works with most tracking software
- Be ethical: Use only during actual work hours
Comparison of All Methods
| Method | Ease | Temporary | Permanent | Best For |
|---|---|---|---|---|
| Windows Settings | Easy | No | Yes | Most users |
| Advanced Power Options | Medium | No | Yes | Detailed control |
| Presentation Mode | Easy | Yes | No | Temporary needs |
| PowerToys Awake | Easy | Both | Both | Flexible control |
| Third-party Apps | Easy | Yes | No | Quick toggle |
| Disable Screensaver | Easy | No | Yes | Simple fix |
| Group Policy | Hard | No | Yes | Business/IT |
| Custom Power Plan | Medium | No | Yes | Multiple scenarios |
| Command Line | Hard | No | Yes | Automation |
| Registry Edit | Very Hard | No | Yes | Last resort |
Choose based on:
- Technical comfort level: Stick to easy methods if you’re not tech-savvy
- Temporary vs. permanent need: Use presentation mode for one-time events
- Control requirements: Use advanced methods for precise control
- Multiple computers: Use command-line or Group Policy methods
Automating Screen Wake Settings
Some scenarios require scheduled control over screen timeout.
Using Task Scheduler
Create tasks that run PowerCfg commands at specific times:
- Open Task Scheduler (search in Start menu)
- Click “Create Basic Task”
- Name it “Disable Screen Timeout – Morning”
- Set trigger (e.g., Daily at 9:00 AM)
- Choose “Start a program”
- Program:
powercfg - Arguments:
/change monitor-timeout-ac 0 - Create opposite task for evening (set timeout back to 10)
This keeps your screen on during work hours, enables power saving at night.
Using Scripts with PowerToys
PowerToys Awake supports command-line arguments. Create shortcuts or scripts:
PowerToys.Awake.exe --use-pt-config
PowerToys.Awake.exe --display-on
Place these shortcuts on your desktop or toolbar for one-click control.
Mobile Device Alternatives
This guide focuses on Windows 11/10 desktop and laptop computers. Mobile devices use different systems:
Windows Tablets
Surface and other Windows tablets run full Windows 10/11. All methods in this guide apply.
iPad/iPhone
iOS devices use different settings:
- Settings > Display & Brightness > Auto-Lock
- Choose time interval or “Never”
Android Tablets
Android devices:
- Settings > Display > Screen timeout
- Select duration or install apps like Caffeine (different from Windows version)
Accessibility Considerations
Some users need extended screen timeout for accessibility reasons:
Vision Impairments
Users with low vision might read more slowly:
- Set timeout to 30+ minutes
- Enable high contrast mode for better visibility
- Increase text size simultaneously
Motor Impairments
Users with limited mobility might interact less frequently:
- Set timeout to Never during active use
- Configure lock screen separately for security
- Use voice commands to wake screen (Windows Hello)
Cognitive Disabilities
Users might need consistent screen availability:
- Avoid automatic screen changes that cause confusion
- Set long timeout or disable timeout
- Use larger, clearer timeout warnings if keeping timeout active
Windows includes built-in accessibility features (Narrator, Magnifier, high contrast) that work independently of screen timeout.
Summary
Keeping your Windows screen on requires adjusting power management settings. The quickest method:
- Open Settings
- Go to System > Power & battery (or Power & sleep)
- Set screen timeout to “Never”
For temporary needs, use Presentation Mode or PowerToys Awake. For permanent changes, adjust power plan settings or create a custom power plan.
Choose your method based on:
- How often you need the screen to stay on
- Whether you use a laptop or desktop
- Your technical comfort level
- Security requirements in your environment
Frequently Asked Questions
Why does my screen turn off even after setting timeout to Never?
Check these common causes: monitor-level power saving features (access through monitor’s physical buttons), graphics driver settings overriding Windows (check NVIDIA/AMD/Intel control panels), third-party power management software from laptop manufacturer, or adaptive brightness being confused with screen timeout. Also verify you changed settings for the correct power plan (some computers have multiple plans).
Does keeping my screen on damage the monitor?
Modern LCD and LED monitors handle extended use well. Screen burn-in affects OLED displays but is extremely rare on computer monitors. Most monitors are rated for 30,000-60,000 hours of use (that’s 10-20+ years at 8 hours daily). Keeping your screen on shortens lifespan slightly through backlight degradation, but normal usage patterns cause more wear than simply staying powered. The bigger concern is power consumption, not hardware damage.
Can I set different timeouts for different applications?
Windows doesn’t natively support per-application screen timeout settings. However, most video players (VLC, Media Player) automatically prevent sleep during playback. For other applications, use PowerToys Awake or third-party tools that you manually enable when using specific programs. Some gaming software includes “gaming mode” that prevents screen timeout automatically.
What is the difference between screen timeout and sleep mode?
Screen timeout only powers down your display. Your computer continues running all programs, maintaining network connections, and performing background tasks. Sleep mode puts your entire computer into a low-power state, suspending all operations except RAM refresh. Configure these separately: you might want screen timeout at 30 minutes but sleep after 2 hours, allowing the display to turn off while programs keep running.
Is there a keyboard shortcut to prevent screen timeout?
Windows doesn’t include a built-in keyboard shortcut. However, you can create one: install PowerToys Awake, then use Windows’ native shortcut capability to assign a key combination to launch Awake. Or use AutoHotkey to create a script that runs PowerCfg commands with a custom keyboard shortcut. Third-party utilities like Caffeine also support global hotkeys that you can configure for quick toggle access.

- How to Disable Pop-Up Blockers on Windows 11/10 (Step-by-Step Guide) - April 10, 2026
- How to Keep Up with Social Media Algorithm Changes in 2026 - April 10, 2026
- How to Keep Screen ON in Windows 11/10: Your Guide to Prevent Display Sleep in 2026 - April 10, 2026