Your microphone won’t work because your device blocked it. This happens in apps, browsers, and video calls. I’ll show you exactly how to fix it on Windows, Mac, iPhone, Android, and every browser you use.
Most people panic when Zoom says “microphone blocked” or Chrome shows a red X. The fix takes 30 seconds once you know where to look.
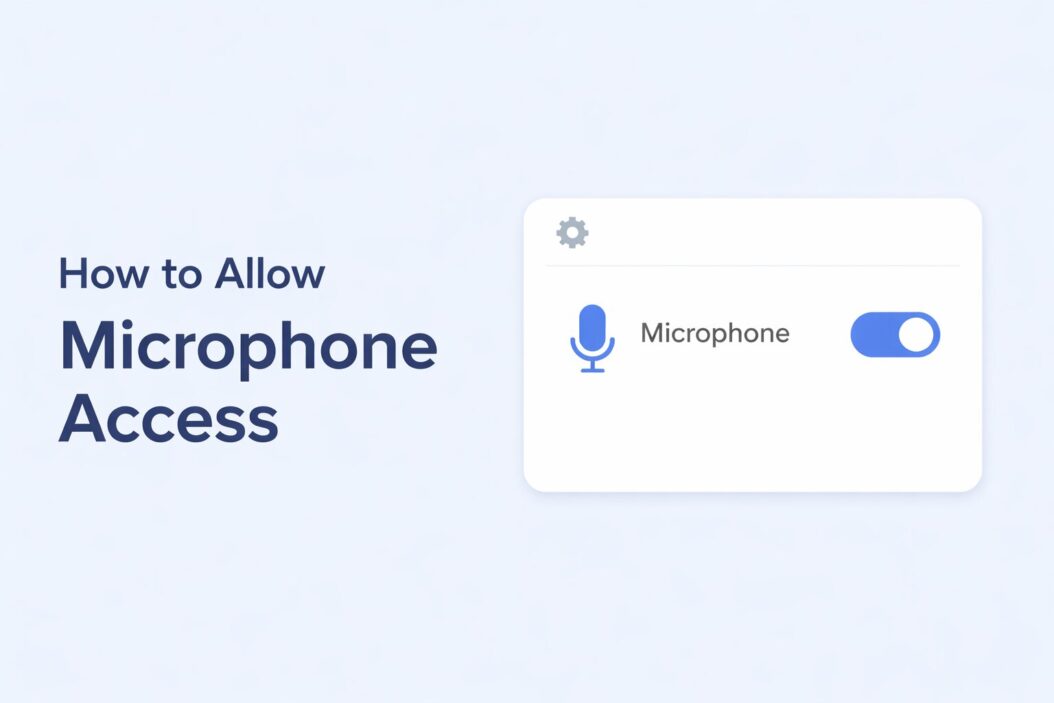
Microphone Permissions
Your device asks permission before letting apps use your microphone. This protects your privacy. When you say “no” or accidentally click “block,” the app can’t hear you.
Three layers control microphone access:
- Operating system settings (Windows, Mac, iOS, Android)
- Browser permissions (Chrome, Firefox, Safari, Edge)
- Individual app permissions
You need to enable all three for your microphone to work. If one layer blocks access, nothing works.
Quick Diagnostic Test
Before changing settings, test if your microphone works at all.
Windows: Right-click the speaker icon in your taskbar. Choose “Sound settings.” Under “Input,” speak normally. The blue bar should move.
Mac: Open System Settings. Click “Sound.” Select “Input.” Talk into your mic. The input level bars should respond.
If nothing happens, your microphone might be physically broken or unplugged. Check your connections first.
How to Allow Microphone Access on Windows 11
Windows 11 changed where microphone settings live. Here’s the exact path.
Enable Microphone System-Wide
- Click the Start button
- Type “microphone privacy”
- Click “Microphone privacy settings”
- Turn on “Microphone access”
- Turn on “Let apps access your microphone”
Allow Specific Apps to Use Your Microphone
Scroll down in the same window. You’ll see two lists:
Microsoft Store apps appear first. Toggle the switch next to each app you want to allow.
Desktop apps appear second. These include Chrome, Zoom, Skype, and Discord. Toggle these on too.
Fix Common Windows 11 Microphone Blocks
Sometimes apps still can’t access your mic. Try this:
Open Settings, click “Privacy & security,” then “App permissions.” Find “Microphone.” Make sure both global toggles are ON before you enable individual apps.
How to Allow Microphone Access on Windows 10
Windows 10 uses a similar but slightly different layout.
- Open Settings (Windows key + I)
- Click “Privacy”
- Select “Microphone” from the left sidebar
- Click “Change” under “Microphone access for this device”
- Turn the switch to ON
- Enable “Allow apps to access your microphone”
- Scroll down and toggle ON for each app you use
Desktop apps work differently in Windows 10. The system lists them, but you can’t toggle them individually. If “Allow desktop apps to access your microphone” is ON, all desktop programs can use it.
How to Allow Microphone Access on Mac
Mac organizes permissions differently than Windows. The controls are simpler but sometimes harder to find.
macOS Ventura and Newer (2023-2026)
- Click the Apple menu
- Select “System Settings”
- Click “Privacy & Security” in the sidebar
- Scroll down and click “Microphone”
- Toggle the switch ON for each app you want to allow
macOS Monterey and Older
- Open System Preferences
- Click “Security & Privacy”
- Select the “Privacy” tab
- Click “Microphone” from the left list
- Check the box next to each app you trust
You might see a lock icon in the bottom-left corner. Click it and enter your password before you can change anything.
Reset All Microphone Permissions on Mac
If apps still can’t access your mic, reset everything:
Open Terminal (press Command + Space, type “terminal”). Paste this command:
tccutil reset MicrophonePress Enter. Restart your Mac. Every app will ask for microphone permission again.
How to Allow Microphone Access on iPhone
iPhone makes you approve microphone access app by app. There’s no master switch.
- Open Settings
- Scroll down and tap “Privacy & Security”
- Tap “Microphone”
- You’ll see every app that requested mic access
- Toggle ON for the apps you want to allow
First-Time App Permission
When you first use an app that needs your microphone, iOS shows a popup: “[App name] would like to access the Microphone.” Tap “OK” to allow it. If you tap “Don’t Allow,” go back to Settings later to fix it.
Troubleshooting iPhone Microphone Issues
If an app shows as enabled but still can’t hear you:
- Close the app completely (swipe up from the bottom, swipe the app away)
- Toggle the microphone permission OFF, wait 5 seconds, toggle ON
- Restart your iPhone
- Update the app to the latest version
How to Allow Microphone Access on Android
Android settings vary by manufacturer. Samsung, Google Pixel, and OnePlus all organize this differently. I’ll cover the standard Android path first.
Stock Android (Google Pixel, Most Phones)
- Open Settings
- Tap “Privacy”
- Tap “Permission manager”
- Tap “Microphone”
- You’ll see three categories: Allowed, Ask every time, Not allowed
- Tap any app and select “Allow only while using the app”
Samsung Phones
- Open Settings
- Tap “Apps”
- Tap “Permission manager”
- Tap “Microphone”
- Select each app and choose your permission level
When an App Requests Microphone Access
Android shows a dialog the first time: “Allow [app] to record audio?” You get three choices:
- While using the app (recommended)
- Only this time
- Don’t allow
Choose “While using the app” for apps you trust. Choose “Don’t allow” for sketchy apps.
How to Allow Microphone Access in Chrome
Chrome controls microphone access separately from your operating system. You need both enabled.
Enable Microphone in Chrome Settings
- Click the three dots in the top-right corner
- Select “Settings”
- Click “Privacy and security” in the left sidebar
- Click “Site settings”
- Scroll down and click “Microphone”
- Make sure “Sites can ask to use your microphone” is selected
- Check the “Not allowed” list and remove any sites you want to unblock
Allow Microphone for a Specific Website
When you visit a site that needs your mic, Chrome shows a popup in the address bar. Click “Allow.”
If you already blocked it:
- Click the lock icon (or site information icon) next to the URL
- Find “Microphone” in the dropdown
- Change it from “Block” to “Allow”
- Refresh the page
Check What’s Blocking Your Microphone
Type this in Chrome’s address bar: chrome://settings/content/microphone
You’ll see every website you’ve allowed or blocked. Remove sites from the blocked list by clicking the trash icon next to them.
How to Allow Microphone Access in Firefox
Firefox organizes permissions clearly but hides them deep in settings.
- Click the three horizontal lines (menu button)
- Select “Settings”
- Click “Privacy & Security” in the left sidebar
- Scroll down to “Permissions”
- Find “Microphone” and click “Settings” next to it
- You’ll see every website that asked for access
- Change “Block” to “Allow” for sites you trust
Per-Site Microphone Control
Firefox shows a microphone icon in the address bar when a site requests access. Click “Allow” or “Block.”
To change your decision later, click the site information icon (looks like a lock or “i”) to the left of the URL. Find “Use the Microphone” and change the setting.
How to Allow Microphone Access in Safari
Safari ties microphone permissions to website settings.
On Mac
- Open Safari
- Click “Safari” in the menu bar
- Select “Settings”
- Click the “Websites” tab
- Click “Microphone” in the left sidebar
- Change each website from “Deny” to “Allow”
On iPhone/iPad
Safari uses the system-level microphone permission. Go to Settings, Privacy & Security, Microphone, and enable Safari.
For individual website permissions, visit the site. When it asks for microphone access, tap “Allow.” If you blocked it before, you need to clear the website data:
- Go to Settings
- Scroll down to “Safari”
- Tap “Advanced”
- Tap “Website Data”
- Find the site and swipe left to delete
- Visit the site again and it will re-ask for permission
How to Allow Microphone Access in Microsoft Edge
Edge uses similar settings to Chrome since they share the same base technology.
- Click the three dots in the top-right
- Select “Settings”
- Click “Cookies and site permissions”
- Click “Microphone”
- Make sure “Ask before accessing” is turned ON
- Remove any sites from the “Block” list
For quick access, click the padlock icon next to the website URL. Click “Permissions for this site.” Change Microphone from “Block” to “Allow.”
Common Microphone Access Problems and Fixes
Even with permissions enabled, microphones sometimes fail. Here’s what actually works.
The App Shows as Allowed But Still Can’t Hear Me
This happens because of permission caching:
- Windows: Restart the app completely
- Mac: Quit the app (Command + Q), not just close the window
- iPhone: Force close the app from the app switcher
- Android: Go to Settings, Apps, find the app, tap “Force stop”
Try again after a full restart.
My Microphone Works in One App But Not Another
Each app needs its own permission. Check the specific app in your system settings. On Windows, desktop apps have separate toggles from Microsoft Store apps.
The Browser Says Microphone is Blocked By System Policy
Your company or school might control this through group policy (Windows) or MDM (Mac/mobile). You can’t override it yourself. Contact your IT department.
On personal devices, antivirus software sometimes blocks microphones. Check your security software settings.
Zoom/Teams/Skype Won’t Access My Microphone
These apps have their own internal permission settings:
Zoom: Open settings, click “Audio,” make sure the right microphone is selected in the dropdown.
Teams: Click your profile picture, select “Settings,” go to “Devices,” choose the correct microphone.
Skype: Click the three dots, select “Settings,” click “Audio & Video,” select your microphone from the list.
The app might be trying to use a disconnected Bluetooth headset instead of your built-in mic.
Hardware Issues That Look Like Permission Problems
Sometimes the mic itself is broken:
- Laptop: Check if you muted the mic with a function key (usually F4 or F10)
- Desktop: Make sure the mic is plugged into the pink port, not the blue one
- USB mic: Try a different USB port
- Bluetooth: Unpair and re-pair the device
| Device Type | Check This |
|---|---|
| Laptop | Function key mute toggle |
| External USB | Different USB port, cable connection |
| Bluetooth | Battery level, pairing status |
| Headset | Inline mute switch on cable |
| Webcam | Camera permissions might control mic too |
Security Considerations for Microphone Access
Allowing microphone access creates privacy risks. Follow these rules:
Only Allow Apps You Actually Use
Go through your permission lists monthly. Remove apps you don’t recognize or haven’t used in 6 months.
Never Allow Microphone Access to These
- Games that don’t need voice chat
- Flashlight or calculator apps
- Random websites you just discovered
- Apps that seem sketchy or have bad reviews
Check What’s Listening Right Now
Windows 11: When an app uses your mic, a microphone icon appears in the system tray.
Mac: A small orange dot appears in the menu bar when the mic is active.
iPhone/Android: A dot or microphone icon shows in the status bar during active use.
If you see these indicators when no app should be listening, you have a problem. Check which app is running and revoke its access immediately.
Use “Ask Every Time” When Possible
Some operating systems let you set permissions to “Ask every time” instead of “Always allow.” This adds friction but prevents background recording.
Android offers this option. iPhone doesn’t, but it shows a clear indicator when the mic is active.
Advanced Troubleshooting Techniques
If basic fixes didn’t work, try these technical solutions.
Reset All Microphone Permissions (Windows)
This nuclear option clears every permission and starts fresh:
- Open Registry Editor (type “regedit” in Start)
- Navigate to:
HKEY_CURRENT_USER\Software\Microsoft\Windows\CurrentVersion\CapabilityAccessManager\ConsentStore\microphone - Right-click the “microphone” folder
- Select “Delete”
- Restart your computer
Windows will rebuild the permission database. Every app will ask for access again.
Check Driver Issues (Windows)
Outdated or corrupted audio drivers cause weird permission problems:
- Right-click Start, select “Device Manager”
- Expand “Audio inputs and outputs”
- Right-click your microphone device
- Select “Update driver”
- Choose “Search automatically for drivers”
If that doesn’t work, uninstall the driver and restart. Windows will reinstall it automatically.
Verify Microphone Hardware (Mac)
Mac hides the Audio MIDI Setup utility. It shows if your Mac detects the microphone at all:
- Press Command + Space
- Type “Audio MIDI Setup”
- Press Enter
- Look for your microphone in the device list
- If it’s grayed out, the hardware isn’t connected properly
Clear Browser Cache and Cookies
Sometimes corrupted browser data breaks permissions:
Chrome/Edge: Press Ctrl+Shift+Delete (Command+Shift+Delete on Mac), select “Cached images and files” and “Cookies,” click “Clear data.”
Firefox: Press Ctrl+Shift+Delete, select “Cookies” and “Cache,” click “Clear Now.”
Safari: Safari menu, Clear History, select “all history,” click “Clear History.”
This logs you out of websites, so have your passwords ready.
Microphone Access for Specific Apps
Different apps handle microphone access in unique ways. Here’s what you need to know for the most popular ones.
Discord
Discord needs both system permission and in-app permission:
- Enable microphone in your operating system settings
- Enable it in your browser (if using web Discord)
- Open Discord User Settings (gear icon)
- Click “Voice & Video”
- Select the correct input device
- Test the mic with the “Let’s Check” button
Google Meet
Meet runs in your browser, so it needs browser permission:
- Join a meeting
- Click the camera/microphone icon in the address bar
- Set microphone to “Allow”
- Click the microphone icon in the meeting controls to unmute
If you’re still muted, check that Google Meet is allowed in Chrome’s site settings.
Slack
Slack’s desktop app needs operating system permission. The web version needs browser permission too:
- Start a huddle or call
- Click your profile picture
- Select “Preferences”
- Click “Audio & video”
- Choose your microphone from the dropdown
- Speak to test the input level meter
WhatsApp Desktop
WhatsApp desktop (not the browser version) needs system permission:
Windows: Settings, Privacy & security, Microphone, toggle ON for WhatsApp.
Mac: System Settings, Privacy & Security, Microphone, enable WhatsApp.
OBS Studio
OBS needs system permission even though it’s a recording app, not communication software. Enable it the same way as other desktop apps. Then configure the audio source in OBS’s settings under “Audio.”
Microphone Permission Locations by Platform
| Platform | Settings Path | Time to Fix |
|---|---|---|
| Windows 11 | Settings → Privacy & security → Microphone | 30 seconds |
| Windows 10 | Settings → Privacy → Microphone | 30 seconds |
| Mac (Ventura+) | System Settings → Privacy & Security → Microphone | 20 seconds |
| iPhone/iPad | Settings → Privacy & Security → Microphone | 20 seconds |
| Android | Settings → Privacy → Permission manager → Microphone | 30 seconds |
| Chrome | Settings → Privacy and security → Site settings → Microphone | 45 seconds |
| Firefox | Settings → Privacy & Security → Permissions → Microphone | 45 seconds |
| Safari (Mac) | Safari → Settings → Websites → Microphone | 30 seconds |
| Edge | Settings → Cookies and site permissions → Microphone | 45 seconds |
Tips for Managing Microphone Permissions Long-Term
Don’t just enable everything once and forget about it. Good permission management prevents problems:
Review Permissions Quarterly
Set a calendar reminder for every 3 months. Go through your allowed apps list. Remove anything you don’t use anymore. Apps you deleted might still show up as “allowed.”
Keep Track of What You Allow
When you grant microphone access, write down why. “Allowed Zoom for work calls.” This helps you remember months later whether you still need it.
Update Your Apps Regularly
App updates sometimes reset permissions or require new ones. Keep Chrome, Zoom, and your operating system current. Old software has bugs that break microphone access.
Create Different Browser Profiles
Use Chrome’s profile feature to separate work and personal browsing. Your work profile allows Google Meet and Slack. Your personal profile blocks everything except trusted sites. This prevents random websites from even asking.
Learn Your Platform’s Indicators
Know what it looks like when your mic is active:
- Windows 11: Microphone icon in system tray
- Mac: Orange dot in menu bar
- iPhone: Orange dot above cellular signal
- Android: Microphone icon in status bar
Glance at these occasionally. If something is listening when it shouldn’t be, you’ll catch it.
Conclusion
Enabling microphone access takes 30 seconds once you know where to look. The process differs between Windows, Mac, iPhone, and Android, but follows the same pattern: enable system-level access first, then allow individual apps or websites.
Most microphone problems aren’t actually permission problems. Check if your mic is physically connected, unmuted, and selected as the active input device. Restart the app that can’t hear you. Update your drivers and software.
Review your microphone permissions every few months. Remove access from apps you don’t use. Pay attention to the microphone indicators on your device so you know when something is listening.
Frequently Asked Questions
Why does my microphone work in some apps but not others?
Each app needs individual permission. Enabling microphone access system-wide isn’t enough. Go to your privacy settings and check the specific app that isn’t working. Toggle its microphone permission OFF and back ON. Restart the app afterward.
Can websites access my microphone without asking?
No. Modern browsers always show a permission prompt before allowing microphone access. You must click “Allow” before a website can hear you. If you don’t see a prompt, the browser blocked the request automatically. Check your browser’s microphone settings to find blocked sites.
How do I know if an app is secretly recording me?
Your device shows clear indicators. Windows 11 displays a microphone icon in the system tray. Mac shows an orange dot in the menu bar. iPhone and Android show a colored dot or icon in the status bar. If you see these when no app should be listening, check your task manager or recent apps list to find what’s running.
What happens if I deny microphone access permanently?
The app or website can’t use your microphone until you manually enable it again. You won’t see another permission prompt. Go to your system settings or browser settings, find the app or site in your microphone permissions list, and change it from “Deny” to “Allow.” Refresh the page or restart the app.
My microphone permissions keep resetting after Windows updates
Windows sometimes resets privacy settings during major updates. After each Windows feature update, check your microphone settings. Re-enable access for all your essential apps. Create a text file listing which apps you’ve allowed so you can quickly reconfigure everything after an update. This affects Windows 10 and 11 users, especially after twice-yearly feature updates.

- How to Disable Driver Signature Enforcement in Windows 11/10 (2026 Complete Guide) - April 11, 2026
- How to Allow Microphone Access on Your Device in 2026 - April 11, 2026
- How to Disable Pop-Up Blockers on Windows 11/10 (Step-by-Step Guide) - April 10, 2026