Windows 11 gives you powerful ways to customize your desktop, and themes are the fastest route to a fresh look. A theme bundles wallpapers, colors, sounds, and cursor styles into one package you can apply instantly. This guide shows you exactly how to get, install, and manage themes on Windows 11.
What Are Windows 11 Themes and Why Use Them?
A Windows 11 theme is a collection of visual and audio settings that work together. When you apply a theme, it changes:
- Desktop wallpaper (background image)
- Accent colors throughout the interface
- System sounds for alerts and actions
- Mouse cursor appearance
- Window border colors
Themes save time. Instead of adjusting each setting individually, you pick one theme and everything updates at once. You can switch between themes in seconds to match your mood, work environment, or time of day.
Quick Answer: Three Ways to Get Windows 11 Themes
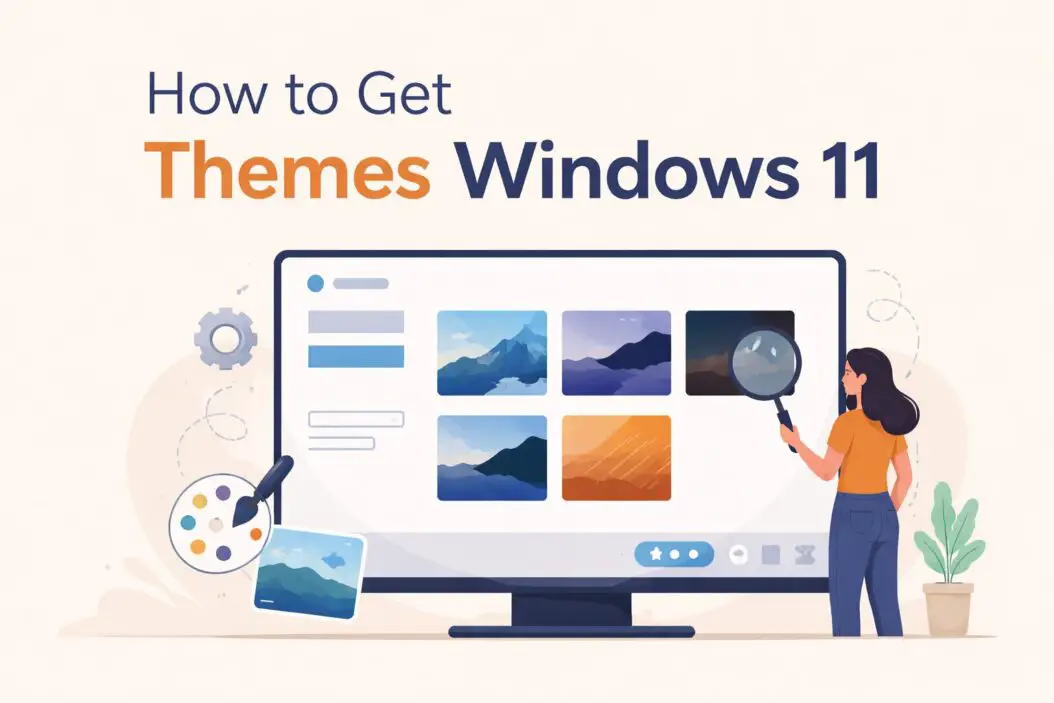
Built-in Themes: Already installed on your computer. Go to Settings > Personalization > Themes to see them.
Microsoft Store: Free and paid themes created by Microsoft and verified developers. Safe and easy to install.
Third-Party Websites: Community-made themes from sites like DeviantArt or ThemeForest. Require more careful installation but offer unique designs.
I’ll walk through each method with clear steps.
Method 1: Using Built-In Windows 11 Themes
Windows 11 comes with several pre-installed themes. This is the simplest starting point.
Steps to Apply Built-In Themes
- Right-click anywhere on your desktop
- Select “Personalize” from the menu
- Click “Themes” in the left sidebar
- Scroll through the available themes
- Click any theme thumbnail to apply it immediately
Your screen will update within seconds. The wallpaper changes, colors shift, and if the theme includes custom sounds, those activate too.
Available Built-In Themes
Windows 11 typically includes:
- Windows (Light): Clean white interface with blue accents
- Windows (Dark): Black backgrounds with reduced eye strain
- Glow: Vibrant gradient backgrounds
- Captured Motion: Dynamic abstract images
- Sunrise/Sunset: Nature photography themes
- Flow: Fluid wave patterns in multiple colors
These themes are tested, stable, and use no extra storage beyond what Windows already occupies.
Method 2: Downloading Themes from Microsoft Store
The Microsoft Store hosts hundreds of free themes and a few premium options. This is the safest way to expand your theme collection.
How to Get Themes from Microsoft Store
- Open Settings (Windows key + I)
- Click “Personalization” on the left
- Select “Themes”
- Click “Browse themes in Microsoft Store” (blue link near the top)
- The Store app opens to the Themes section
- Browse categories or use the search bar
- Click a theme you like
- Press the “Get” or “Buy” button
- The theme downloads automatically
- Click “Apply” when the download completes
The theme appears in your Themes list immediately. You can preview it before applying by clicking the thumbnail.
Theme Categories in Microsoft Store
Animals & Nature: Wildlife photography, landscapes, ocean scenes
Art: Digital art, paintings, abstract designs
Automotive: Cars, motorcycles, racing imagery
Games: Themed around popular Microsoft and third-party games
Movies & TV: Official themes from entertainment properties
Panoramic: Ultra-wide landscape images
Places & Landmarks: Travel photography from around the world
Most Store themes are free. Premium themes typically cost between $2 and $5 and often include higher resolution images or exclusive artwork.
Checking Theme Ratings and Reviews
Before downloading, look at the star rating below the theme title. Read a few reviews to see what others say about image quality and whether the theme works properly. Verified purchases indicate real user experiences.
Method 3: Installing Third-Party Themes
Community creators make custom themes that go beyond what Microsoft offers. These can completely transform Windows 11’s appearance, but they require additional steps and carry some risk.
Important: Third-party themes may require disabling system protection features. Only download from trusted sources and at your own risk.
Finding Third-Party Themes
Reputable sources include:
- DeviantArt (deviantart.com): Large community with thousands of Windows themes
- ThemePack.me: Curated collection of desktop themes
- WinCustomize: Long-standing Windows customization site
Avoid random download sites or sources that require suspicious permissions.
How to Install Third-Party Theme Files
Third-party themes come as .themepack or .deskthemepack files.
- Download the theme file to your computer
- Locate the file in your Downloads folder
- Double-click the theme file
- Windows asks for confirmation
- Click “Yes” or “Apply”
- The theme installs and appears in Settings > Personalization > Themes
Some advanced themes require additional software like UltraUXThemePatcher or SecureUXTheme to bypass Windows theme restrictions. These tools modify system files and can cause stability issues. Research thoroughly before using them.
Understanding Theme File Formats
.themepack: Standard Windows theme package containing wallpapers, colors, and settings
.deskthemepack: Similar to themepack, used by Windows since Windows 7
.theme: Configuration file that references images and settings but doesn’t bundle them
When downloading, prefer .themepack or .deskthemepack files as they’re complete packages.
Creating Your Own Custom Theme
You don’t need to download themes. Windows 11 lets you create personalized themes from your own images and preferences.
Steps to Create a Custom Theme
- Open Settings > Personalization > Background
- Choose “Picture” or “Slideshow” from the dropdown
- Select your own images (Browse button)
- Go to Settings > Personalization > Colors
- Pick an accent color or let Windows choose from your wallpaper
- Navigate to Settings > Personalization > Themes
- Your current settings appear as an unsaved custom theme
- Click “Save theme”
- Give it a name
- Click “Save”
Your custom theme now appears alongside built-in and downloaded themes.
Setting Up a Slideshow Theme
Slideshows rotate through multiple images automatically.
- Go to Settings > Personalization > Background
- Select “Slideshow” from the dropdown
- Click “Browse” and choose a folder containing your images
- Set how often images change (1 minute to 1 day)
- Toggle “Shuffle” if you want random order
- Save as a theme following the steps above
This works great for photo collections from vacations, family pictures, or curated image sets.
Managing Your Windows 11 Themes
As you collect themes, you’ll want to organize and maintain them.
Switching Between Themes
Click Settings > Personalization > Themes, then click any theme thumbnail. The change happens instantly. You can switch as often as you like with no performance impact.
Deleting Themes You Don’t Use
- Go to Settings > Personalization > Themes
- Right-click the theme you want to remove
- Select “Delete”
- Confirm the deletion
You cannot delete the currently active theme. Switch to another theme first.
Where Windows Stores Theme Files
Windows keeps themes in: C:\Users\[YourUsername]\AppData\Local\Microsoft\Windows\Themes
The wallpapers are usually stored in: C:\Users\[YourUsername]\AppData\Local\Microsoft\Windows\Themes\RoamedThemeFiles
You rarely need to access these folders directly, but knowing the location helps if you want to back up custom themes or transfer them to another computer.
Advanced Theme Customization Options
Beyond applying complete themes, you can adjust individual components.
Customizing Colors
- Settings > Personalization > Colors
- Choose light, dark, or custom mode
- Select an accent color manually or use automatic color from wallpaper
- Toggle “Show accent color on Start and taskbar”
- Toggle “Show accent color on title bars and window borders”
These changes update your current theme. Save it as a new custom theme to preserve the modifications.
Changing Sounds
- Settings > Personalization > Themes
- Click “Sounds” under Related settings
- Select a Sound Scheme from the dropdown
- Or customize individual events (click an event, then Browse for a .wav file)
- Click “Save As” to save your sound scheme
- Click OK
Sound schemes are separate from visual themes but can be saved together in a custom theme.
Adjusting Mouse Cursors
- Settings > Bluetooth & devices > Mouse
- Click “Additional mouse settings”
- Go to the Pointers tab
- Choose a scheme from the dropdown
- Click OK
For more cursor options, visit Microsoft Store and search for “cursor themes.”
Troubleshooting Common Theme Problems
Theme Won’t Apply
Solution: Restart Windows Explorer. Press Ctrl+Shift+Esc to open Task Manager, find “Windows Explorer” in the list, right-click it, and select “Restart.”
Wallpaper Not Changing
Check: Settings > Personalization > Background. Make sure it’s set to “Picture” or “Slideshow,” not “Solid color.”
Verify: Right-click the desktop, select “Personalize,” and ensure the theme you want is actually selected.
Downloaded Theme Missing
Look: Check Settings > Personalization > Themes. Downloaded themes should appear in the list. If missing, try downloading again from Microsoft Store.
Permissions: Rarely, folder permissions prevent theme installation. Run Settings as administrator (though this usually isn’t necessary).
Theme Colors Look Wrong
Reset: Apply a built-in theme like “Windows (Light),” then reapply your desired theme. This clears conflicting settings.
Update: Ensure Windows is fully updated. Go to Settings > Windows Update and install any pending updates.
Third-Party Theme Breaks Desktop
Safe Mode: Boot into Safe Mode (hold Shift while clicking Restart, then select Troubleshoot > Advanced Options > Startup Settings > Restart > press 4 for Safe Mode). In Safe Mode, revert to a default theme, then restart normally.
System Restore: If the theme damaged system files, use System Restore to roll back to before installation.
Performance Impact of Themes
Themes have minimal impact on system performance. The wallpaper is simply a displayed image. Color schemes and sounds use negligible resources.
Exception: Animated wallpapers (using third-party software like Wallpaper Engine) can consume CPU and GPU resources, especially on lower-end hardware. Static themes from Microsoft have zero performance penalty.
Security Considerations When Downloading Themes
Microsoft Store Themes: Safe
Microsoft vets all Store content. You can download these themes without security concerns.
Third-Party Themes: Exercise Caution
- Download only from established sites with good reputations
- Check file extensions (.themepack and .deskthemepack are safer than .exe)
- Scan downloaded files with Windows Defender or your antivirus before opening
- Read user comments and ratings
- Avoid sites that require you to disable antivirus or User Account Control
Never run .exe files claiming to be themes. Legitimate themes use .themepack or .deskthemepack formats.
Understanding Theme Permissions
Themes from Microsoft Store cannot access your files, network, or personal information. They only change visual settings.
Third-party theme tools that modify system files (like theme patchers) require administrator access and can potentially harm your system if malicious. Only use well-known, widely reviewed tools.
Comparing Free vs Paid Themes
| Feature | Free Themes | Paid Themes |
|---|---|---|
| Image Quality | Good (typically 1080p or 4K) | Excellent (often 4K+, professional photography) |
| Variety | Thousands available | Hundreds of premium options |
| Updates | Rarely updated | Sometimes updated with new images |
| Support | Community forums | Developer support (sometimes) |
| Exclusive Content | No | Yes (licensed artwork, official franchises) |
| Price | $0 | Usually $2-$5 |
For most users, free themes provide more than enough variety and quality. Paid themes make sense if you want official content from specific franchises or support artists directly.
Tips for Choosing the Right Theme
Match Your Environment: Bright themes work well in lit rooms. Dark themes reduce eye strain in dim lighting.
Consider Your Work: Professional settings might call for subtle, neutral themes. Creative work might benefit from inspiring imagery.
Test Before Committing: Apply a theme for a day before keeping it. Some wallpapers look good initially but become distracting over time.
Coordinate with Apps: If you use the same apps daily, choose themes that complement their color schemes for visual harmony.
Seasonal Rotation: Change themes with seasons. Winter landscapes in December, beach scenes in summer.
Additional Resources for Windows 11 Customization
Beyond themes, Windows 11 offers many personalization options:
Widgets: Pin useful information to your desktop (weather, news, calendar)
Desktop Icons: Show or hide system icons, change their appearance
Start Menu Layout: Pin your most-used apps, resize the menu
Taskbar: Adjust alignment, hide or show system icons
For comprehensive customization guidance, visit Microsoft’s official Windows 11 personalization documentation.
The Windows customization community at r/Windows11 on Reddit shares themes, tips, and troubleshooting help.
Syncing Themes Across Devices
Windows 11 can sync themes across your devices if you sign in with a Microsoft account and enable sync.
- Go to Settings > Accounts > Windows backup
- Toggle on “Remember my preferences”
- Under “Personalization,” toggle on “Themes”
Now when you apply or create a theme on one Windows 11 device, it appears on your other devices. The theme files themselves don’t sync (too large), but the theme configuration does. If you used custom images, those won’t transfer unless they’re in a synced folder like OneDrive.
Understanding Windows 11 Dark Mode and Light Mode
Dark mode and light mode are system-wide settings that affect more than just wallpaper.
Dark Mode: Black backgrounds in File Explorer, Settings, and many apps. Reduces eye strain in low light.
Light Mode: White backgrounds everywhere. Better for bright environments.
Custom: You can set apps to dark mode while keeping Windows itself in light mode, or vice versa.
To switch: Settings > Personalization > Colors > Choose your mode
Many themes specify light or dark mode automatically. You can override this choice in the Colors settings.
The Difference Between Themes, Wallpapers, and Backgrounds
These terms are often confused:
Wallpaper/Background: Just the desktop image. One component of a theme.
Theme: A complete package including wallpaper, colors, sounds, and cursor. Applying a theme changes multiple settings at once.
You can change your wallpaper without changing your theme. But changing your theme always changes your wallpaper (unless the theme has no wallpaper specified).
How Themes Interact with Other Settings
Display Settings
Themes respect your monitor resolution. A 4K theme looks sharper on a 4K monitor but Windows automatically scales it to fit any resolution.
High Contrast Mode
If you enable High Contrast mode (Settings > Accessibility > Contrast themes), it overrides your current theme to improve readability for users with vision impairments. Disable High Contrast to return to your regular theme.
Night Light
Night Light (Settings > System > Display > Night light) reduces blue light by adding a warm color filter. This works on top of any theme and doesn’t conflict with theme colors.
HDR
If your monitor supports HDR and you enable it, theme wallpapers may appear more vibrant. Windows enhances images to take advantage of HDR displays.
Table: Quick Reference for Theme Sources
| Source | Safety | Variety | Cost | Ease of Use |
|---|---|---|---|---|
| Built-in Themes | Very Safe | Limited (10-15 themes) | Free | Very Easy (already installed) |
| Microsoft Store | Very Safe | Extensive (1000+ themes) | Mostly Free | Easy (one-click install) |
| DeviantArt | Use Caution | Very Extensive | Free | Moderate (manual install) |
| ThemePack.me | Generally Safe | Extensive | Free | Moderate (manual install) |
| Theme Modification Tools | Risk Involved | Unlimited (if creating your own) | Varies | Advanced (system modification) |
Backing Up Your Favorite Themes
If you’ve created custom themes or downloaded many from the Store, back them up to avoid losing them.
Manual Backup Method
- Open File Explorer
- Navigate to:
C:\Users\[YourUsername]\AppData\Local\Microsoft\Windows\Themes - Copy the entire Themes folder to an external drive or cloud storage
- Also copy:
C:\Users\[YourUsername]\AppData\Roaming\Microsoft\Windows\Themes
To restore, copy these folders back to the same locations on a new installation.
Automatic Backup with OneDrive
If you use OneDrive:
- Move your custom wallpaper images to a OneDrive folder
- Create themes using those OneDrive images
- Enable theme sync (Settings > Accounts > Windows backup)
This keeps your themes accessible across devices and protects against data loss.
Conclusion
Getting themes for Windows 11 is straightforward. Start with built-in themes to see what’s already available. Expand your collection through the Microsoft Store for safe, verified options. Create custom themes using your own photos for a truly personal desktop. Only explore third-party sources if you want specialized designs and understand the risks.
Themes take seconds to apply and dramatically change your desktop’s look. Experiment freely. You can always switch back or delete themes you don’t like. The right theme makes your daily computer use more enjoyable and can even boost productivity by creating an environment that matches your work style.
Remember to keep Windows updated, download only from trusted sources, and back up themes you’ve customized. With these practices, you’ll maintain a fresh, personalized Windows 11 desktop that reflects your preferences.
Frequently Asked Questions
Can I use Windows 10 themes on Windows 11?
Yes, most Windows 10 themes work on Windows 11. Download the .themepack file and double-click it. Windows 11 applies it like any other theme. Some very old themes from Windows 7 or 8 may have compatibility issues, but Windows 10 themes transfer smoothly.
Do themes slow down my computer?
No, standard themes have no performance impact. They’re just wallpapers and color settings. Your desktop displays the wallpaper whether you use a theme or not. The only exception is if you install third-party animated wallpaper software, which uses CPU and GPU resources to render animations.
How do I get a completely black desktop with no wallpaper?
Go to Settings > Personalization > Background. Change the dropdown to “Solid color.” Select black from the color palette. Then go to Settings > Personalization > Colors and choose dark mode. This creates an all-black desktop environment.
Can themes contain viruses or malware?
Themes from Microsoft Store cannot contain malware. They’re vetted before publication. Third-party .themepack files are usually safe because they only contain images and settings, not executable code. The danger comes from .exe files disguised as themes or theme modification tools from untrusted sources. Always scan downloads and stick to reputable sites.
How many themes can I install at once?
There’s no practical limit. Windows handles dozens or even hundreds of installed themes without issues. Each theme takes minimal storage space (usually under 20MB). Install as many as you want and switch between them freely. If you accumulate too many, just delete the ones you don’t use anymore.
