If you need to open and use dnsmgmt.msc, here is the short answer: press Win + R, type dnsmgmt.msc, and hit Enter. That opens the DNS Manager console on Windows Server. Everything else in this guide helps you actually use it well.
What Is dnsmgmt.msc?
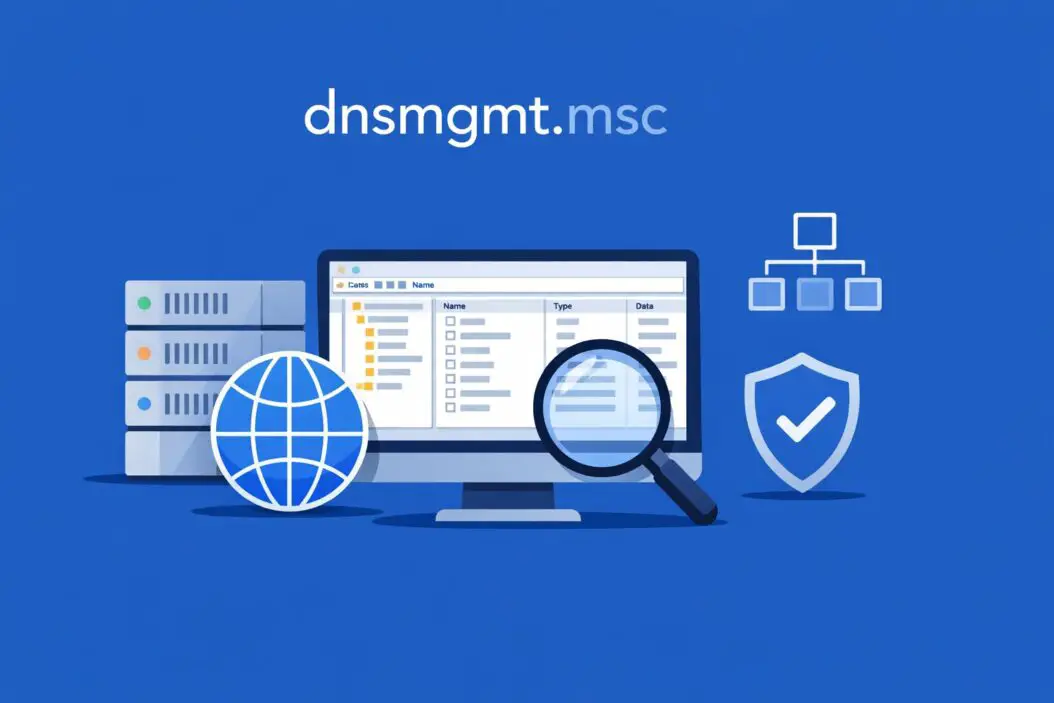
dnsmgmt.msc is the Microsoft Management Console snap-in for DNS (Domain Name System) management. It is built into Windows Server operating systems. You use it to create, edit, and delete DNS zones and records, troubleshoot name resolution problems, and manage DNS server settings from a graphical interface.
Think of DNS as the phonebook of your network. It translates human-readable names like server.company.local into IP addresses that computers understand. dnsmgmt.msc is the tool you use to manage that phonebook.
It is available on:
- Windows Server 2016
- Windows Server 2019
- Windows Server 2022
- Windows 11 (with RSAT tools installed)
- Windows 10 (with RSAT tools installed)
How to Open dnsmgmt.msc: Every Method
Method 1: Run Dialog (Fastest)
- Press Win + R
- Type
dnsmgmt.msc - Press Enter
This works on any Windows Server where DNS Server role is installed.
Method 2: Start Menu Search
- Click the Start button
- Type
DNS - Click DNS Manager from the results
Method 3: Server Manager
- Open Server Manager
- Click Tools in the top-right menu
- Select DNS
Method 4: Command Prompt or PowerShell
Open CMD or PowerShell and run:
dnsmgmt.msc
Method 5: Remote Access from Another Machine
If you are managing a remote DNS server, you can open DNS Manager and connect to a different server. When DNS Manager opens, right-click the top node and select Connect to DNS Server, then enter the remote server name or IP.
dnsmgmt.msc Is Not Opening: Common Fixes
| Problem | Cause | Fix |
|---|---|---|
| “Windows cannot find dnsmgmt.msc” | DNS Server role not installed | Install DNS Server role via Server Manager |
| Opens but no server listed | DNS service stopped | Run net start dns in CMD |
| Access denied | Not running as admin | Right-click and run as Administrator |
| Not available on Windows 10/11 | RSAT not installed | Install Remote Server Administration Tools |
Installing RSAT on Windows 10 or 11
If you are on a workstation, not a server, you need RSAT:
- Go to Settings > Apps > Optional Features
- Click Add a feature
- Search for RSAT: DNS Server Tools
- Install it
After that, dnsmgmt.msc will work from your workstation and you can manage DNS servers remotely.
Understanding the DNS Manager Interface
When you open DNS Manager, you see a tree on the left and details on the right. Here is what each section means:
Forward Lookup Zones This is where hostname-to-IP mappings live. When a computer asks “what is the IP of server01.company.local?”, it looks here.
Reverse Lookup Zones This is where IP-to-hostname mappings live. Used for verification and logging. When something asks “what is the name of 192.168.1.10?”, it checks here.
Conditional Forwarders Rules that tell your DNS server to forward specific domain queries to another DNS server. Useful in multi-domain or hybrid environments.
Root Hints A list of root DNS servers on the internet. Your server uses these when it cannot resolve a name from local zones.
How to Create a DNS Zone
Creating a Forward Lookup Zone
- Open
dnsmgmt.msc - Expand your server name
- Right-click Forward Lookup Zones
- Select New Zone
- Click Next on the wizard
- Choose zone type:
- Primary Zone = writable master copy
- Secondary Zone = read-only copy from another server
- Stub Zone = stores only NS records
- Enter the zone name (example:
company.local) - Choose whether to store in Active Directory (recommended if AD is present)
- Accept defaults for replication and dynamic updates
- Click Finish
Creating a Reverse Lookup Zone
- Right-click Reverse Lookup Zones
- Select New Zone
- Follow the wizard
- Choose IPv4 Reverse Lookup Zone
- Enter your network ID (example:
192.168.1) - Complete the wizard
How to Add DNS Records
This is one of the most common tasks in DNS Manager. Here are the record types you will use most:
A Record (Host Record)
Maps a hostname to an IPv4 address.
- Expand Forward Lookup Zones
- Click your zone
- Right-click in the right pane
- Select New Host (A or AAAA)
- Enter the name (example:
webserver) and IP address (example:192.168.1.50) - Check Create associated pointer (PTR) record if you have a reverse zone
- Click Add Host
CNAME Record (Alias)
Points one name to another name. Useful for creating aliases.
- Right-click your zone
- Select New Alias (CNAME)
- Enter the alias name (example:
www) - Enter the fully qualified target (example:
webserver.company.local) - Click OK
MX Record (Mail Exchanger)
Tells other mail servers where to send email for your domain.
- Right-click your zone
- Select New Mail Exchanger (MX)
- Leave the host field blank (for the root of the domain) or enter a subdomain
- Enter the mail server FQDN (example:
mail.company.local) - Set priority (lower number = higher priority)
- Click OK
PTR Record (Pointer)
Used in reverse lookup zones. Maps an IP to a hostname.
- Expand Reverse Lookup Zones
- Click your reverse zone
- Right-click the right pane
- Select New Pointer (PTR)
- Enter the last octet of the IP (example:
50for192.168.1.50) - Enter the hostname FQDN
- Click OK
SRV Record (Service Locator)
Used by applications like Active Directory and VoIP to find services.
- Right-click your zone
- Select Other New Records
- Choose Service Location (SRV)
- Fill in: Service, Protocol, Priority, Weight, Port, Target
- Click OK
DNS Record Types:
| Record Type | Purpose | Example Use |
|---|---|---|
| A | Hostname to IPv4 | server01 > 192.168.1.10 |
| AAAA | Hostname to IPv6 | server01 > ::1 |
| CNAME | Alias to another name | www > webserver.company.local |
| MX | Mail server for domain | Mail delivery |
| PTR | IP to hostname | Reverse lookup |
| NS | Name server for zone | Delegation |
| SOA | Zone authority info | Zone metadata |
| SRV | Service location | AD, Teams, SIP |
| TXT | Text data | SPF, DKIM, verification |
How to Edit or Delete DNS Records
Edit a Record
- Open DNS Manager
- Navigate to the zone containing the record
- Find the record in the right pane
- Double-click it
- Make your changes
- Click OK
Delete a Record
- Right-click the record
- Select Delete
- Confirm the deletion
Be careful when deleting records. If a system depends on that record, you will break name resolution for it immediately.
Managing DNS Zones: Key Operations
Transfer a Zone (Secondary DNS)
If you have a secondary DNS server that should pull zone data from the primary:
- On the primary server, open zone properties
- Go to the Zone Transfers tab
- Allow zone transfers to specific servers
- On the secondary server, create a new secondary zone
- Enter the primary server IP as the master
Force Zone Transfer
On the secondary server:
- Right-click the secondary zone
- Select Transfer from Master
Enable Dynamic Updates
Dynamic updates let DHCP automatically register DNS records.
- Right-click a zone
- Select Properties
- Under Dynamic updates, choose:
- None = no automatic updates
- Nonsecure and secure = any client can register
- Secure only = only domain-joined computers can register (recommended)
Configuring Forwarders
Forwarders tell your DNS server where to send queries it cannot resolve locally.
Adding a Forwarder
- Right-click your server name in DNS Manager
- Select Properties
- Click the Forwarders tab
- Click Edit
- Add IP addresses (example:
8.8.8.8for Google DNS or your ISP DNS) - Click OK
Adding a Conditional Forwarder
Used when you want queries for a specific domain to go to a specific server.
- Right-click Conditional Forwarders
- Select New Conditional Forwarder
- Enter the domain name (example:
partner.company.com) - Add the DNS server IP that handles that domain
- Click OK
This is very useful in Azure hybrid environments where on-premises DNS needs to forward Azure Private DNS zones to Azure DNS resolvers.
Viewing and Clearing the DNS Cache
Your DNS server caches records it has looked up from the internet. Sometimes cached data becomes stale and causes resolution issues.
View Cached Lookups
- In DNS Manager, go to View in the menu
- Enable Advanced
- You will now see a Cached Lookups folder under your server
- Expand it to see what is cached
Clear the Cache
Right-click your server name and select Clear Cache.
Or use PowerShell:
Clear-DnsServerCache
Or use CMD:
ipconfig /flushdns
Note: ipconfig /flushdns clears the client-side cache on the machine you run it on. The Clear Cache option in DNS Manager clears the server’s resolver cache.
Using PowerShell Alongside dnsmgmt.msc
The DNS Manager GUI is great for visual work, but PowerShell is faster for bulk tasks. Here are useful commands that complement your work in dnsmgmt.msc:
# View all zones
Get-DnsServerZone

# Add an A record
Add-DnsServerResourceRecordA -ZoneName "company.local" -Name "server02" -IPv4Address "192.168.1.20"

# Remove a record
Remove-DnsServerResourceRecord -ZoneName "company.local" -RRtype "A" -Name "server02"

# View all records in a zone
Get-DnsServerResourceRecord -ZoneName "company.local"

# Restart DNS service
Restart-Service DNS
Microsoft’s official DNS Server PowerShell documentation covers all available cmdlets in detail and is worth bookmarking.
Troubleshooting DNS Problems with DNS Manager
Check Zone Status
Open DNS Manager and look at your zones. A healthy zone shows records normally. A zone showing as red or with a warning icon indicates a problem.
Check SOA Record
The SOA (Start of Authority) record holds important zone metadata including the serial number. If a secondary zone is not updating, compare the SOA serial number between primary and secondary. They should match after a successful zone transfer.
To view SOA:
- Click your zone
- Find the SOA record (usually at the top of the list)
- Double-click to inspect
Test DNS Resolution
Use nslookup to test from CMD:
nslookup server01.company.local
nslookup server01.company.local 192.168.1.1
The second command forces the query to a specific DNS server. Useful when you want to test a particular server’s response.
Use Resolve-DnsName in PowerShell for more detail:
Resolve-DnsName server01.company.local -Server 192.168.1.1
Common DNS Issues and Fixes
| Symptom | Likely Cause | Fix |
|---|---|---|
| Name not resolving | Missing A record | Add the record in DNS Manager |
| Wrong IP returned | Old cached record | Clear DNS cache, update record |
| External sites not resolving | Missing forwarder | Add forwarder in server properties |
| Secondary zone not updating | Zone transfer blocked | Check firewall, allow TCP/UDP 53 |
| Reverse lookup failing | Missing PTR record | Add PTR in reverse zone |
DNS Security Best Practices
Restrict Zone Transfers
Zone transfers copy your entire DNS zone. Restrict who can request them:
- Zone Properties > Zone Transfers tab
- Select Only to the following servers
- Add only your secondary DNS server IPs
Enable Secure Dynamic Updates
As mentioned earlier, set dynamic updates to Secure only so only authenticated domain members can register records.
Use DNSSEC
DNS Security Extensions add digital signatures to DNS records, preventing spoofing. To enable:
- Right-click a zone
- Select DNSSEC > Sign the Zone
- Follow the wizard
DNSSEC is complex but worth it for external-facing zones. The IANA DNSSEC guide provides a solid foundation for understanding how it works in practice: https://www.iana.org/dnssec
Disable Recursion on Authoritative Servers
If a server is only authoritative (not a resolver for clients), disable recursion:
- Right-click server > Properties
- Go to Advanced tab
- Check Disable recursion
Scavenging Stale DNS Records
Over time, DNS zones fill up with old records from decommissioned machines. DNS scavenging automatically removes them.
Enable Scavenging on the Server
- Right-click server > Set Aging/Scavenging for All Zones
- Check Scavenge stale resource records
- Set:
- No-refresh interval: 7 days (how long before a record can be marked stale)
- Refresh interval: 7 days (how long after being stale before deletion)
- Click OK
Enable Scavenging on a Zone
- Right-click the zone
- Select Properties
- Go to General tab
- Click Aging
- Check Scavenge stale resource records
Scavenging only removes dynamically registered records, not manually created ones. Your static A records are safe.
Delegating a DNS Zone
Delegation lets you hand off management of a subdomain to a different DNS server.
Example: You manage company.local but want a different server to handle dev.company.local.
- On the parent zone server, right-click
company.local - Select New Delegation
- Enter the delegated subdomain:
dev - Add the DNS server responsible for
dev.company.local - Complete the wizard
The wizard creates an NS record in the parent zone pointing to the child zone’s server.
Backing Up DNS Data
Method 1: Export Zone File
For primary zones not stored in Active Directory:
- Zone files are stored in
C:\Windows\System32\dns\ - Files are named
zonename.dns - Copy these files as your backup
Method 2: Active Directory Backup
If zones are AD-integrated, they are backed up as part of AD. Use Windows Server Backup or your existing backup solution that covers the System State.
Method 3: PowerShell Export
Get-DnsServerZone | Export-Csv C:\dns-zones-backup.csv
For full record backup:
Get-DnsServerResourceRecord -ZoneName "company.local" | Export-Csv C:\dns-records-backup.csv
Monitoring DNS Server Health
DNS Manager shows basic status, but for deeper monitoring:
DNS Debug Logging:
- Right-click server > Properties
- Go to Debug Logging tab
- Enable and configure what to log
- Log file is saved to
C:\Windows\System32\dns\dns.log
This log is very detailed and can grow large. Enable it for troubleshooting, then turn it off after.
Event Viewer: DNS events appear in: Event Viewer > Applications and Services Logs > DNS Server
Look for warnings or errors here when DNS behaves unexpectedly.
Summary
dnsmgmt.msc is a powerful tool that handles everything DNS on Windows Server. Open it with Win + R and typing the command. Use it to manage zones, add and edit records, configure forwarders, handle delegation, enable scavenging, and troubleshoot resolution issues. Pair it with PowerShell for bulk work. Keep zones secure with restricted zone transfers, secure dynamic updates, and scavenging. Back up zone files or rely on AD replication for redundancy.
If you understand zones, record types, and the difference between forwarders and conditional forwarders, you can handle nearly every DNS task that comes your way through this single console.
Frequently Asked Questions
What is the difference between dnsmgmt.msc and ipconfig /flushdns?
dnsmgmt.msc is a server-side management console. It manages the DNS server itself including zones, records, and configuration. ipconfig /flushdns clears the DNS resolver cache on the local client machine. They operate at different levels. Use DNS Manager on the server. Use ipconfig /flushdns on a workstation that is returning stale results.
Can I use dnsmgmt.msc on Windows 10 or 11?
Yes. You need to install the RSAT DNS Server Tools feature. Go to Settings > Apps > Optional Features, search for RSAT DNS Server Tools, and install it. After that, you can open DNS Manager and connect to remote DNS servers on your network.
How do I connect dnsmgmt.msc to a remote DNS server?
Open DNS Manager, right-click the top node labeled DNS, and select Connect to DNS Server. Enter the name or IP of the remote server. You need admin rights on the remote server and network connectivity on port 53 (TCP and UDP).
Why are my DNS changes not taking effect immediately?
DNS changes are subject to TTL (Time To Live). Each record has a TTL value that tells caches how long to keep the record. If a device cached the old record, it will keep using it until the TTL expires. Lower the TTL before making a change, wait for existing caches to expire, then make the change. Also clear server and client caches after changes for faster propagation on your local network.
How do I check if the DNS Server service is running from DNS Manager?
Open DNS Manager. If the DNS server icon has a red down-arrow, the service is stopped. Right-click the server and select Start to restart it. You can also check from CMD with sc query dns or restart it with net start dns. In PowerShell, use Get-Service DNS to check status and Start-Service DNS to start it.
