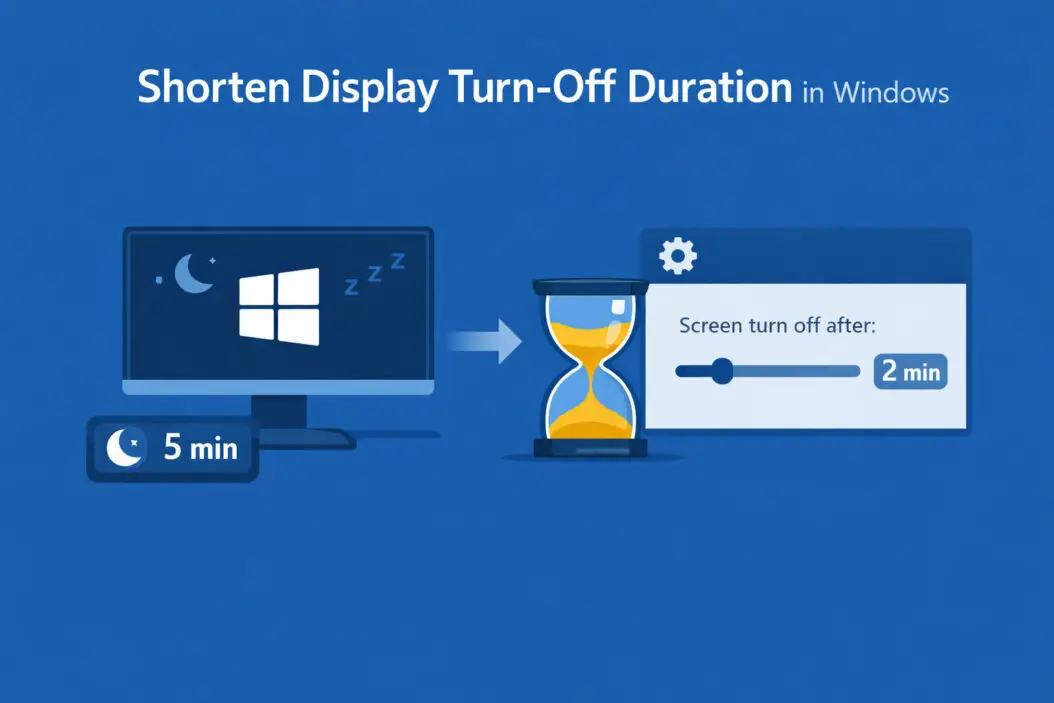
Your computer screen staying on too long wastes energy and shortens your display’s lifespan. This guide shows you exactly how to shorten your display turn-off duration in Windows so your monitor sleeps when you’re not using it.
Open Settings > System > Power & sleep (or Power & battery), then reduce the time under “Screen” to make your display turn off faster. For Windows 11, this takes about 30 seconds. For Windows 10, the path is nearly identical.
Let me walk you through everything you need to know.
Why Shorten Your Display Turn-Off Time
Your monitor consumes significant power even when idle. A typical 24-inch LED display uses 20-30 watts continuously. If your screen stays on for an extra 3 hours daily when you’re not there, that’s roughly 22-33 kWh wasted per year.
Real benefits of shorter turn-off times:
- Lower electricity bills (saves $3-5 annually per display)
- Reduced screen burn-in risk on OLED panels
- Extended backlight lifespan
- Better privacy when stepping away
- Cooler room temperatures
Modern displays can handle frequent on-off cycles without damage. The old advice about leaving screens on all day doesn’t apply to current technology.
How to Shorten Display Turn-Off Duration in Windows 11
Windows 11 moved power settings to a more intuitive location. Here’s the fastest method.
Method 1: Using Settings App
Step 1: Press Windows key + I to open Settings.
Step 2: Click “System” in the left sidebar (usually selected by default).
Step 3: Click “Power & battery” (on laptops) or “Power” (on desktops).
Step 4: Find the “Screen and sleep” section.
Step 5: Click the dropdown next to “On battery power, turn off my screen after” and select your preferred time (1 minute, 2 minutes, 3 minutes, 5 minutes, etc.).
Step 6: Click the dropdown next to “When plugged in, turn off my screen after” and choose a time.
Options available:
- 1 minute
- 2 minutes
- 3 minutes
- 5 minutes
- 10 minutes
- 15 minutes
- 20 minutes
- 25 minutes
- 30 minutes
- Never
For most users, 3-5 minutes works well. Office environments often use 5-10 minutes. Home users who step away frequently benefit from 2-3 minutes.
Method 2: Using Control Panel (Advanced)
Some users prefer the classic Control Panel for additional options.
Step 1: Press Windows key + R to open Run dialog.
Step 2: Type control panel and press Enter.
Step 3: Click “Hardware and Sound.”
Step 4: Click “Power Options.”
Step 5: Next to your selected power plan, click “Change plan settings.”
Step 6: Use the dropdown menu under “Turn off the display” to select your time.
Step 7: Click “Save changes.”
The Control Panel method provides access to advanced power settings that Settings app doesn’t show. Click “Change advanced power settings” for granular control over USB, hard disk, and processor power management.
How to Shorten Display Turn-Off Duration in Windows 10
Windows 10 uses a slightly different layout but the same core functionality.
Standard Method
Step 1: Click Start menu, then click the gear icon for Settings.
Step 2: Click “System.”
Step 3: Click “Power & sleep” in the left menu.
Step 4: Under “Screen,” use the dropdown menus to select when your display turns off.
Step 5: Choose one time for “On battery” and another for “When plugged in” (laptops only).
Desktop users see only one “Screen” dropdown since they don’t have battery power.
Quick Access via Search
Step 1: Click the search box near Start menu.
Step 2: Type “screen timeout” or “display sleep.”
Step 3: Click “Change when the PC sleeps” or “Power & sleep settings.”
Step 4: Adjust your screen timeout values.
This method saves time when you know exactly what setting you want.
Setting Custom Turn-Off Times
The standard dropdowns limit you to preset intervals. If you need a custom duration like 4 minutes or 7 minutes, use Command Prompt.
For Plugged-In Display Timeout
Step 1: Right-click Start menu and select “Windows Terminal (Admin)” or “Command Prompt (Admin).”
Step 2: Type this command, replacing 240 with your desired seconds:
powercfg -change -monitor-timeout-ac 240
240 seconds equals 4 minutes. Calculate your preferred time in seconds (minutes × 60).
Step 3: Press Enter.
For Battery-Powered Display Timeout
Use this command instead:
powercfg -change -monitor-timeout-dc 180
Here, 180 seconds equals 3 minutes. The -dc flag means “direct current” (battery), while -ac means “alternating current” (plugged in).
Common custom timeouts in seconds:
- 90 seconds = 1.5 minutes
- 120 seconds = 2 minutes
- 150 seconds = 2.5 minutes
- 210 seconds = 3.5 minutes
- 270 seconds = 4.5 minutes
Understanding Power Plans and Display Settings
Windows uses power plans to manage energy consumption. Each plan stores separate display timeout values.
Three Default Power Plans
Balanced: Balances performance and energy use. Display typically turns off after 10 minutes on AC power, 5 minutes on battery.
Power Saver: Prioritizes battery life. Display turns off after 5 minutes on AC power, 3 minutes on battery.
High Performance: Maximizes speed, uses more energy. Display turns off after 20 minutes on AC power (not available on battery since this plan disables battery mode).
Your display timeout applies only to the currently active power plan. If you switch plans, the timeout may change.
Checking Your Active Power Plan
Step 1: Open Control Panel > Hardware and Sound > Power Options.
Step 2: Look for the radio button with a filled circle.
That’s your active plan. The display timeout you set applies only to this plan.
Multiple Monitor Display Timeout Settings
Windows applies the same timeout to all connected displays. You cannot set different turn-off times for individual monitors through standard settings.
What Happens with Multiple Monitors
When your timeout triggers:
- All displays turn off simultaneously
- Moving your mouse or pressing a key wakes all displays
- Each monitor resumes at its previous brightness level
Workarounds for Different Monitor Timeouts
Third-party software: Programs like DisplayFusion or Monitor Profile Switcher offer per-monitor power management. These tools cost $25-50 but provide granular control.
Manual power button: Some users turn off specific monitors manually while letting Windows control others. This works but isn’t automated.
USB-controlled power strips: Smart power strips can cut power to specific monitors on schedule. This approach requires hardware investment ($40-80).
According to Microsoft’s documentation, Windows treats all displays as a single unit for power management purposes. Individual control requires third-party solutions.
Preventing Display Timeout Temporarily
Sometimes you need your screen to stay on longer than usual, watching a movie or giving a presentation.
Quick Override Methods
Method 1: Presentation Mode
Windows 10/11 includes presentation settings that prevent screen timeout.
Step 1: Press Windows key + P.
Step 2: This opens Project settings. Though designed for external displays, keeping this panel open prevents timeout.
Better option: Use Windows key + X, select “Mobility Center” (laptops), then turn on “Presentation Settings.”
Method 2: PowerToys Awake
Microsoft’s free PowerToys includes an Awake utility.
Step 1: Download PowerToys from Microsoft’s GitHub (https://github.com/microsoft/PowerToys).
Step 2: Install and open PowerToys.
Step 3: Enable “Awake” in the left menu.
Step 4: Choose “Keep awake indefinitely” or set a specific duration.
Step 5: Your display stays on until you disable Awake.
PowerToys is open-source and safe. Many Windows power users keep it installed for its utilities.
Method 3: Moving Mouse Cursor
Simple but manual. Place a lightweight object on your mouse or use an analog watch under your optical mouse. The movement prevents timeout.
This method is crude but works in restricted environments where you can’t install software.
Troubleshooting Display Timeout Issues
Sometimes your display timeout setting doesn’t work as expected. Here’s how to fix common problems.
Display Won’t Turn Off
Cause 1: Background programs preventing sleep
Media players, download managers, and backup software often keep your display awake.
Fix: Open Task Manager (Ctrl + Shift + Esc), click “More details,” then check the “Status” column. Look for processes marked “Running” with high CPU usage.
Close unnecessary programs, especially video players and streaming apps.
Cause 2: Windows Update activity
Updates can prevent display sleep during download and installation.
Fix: Open Settings > Update & Security > Windows Update. Let pending updates complete, then restart your PC.
Cause 3: Active presentations or media
Windows detects media playback and presentations, keeping your screen on.
Fix: Close all media players, browsers with video tabs, and presentation software. If using PowerPoint, exit slideshow mode completely.
Display Turns Off Too Quickly
Cause: Conflicting power settings
Group Policy or domain settings might override your personal preferences in work environments.
Fix: Press Windows key + R, type gpedit.msc, and press Enter (Windows Pro/Enterprise only).
Navigate to: Computer Configuration > Administrative Templates > System > Power Management > Video and Display Settings
Check if “Turn off the display” is configured. If set to “Enabled” with a specific timeout, your admin has enforced this policy. Contact your IT department.
Alternative fix for all Windows versions:
Check if your screen saver timeout is shorter than display timeout.
Step 1: Search for “screen saver” in Start menu.
Step 2: Click “Change screen saver.”
Step 3: Look at “Wait” minutes. If this is lower than your display timeout, your screen saver activates first.
Step 4: Either disable the screen saver or increase wait time.
Display Timeout Resets After Updates
Windows updates occasionally reset power settings to defaults.
Fix: After major updates, revisit Settings > System > Power & sleep and verify your timeout values. Set calendar reminders to check after scheduled update days (typically second Tuesday of each month).
Display Timeout vs Sleep Mode vs Hibernate
Understanding these power states helps you configure optimal settings.
Display Timeout
What happens: Monitor turns off, computer keeps running.
Power usage: Saves 20-40 watts (just the display).
Wake time: Instant (move mouse or press key).
Data safety: All programs remain active, no data loss risk.
Best for: Short breaks (1-15 minutes).
Sleep Mode
What happens: Display turns off, computer enters low-power state, RAM stays powered.
Power usage: Saves 90-95% of total system power.
Wake time: 2-5 seconds.
Data safety: Very safe, but extended power loss can cause issues.
Best for: Longer breaks (15 minutes to several hours).
Configure sleep separately from display timeout: Settings > System > Power & sleep > “PC sleep” dropdown.
Hibernate
What happens: Computer saves RAM contents to disk, then powers off completely.
Power usage: Zero power consumption.
Wake time: 10-30 seconds (like cold boot but faster).
Data safety: Extremely safe, survives power loss.
Best for: Overnight or multi-day periods away.
Enable hibernate: Control Panel > Power Options > Choose what the power buttons do > Change settings currently unavailable > Check “Hibernate.”
Recommended Display Timeout Settings by Use Case
Different scenarios call for different timeout durations.
| Use Case | On Battery | Plugged In | Reasoning |
|---|---|---|---|
| Office work (frequent breaks) | 2-3 min | 5 min | Saves power during meetings, phone calls |
| Home general use | 5 min | 10 min | Balance between convenience and efficiency |
| Gaming/media PC | 15 min | 20 min | Prevents interruption during cutscenes, loading |
| Public kiosk | 1 min | 1 min | Privacy and security priority |
| Video editing workstation | 15 min | 30 min | Prevents interruption during rendering |
| Always-on server/monitor | Never | Never | Display shows status continuously |
These are starting points. Adjust based on your actual usage patterns.
Testing Your Ideal Timeout
Week 1: Set timeout to 3 minutes. Track how often you need to wake your display.
Week 2: If you wake it more than 10 times daily, increase to 5 minutes.
Week 3: If you rarely wake it manually, decrease to 2 minutes.
Week 4: Settle on the duration that balances convenience with energy savings.
Advanced Configuration with Registry Editor
Power users can access deeper timeout controls through Windows Registry.
Warning: Incorrect registry edits can cause system instability. Create a restore point first.
Creating a Restore Point
Step 1: Search “Create a restore point” in Start menu.
Step 2: Click your system drive, then click “Create.”
Step 3: Name it “Before Display Timeout Registry Edit” and click Create.
Registry Edit for Additional Timeout Options
Step 1: Press Windows key + R, type regedit, press Enter.
Step 2: Navigate to: HKEY_LOCAL_MACHINE\SYSTEM\CurrentControlSet\Control\Power\PowerSettings\7516b95f-f776-4464-8c53-06167f40cc99\3C0BC021-C8A8-4E07-A973-6B14CBCB2B7E
Step 3: Double-click “Attributes” in the right pane.
Step 4: Change value from 1 to 2.
Step 5: Click OK, close Registry Editor.
Step 6: Open Control Panel > Power Options > Change plan settings > Change advanced power settings.
Step 7: Expand “Display” section. You’ll now see additional options including minimum/maximum display brightness settings.
This registry tweak unhides advanced display power options that Microsoft hides by default.
Impact on Battery Life (Laptops)
Shorter display timeouts directly extend battery runtime on laptops.
Measured Battery Impact
Based on typical laptop specifications:
15.6-inch laptop (1080p IPS display, 250 nits brightness):
- Display power consumption: 3-4.5 watts
- Total system idle power: 8-12 watts
- Display represents: 30-40% of idle power
Real-world battery extension:
| Display Timeout | Daily Time Saved | Weekly Battery Extension |
|---|---|---|
| 10 min vs Never | 2-3 hours dark screen | 15-20% longer battery |
| 5 min vs 10 min | 45-60 min dark screen | 5-8% longer battery |
| 2 min vs 5 min | 25-35 min dark screen | 3-5% longer battery |
These figures assume typical office work with periodic breaks. Your results vary based on brightness level and display technology (IPS uses more power than OLED).
Optimizing for Maximum Battery Life
Best combination:
- Display timeout: 2 minutes on battery
- Display brightness: 40-50%
- Sleep timeout: 5 minutes on battery
- Wi-Fi: Off when not needed
This configuration can extend a 6-hour battery to 7-7.5 hours in real use.
Screen Burn-In Prevention
OLED laptop displays (increasingly common in premium models) need shorter timeouts to prevent burn-in.
What Is Burn-In
Burn-in occurs when static images display too long, causing permanent ghost images. OLED pixels degrade unevenly when showing the same content continuously.
High-risk scenarios:
- Taskbar visible 8+ hours daily
- Static desktop icons never moving
- Always-visible browser tabs or toolbars
- Ticker displays or status bars
OLED Display Timeout Recommendations
Minimum protection: 5-minute timeout
Better protection: 3-minute timeout
Best protection: 2-minute timeout + periodic pixel refresh
Most OLED laptops include automatic pixel-refresh routines. These run when the display is off. Shorter timeouts give these routines more opportunities to run.
Additional OLED protection:
- Enable auto-hide taskbar
- Use dark mode in applications
- Rotate wallpapers daily
- Avoid maximum brightness
IPS and VA panel laptops don’t suffer burn-in. These can safely use longer timeouts without damage.
Group Policy Management for Organizations
IT administrators can enforce display timeout across multiple Windows machines.
Setting Timeout via Group Policy
Step 1: Open Group Policy Management Console on domain controller.
Step 2: Create or edit a GPO linked to target organizational unit.
Step 3: Navigate to: Computer Configuration > Policies > Administrative Templates > System > Power Management > Video and Display Settings
Step 4: Enable “Turn off the display (plugged in)”
Step 5: Set timeout in seconds (300 = 5 minutes).
Step 6: Repeat for “Turn off the display (on battery)” if managing laptops.
Step 7: Run gpupdate /force on client machines or wait for automatic policy refresh.
This ensures consistent power management across your organization. Users cannot override domain-enforced timeouts through Settings app.
Allowing User Flexibility
Some organizations prefer recommended rather than enforced timeouts.
Alternative approach:
- Set minimum timeout (prevents “Never”)
- Allow users to choose any duration above minimum
- Monitor compliance through power management reports
This requires scripting through PowerShell rather than strict Group Policy enforcement.
Energy Cost Calculations
Understanding actual costs helps justify shorter timeouts.
Annual Energy Savings Formula
Watts saved × Hours saved per day × Days per year × Local kWh rate ÷ 1000 = Annual savings
Example calculation:
- Display power: 25 watts
- Shortened timeout saves: 3 hours daily
- Work days per year: 250
- Electricity rate: $0.12 per kWh
25 × 3 × 250 × 0.12 ÷ 1000 = $2.25 saved annually
This seems small per computer, but scales significantly:
| Organization Size | Annual Savings (3-hour reduction) |
|---|---|
| 10 computers | $22.50 |
| 50 computers | $112.50 |
| 200 computers | $450 |
| 1000 computers | $2,250 |
Add HVAC savings (displays generate heat requiring cooling), and total savings increase 15-25%.
Carbon Footprint Reduction
Energy savings translate to environmental impact.
Average US electricity carbon intensity: 0.92 pounds CO2 per kWh
Per computer annual CO2 reduction: 25W × 3 hours × 250 days ÷ 1000 × 0.92 = 17.25 pounds CO2
A 200-computer office reduces emissions by 3,450 pounds (1.56 metric tons) annually just from shortened display timeouts.
Common Mistakes to Avoid
Users often make these errors when configuring display timeouts.
Mistake 1: Setting Timeout Too Short
Problem: 30-second or 1-minute timeouts interrupt reading or viewing stationary content.
Solution: Minimum 2 minutes for general use, 3-5 minutes for reading-heavy work.
Mistake 2: Ignoring Separate Battery/AC Settings
Problem: Laptop users set AC timeout but forget battery setting, wasting power on the go.
Solution: Always configure both settings. Battery should be shorter than AC timeout.
Mistake 3: Confusing Display Timeout with Sleep
Problem: Setting 1-minute display timeout expecting full system sleep, then finding downloads interrupted.
Solution: Display timeout only turns off screen. Configure system sleep separately for full power savings.
Mistake 4: Never Adjusting After Initial Setup
Problem: Work patterns change but timeout settings stay static, causing frustration or waste.
Solution: Review timeout settings quarterly. Adjust when changing roles or work styles.
Mistake 5: Disabling Timeout Entirely
Problem: Setting timeout to “Never” wastes energy and risks burn-in.
Solution: Even long timeouts (20-30 minutes) provide benefits. Reserve “Never” for specialty applications only.
Conclusion
Shortening your display turn-off duration in Windows takes less than a minute but provides ongoing benefits. Access Settings > System > Power & sleep, choose a timeout between 2-10 minutes based on your usage, and apply changes. Your display will now turn off automatically when idle, saving energy and extending hardware life.
For most users, 5 minutes plugged in and 3 minutes on battery offers the best balance. Adjust based on how often you step away from your computer.
Remember that display timeout is separate from system sleep. Configure both for maximum power savings. Check your settings after major Windows updates, as they occasionally reset to defaults.
The few seconds you invest now will save hours of unnecessary display time and reduce your annual energy costs. Start with a conservative timeout, then adjust based on your actual experience over the next few weeks.
Frequently Asked Questions
How do I stop my screen from turning off so quickly in Windows 11?
Open Settings (Windows + I), click System, select Power & battery, then increase the time under “Screen and sleep” section. Change both “On battery power” and “When plugged in” dropdowns to longer durations like 10, 15, or 20 minutes. This prevents your screen from turning off too frequently.
What is the difference between display timeout and sleep mode?
Display timeout turns off only your monitor while your computer continues running all programs and processes. Sleep mode puts your entire computer into low-power state, turning off the display and suspending most system operations. Display timeout saves 20-40 watts, while sleep saves 90-95% of total power consumption.
Can I set different timeouts for each monitor with multiple displays?
No, Windows applies the same display timeout to all connected monitors simultaneously. All screens turn off together when the timeout triggers. To control individual monitors separately, you need third-party software like DisplayFusion or manual hardware switches. Windows native settings do not support per-monitor timeout configuration.
Why does my display turn off even though I set it to Never?
Several causes override “Never” settings. Active screen savers with shorter timeouts will activate first. Group Policy settings from your workplace IT department can enforce timeouts regardless of personal settings. Some graphics driver utilities include separate power management that conflicts with Windows settings. Check screen saver settings and contact your IT admin if on a work computer.
Will frequent display on-off cycles damage my monitor?
No, modern LED and OLED displays handle frequent power cycling without damage. Backlight components are designed for hundreds of thousands of on-off cycles. Older CFL-backlit monitors (pre-2010) had some cycle limitations, but current technology has no such restrictions. Shorter timeouts actually extend display lifespan by reducing total operating hours and heat exposure.
