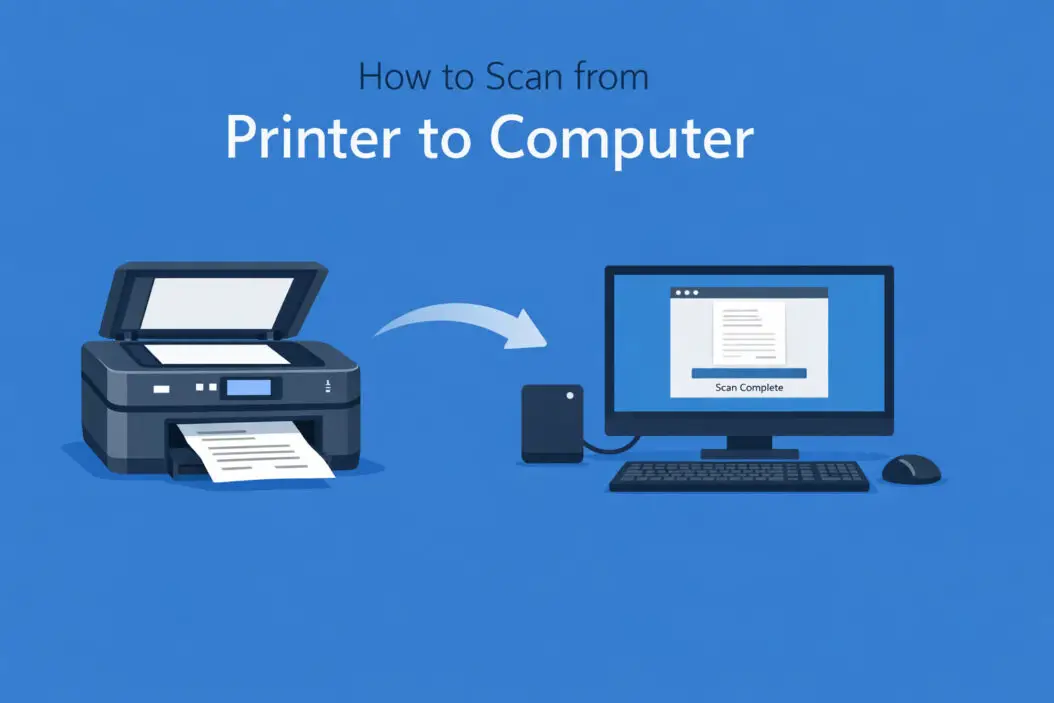
Most modern printers include a built-in scanner, but getting that scanned document onto your computer isn’t always obvious. Whether you have a Windows PC, Mac, or need to scan wirelessly, this guide walks you through every method that actually works in 2026.
Quick Answer: Three Ways to Scan
You can scan from your printer to computer using:
- USB cable connection with pre-installed software
- Wireless scanning over your home network
- Built-in operating system tools like Windows Scan or Mac Image Capture
The fastest method depends on your setup. If your printer connects via USB, use the manufacturer’s software. For wireless printers, network scanning works from anywhere in your home.
What You Need Before Starting
Check these basics first:
- Printer connected to computer (USB cable or WiFi network)
- Printer drivers installed on your computer
- Scanner lid closes properly
- Computer powered on and unlocked
Connection check: Open your computer’s printer settings. Your printer should appear in the list. If it doesn’t, you need to install drivers first.
Method 1: Scan Using Manufacturer Software
Every printer brand provides scanning software. This method gives you the most control over scan quality and file format.
Installing Your Printer Software
Most computers automatically install basic drivers, but you need the full software package for scanning.
For HP Printers:
- Download HP Smart app from Microsoft Store (Windows) or App Store (Mac)
- Open the app and add your printer
- Click “Scan” tile on home screen
For Canon Printers:
- Install IJ Scan Utility from Canon’s website
- Launch the utility from your applications folder
- Select scan type (document, photo, custom)
For Epson Printers:
- Download Epson Scan 2 software
- Open the application
- Choose your scanner from the dropdown menu
For Brother Printers:
- Install ControlCenter software
- Open the program
- Click “Scan” button in main window
Step-by-Step Scanning Process
Once you have the software installed:
- Place your document face-down on the scanner glass
- Align it with the corner guides (usually marked with an arrow)
- Close the lid gently
- Open your printer’s scanning software
- Select scan type: photo, document, or custom
- Choose color or black and white
- Set resolution (300 DPI for documents, 600 DPI for photos)
- Click “Scan” or “Preview”
- Review the preview image
- Adjust crop area if needed
- Click “Scan” to save the final file
- Choose save location on your computer
File format tip: Save documents as PDF for easy sharing. Use JPEG for photos. TIFF creates large files but preserves maximum quality.
Method 2: Windows Built-In Scanning
Windows 10 and 11 include a “Windows Scan” app that works with most printers without extra software.
Using Windows Scan App
- Press Windows key and type “Windows Scan“
- Open the app from search results
- Your printer appears in the “Scanner” dropdown
- Select your printer if multiple devices are listed
- Choose source (Flatbed or Document Feeder)
- Pick file type (PDF, JPEG, PNG, TIFF)
- Set color mode and resolution
- Click “Preview” to see what will scan
- Adjust the crop box by dragging corners
- Click “Scan” to capture the image
- File saves to your Pictures > Scans folder
Scanning multiple pages: After each scan, click “Scan” again for the next page. Windows Scan creates separate files for each page unless you select “Add to scan” option.
Windows Fax and Scan (Alternative)
This older tool still works and offers more features:
- Search for “Windows Fax and Scan” in Start menu
- Click “New Scan” button at top
- Select your scanner from dropdown
- Choose profile (Photo or Document)
- Adjust settings in the panel
- Click “Preview” then “Scan”
- Save or email directly from the interface
Method 3: Mac Scanning Methods
Mac computers offer two native scanning options without third-party software.
Using Mac Image Capture
Image Capture provides simple scanning for Mac users:
- Open Finder > Applications > Image Capture
- Your printer appears in left sidebar under “Devices”
- Click your printer name
- Place document on scanner glass
- Click “Show Details” for more options
- Select scan mode (Flatbed or Document Feeder)
- Choose where to save (dropdown menu at bottom)
- Pick format (PDF for documents, JPEG for photos)
- Set resolution (200-300 DPI for most documents)
- Click “Scan” button
Mac tip: Set “Scan To” as a specific folder you check regularly. The default Downloads folder gets cluttered quickly.
Using Mac Preview App
Preview isn’t just for viewing files. It scans too:
- Open Preview application
- Go to File > Import from Scanner
- Select your scanner from submenu
- A scan window opens automatically
- Choose settings on right side panel
- Click “Scan” button
- Image appears in Preview window
- Save with Command+S keyboard shortcut
Batch scanning in Preview: After first scan, choose File > Import from Scanner again. Each scan becomes a new page in the same PDF document.
Wireless Network Scanning
Scanning over WiFi lets you scan from your printer without connecting cables. Your printer and computer must be on the same network.
Setting Up Network Scanning
Check network connection:
- On printer’s control panel, find network settings
- Confirm WiFi is enabled and connected
- Note the printer’s IP address (usually shown in network menu)
- On computer, verify printer appears in devices list
Configure computer:
- Open printer settings on your computer
- Confirm printer shows “Ready” or “Online” status
- If offline, click “Troubleshoot” to reconnect
Scanning from Network Printer
The process mirrors USB scanning, but you select your network printer from available devices:
- Open scanning software or built-in app
- Choose your printer from scanner list (may show IP address)
- Wait for connection (takes 3-5 seconds)
- Proceed with normal scanning steps
- File saves directly to your computer
Network scanning is slower: Files transfer over WiFi instead of USB cable. A color photo at 600 DPI might take 30-45 seconds versus 10-15 seconds with USB.
Scanning Multiple Pages
Different methods handle multi-page documents differently.
Using Automatic Document Feeder (ADF)
If your printer has a document feeder tray on top:
- Stack pages face-up in the feeder tray
- Adjust paper guides to page width
- In scanning software, select “Document Feeder” as source
- Enable “Scan multiple pages” option
- Choose “Create single file” for one PDF
- Start the scan
- Printer feeds each page automatically
- Software combines pages into one document
ADF limitations: Don’t use for photos, thick paper, or wrinkled documents. These jam the feeder.
Manual Multi-Page Scanning
Without an ADF, scan pages individually:
- Scan first page normally
- Remove from scanner glass
- Place next page
- Click “Scan next page” or similar option
- Repeat for all pages
- Choose “Save all as PDF” when finished
Troubleshooting Common Scanning Problems
Scanner Not Detected
Windows fixes:
- Restart printer and computer
- Check USB cable connection (try different port)
- Open Device Manager and look for yellow warning icons
- Right-click printer and choose “Update driver”
- Download latest drivers from manufacturer website
Mac fixes:
- Open System Settings > Printers & Scanners
- Remove printer and add it again
- Reset printing system (right-click in printer list)
- Check for macOS software updates
Poor Scan Quality
Blurry or pixelated scans result from low resolution settings:
- Increase DPI to 300 for text documents
- Use 600 DPI for photos you’ll print
- Clean scanner glass with microfiber cloth
- Make sure document lies completely flat
- Close lid to prevent light leakage
Resolution guide:
| Purpose | Recommended DPI |
|---|---|
| Email or web viewing | 150-200 |
| Standard documents | 300 |
| High-quality documents | 400-600 |
| Photos for printing | 600-1200 |
| Archival scanning | 1200+ |
Scanned File Too Large
High-resolution color scans create massive files:
- Reduce DPI if current setting exceeds needs
- Use black and white instead of color for text
- Save as JPEG instead of TIFF (reduces quality slightly)
- Compress PDF files using Adobe Acrobat or online tools
File size comparison (standard 8.5×11 page):
- 300 DPI color PDF: 5-8 MB
- 300 DPI black/white PDF: 1-2 MB
- 600 DPI color TIFF: 50+ MB
Scanner Software Won’t Open
- Reinstall manufacturer’s scanning software
- Try built-in system tools instead
- Check if antivirus software blocks the application
- Run software as administrator (right-click > Run as administrator)
Scanning to PDF vs Other Formats
Understanding file formats helps you choose correctly.
When to Use PDF
PDF works best for:
- Documents you’ll email or share
- Forms that need to stay formatted
- Multi-page documents in one file
- Files others will print
When to Use JPEG
JPEG suits:
- Single photos
- Images for websites or social media
- Scans where file size matters
- Quick previews
When to Use PNG
PNG provides:
- Text with sharp edges
- Images with transparency needs
- Screenshots or simple graphics
- Lossless compression (maintains quality)
When to Use TIFF
TIFF delivers:
- Maximum quality for archival storage
- Professional photo editing workflows
- Medical or legal documentation
- Files you’ll edit extensively
Advanced Scanning Features
Modern scanners include helpful options beyond basic capture.
OCR (Optical Character Recognition)
OCR converts scanned text into editable text:
- Enable OCR in scanning software settings
- Scan your document normally
- Software analyzes text automatically
- Save as searchable PDF or Word document
- Edit text just like typed content
OCR accuracy: Works best with clear, printed text. Handwriting or low-quality documents produce errors. The National Institute of Standards and Technology has established OCR accuracy standards that modern software follows.
Automatic Color Detection
Smart scanners detect whether pages are color or black/white:
- Saves storage space (black/white files smaller than color)
- Speeds up scanning process
- Maintains quality where color exists
- Enable “Auto Color Detect” in advanced settings
Blank Page Removal
This feature skips empty pages automatically:
- Useful when scanning double-sided documents
- Prevents blank pages in final PDF
- Available in most modern scanning software
- Check “Remove blank pages” before scanning
Scan to Cloud Services
Many printers scan directly to cloud storage:
HP Smart: Scans to Google Drive, Dropbox, OneDrive Epson Connect: Saves to email or cloud accounts Canon Image Gateway: Uploads to cloud services Brother Web Connect: Supports multiple cloud platforms
- Link cloud account in printer software
- Choose “Scan to Cloud” option
- Select destination folder
- Scan uploads automatically
- Access file from any device
Mobile Scanning from Printer
You don’t always need a computer to scan. Most printers support smartphone scanning.
Using Manufacturer Mobile Apps
Download your printer brand’s app:
HP Smart (iOS/Android):
- Open app and connect to printer
- Tap “Scan” tile
- Choose scan from printer option
- Adjust settings on phone
- File saves to phone or cloud
Canon PRINT (iOS/Android):
- Connect phone to same WiFi as printer
- Select printer in app
- Tap scan icon
- Preview and save to phone
Epson iPrint (iOS/Android):
- Add printer in app
- Choose scan function
- Select document or photo mode
- Save or share directly
Scan to Email Feature
Many printers scan and email without a computer:
- Press “Scan to Email” on printer’s touchscreen
- Enter recipient email address
- Place document on glass
- Press start
- Printer sends email with scanned attachment
Setup required: Configure email settings in printer’s web interface first. You’ll need SMTP server details from your email provider. Detailed setup instructions are available through Microsoft’s support documentation for various email services.
Best Practices for Quality Scans
Follow these tips for professional results every time.
Preparing Documents
- Remove staples, paper clips, and sticky notes
- Flatten folded or wrinkled pages (use heavy book overnight)
- Clean scanner glass before each session
- Align document with corner guides precisely
- Close lid completely to avoid light streaks
Choosing Correct Settings
Match settings to your purpose:
For text documents:
- 300 DPI resolution
- Black and white mode
- PDF format
- Enable OCR if needed
For photos:
- 600 DPI minimum
- Color mode
- JPEG format
- Adjust brightness/contrast in preview
For forms:
- 300 DPI
- Grayscale mode (preserves checkboxes better than black/white)
- PDF format
- Maintain original size (don’t resize)
File Organization
Create a system to find scans later:
- Make dedicated “Scanned Documents” folder
- Use descriptive filenames (avoid “scan001.pdf”)
- Include dates in filenames: “2026-01-Invoice-Electric.pdf”
- Create subfolders by category (receipts, medical, taxes)
- Back up important scans to cloud storage
Frequently Asked Questions
How do I scan multiple pages into one PDF?
Enable the multi-page option in your scanning software before starting. On Windows Scan, this is “Add more pages” checkbox. On Mac Preview, each import adds to the same document. With manufacturer software, look for “Multi-page PDF” or “Scan batch” settings. Scan your first page, then add subsequent pages. Save once when all pages are scanned.
Why is my scanned document upside down or sideways?
Most scanning software includes rotate buttons in the preview screen. Click the rotate icon 90 degrees at a time until correct. Some software offers “Auto-rotate” features that detect text orientation. If your software lacks rotation, use PDF editing tools after scanning or simply place documents correctly on the glass with text readable from the front of the printer.
Can I scan without installing printer software?
Yes. Windows 10/11 includes Windows Scan app that works with most printers. Mac computers have Image Capture and Preview built-in. These native tools handle basic scanning without manufacturer software. However, you lose advanced features like automatic document feeders, OCR, and custom scan profiles.
How do I make scanned files smaller?
Reduce file size by lowering resolution (try 200 DPI instead of 600), using black/white mode instead of color, saving as JPEG instead of TIFF, or compressing PDFs after scanning. Online PDF compressors reduce files by 50-70% with minimal quality loss. Most scanning software includes a “compression” or “quality” slider that balances size versus clarity.
What DPI should I use for scanning old photos?
Scan old photos at 600 DPI for standard prints or 1200 DPI if photos are smaller than 4×6 inches or you plan significant enlargements. Higher DPI captures more detail but creates larger files. For photos you’ll only view on screens, 300 DPI suffices. Save as JPEG to balance quality and file size, or TIFF if you’ll edit extensively.
Conclusion
Scanning from your printer to computer works through manufacturer software, built-in operating system tools, or mobile apps. USB connections offer the fastest speeds, while wireless scanning provides convenience. For best results, use 300 DPI for documents and 600 DPI for photos, save documents as PDF and photos as JPEG, and organize scanned files immediately.
The method you choose depends on your setup. Windows and Mac users can scan without extra software using built-in apps. Those who scan frequently benefit from manufacturer software’s advanced features. All methods produce quality scans when you match resolution and format to your intended use.
Start with your computer’s native scanning tool if you’re unsure. Windows Scan and Mac Image Capture handle 90% of scanning needs without complexity. Install manufacturer software only when you need features like OCR, automatic document feeding, or direct cloud uploads.
