Your desktop looks wrong. Maybe everything appears too large, too small, or shifted off screen. This happens more often than you think, especially after updates, connecting new monitors, or changing display settings.
This guide shows you exactly how to fix desktop size and position problems on Windows. You’ll learn the built-in methods, manufacturer tools, and troubleshooting steps that actually work.
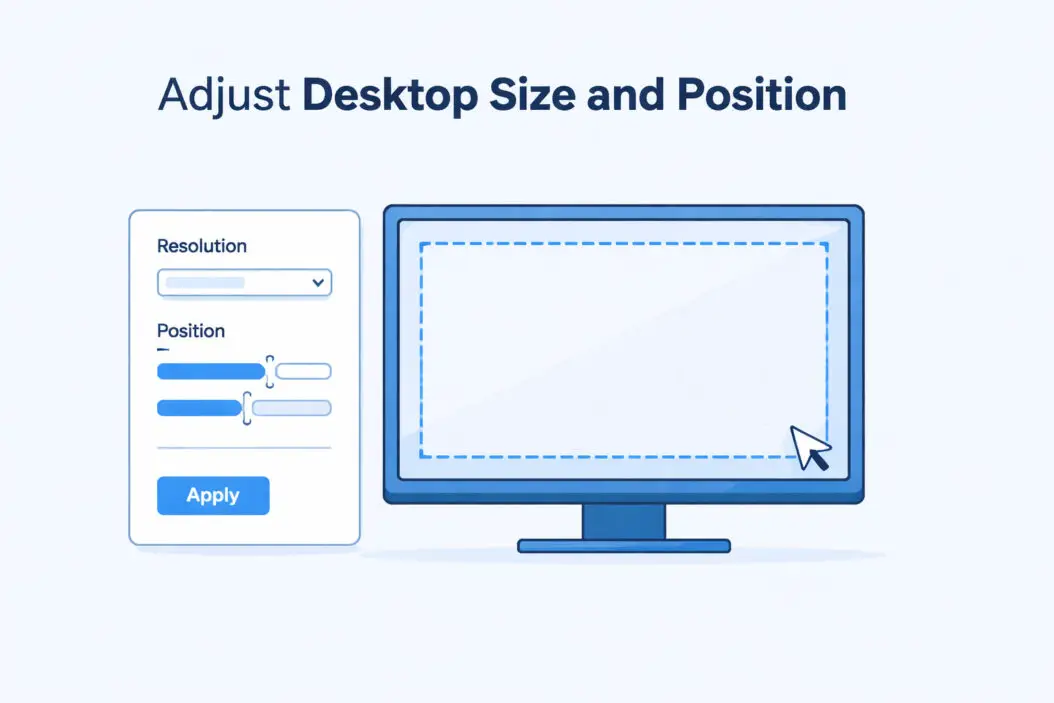
What Desktop Size and Position Settings Actually Control
Desktop size refers to the resolution and scaling of everything on your screen. Position controls where your display content sits within your monitor’s physical boundaries.
When these settings misalign, you get:
- Content cut off at screen edges
- Black bars around your display
- Blurry or stretched images
- Text that’s too small or oversized
- Multiple monitors displaying incorrectly
Windows gives you several ways to adjust these settings. The method you choose depends on your specific problem.
Quick Fix: Adjust Display Resolution in Windows Settings
This solves most desktop size problems in under two minutes.
For Windows 11:
- Right-click empty space on your desktop
- Select “Display settings”
- Scroll to “Scale & layout”
- Click the dropdown under “Display resolution”
- Choose your monitor’s native resolution (marked “Recommended”)
- Click “Keep changes” when prompted
For Windows 10:
- Right-click your desktop
- Click “Display settings”
- Find “Display resolution” under “Scale and layout”
- Select the recommended resolution
- Confirm the change
Your native resolution matches your monitor’s actual pixel count. A 1920×1080 monitor should run at 1920×1080. Using other resolutions causes scaling that makes everything look off.
Adjust Display Scaling to Fix Size Without Changing Resolution
Sometimes the resolution is correct but everything still looks too big or small. This is a scaling issue.
To change scaling:
- Open Settings (Windows key + I)
- Go to System > Display
- Find “Scale” under “Scale & layout”
- Choose 100%, 125%, 150%, or a custom percentage
- Sign out and back in for some apps to update
When to use each scale:
- 100%: Standard size, best for 24-inch or smaller 1080p monitors
- 125%: Comfortable middle ground for most users
- 150%: Better for 4K monitors or users who need larger text
- Custom: Set any percentage between 100% and 500%
Higher scaling makes interface elements larger without changing your actual resolution. This keeps images sharp while improving readability.
Fix Desktop Position Using Monitor Controls
If your display image doesn’t fill the entire screen or sits off-center, your monitor’s physical controls can fix it.
Step-by-step position adjustment:
- Locate the buttons on your monitor (usually bottom or side edge)
- Press the Menu button to open the on-screen display
- Navigate to “Image” or “Display” settings
- Look for options labeled:
- Horizontal Position (moves left/right)
- Vertical Position (moves up/down)
- Clock/Phase (fixes pixel alignment)
- Use arrow buttons to adjust until the image fills your screen
- Press Menu again to save and exit
Some monitors have an “Auto Adjust” button that automatically centers and sizes the image. Try this first before manual adjustment.
Use Graphics Control Panel for Advanced Adjustments
Your graphics card manufacturer provides software with more detailed controls than Windows offers.
NVIDIA Control Panel Method
- Right-click your desktop
- Select “NVIDIA Control Panel”
- Click “Adjust desktop size and position” under Display
- Choose your monitor from the list
- Select a scaling mode:
- No scaling (uses native resolution)
- Aspect ratio (maintains proportions)
- Full-screen (stretches to fill)
- Check “Override the scaling mode set by games and programs” if needed
- Adjust position sliders if the image doesn’t center
- Click Apply
NVIDIA’s panel lets you set different scaling for different monitors, useful for multi-display setups.
AMD Software Settings
- Right-click desktop and open “AMD Software”
- Click the gear icon (Settings)
- Select “Display”
- Choose your monitor
- Adjust “Custom Resolution” if needed
- Use “GPU Scaling” toggle for aspect ratio control
- Position sliders appear if GPU scaling is enabled
- Hit Apply to save changes
AMD’s GPU scaling is particularly helpful for older games that don’t support modern resolutions.
Intel Graphics Command Center
- Open Intel Graphics Command Center from Start menu
- Navigate to “Display” section
- Select your active monitor
- Adjust “Resolution” and “Refresh Rate”
- Use “Scaling” dropdown for aspect ratio options
- Custom resolution options available under Advanced
- Apply settings and test
According to the Microsoft Display Configuration documentation, graphics drivers handle the actual communication between Windows and your display hardware.
Create Custom Resolutions for Non-Standard Displays
Sometimes your ideal resolution isn’t in the standard list. Custom resolution creation solves this.
Using NVIDIA Control Panel:
- Open NVIDIA Control Panel
- Click “Change resolution” under Display
- Click “Customize” button
- Check “Enable resolutions not exposed by the display”
- Click “Create Custom Resolution”
- Enter your desired width and height
- Keep refresh rate at 60Hz unless you know your monitor supports higher
- Click Test to verify it works
- Accept if display looks correct
Using AMD Software:
- Open AMD Software
- Go to Display settings
- Select “Custom Resolutions”
- Click “Create New”
- Input resolution dimensions
- Set timing to “CVT-RB” for most monitors
- Save and test the resolution
Custom resolutions are useful for older monitors, ultra-wide displays, or matching specific application requirements. Be conservative with these settings as incorrect values can temporarily black out your screen.
Fix Multiple Monitor Positioning and Alignment
Multi-monitor setups require positioning each display correctly so your mouse moves smoothly between them.
To arrange multiple monitors:
- Open Settings > System > Display
- You’ll see numbered boxes representing each monitor
- Click “Identify” to see which number matches which physical screen
- Drag the numbered boxes to match your physical monitor arrangement
- Align the tops or bottoms so the mouse transitions smoothly
- Click Apply
Set primary monitor:
- Click the monitor you want as primary
- Scroll down to “Multiple displays”
- Check “Make this my main display”
- Your taskbar and startup programs will appear on this screen
Adjust individual monitor settings:
Each monitor can have different resolution and scaling:
- Click each numbered display
- Set its specific resolution
- Adjust scaling independently
- Choose landscape or portrait orientation
This flexibility helps when mixing different sized monitors or using a laptop with an external display.
Troubleshoot Common Desktop Size and Position Problems
Problem: Settings Won’t Save After Restart
Solution:
- Update your graphics drivers from manufacturer website
- Run Windows Update for display driver updates
- Check if third-party software is overriding settings
- Create a custom resolution as described earlier
- Disable fast startup: Control Panel > Power Options > Choose what power buttons do > Change settings currently unavailable > Uncheck “Turn on fast startup”
Problem: Display Resolution Options Are Greyed Out
Causes and fixes:
- Remote desktop connection: Settings are controlled by the remote connection
- Generic graphics driver: Install proper manufacturer driver
- Hardware limitation: Your cable or monitor doesn’t support higher resolutions
- Cable type: HDMI 1.4 maxes at 4K 30Hz, use HDMI 2.0+ or DisplayPort for 4K 60Hz
Problem: Everything Looks Blurry or Fuzzy
This typically indicates resolution mismatch or scaling issues:
- Set resolution to native/recommended setting
- Right-click desktop > Display settings
- Click “Advanced scaling settings”
- Turn on “Let Windows try to fix apps so they’re not blurry”
- Under “Custom scaling,” ensure it’s set to 100% or empty
- Restart your computer
Problem: Black Borders Around Screen Content
Fix using monitor position controls:
- Press Auto Adjust on your monitor if available
- Manually adjust using monitor menu as described earlier
- Check cable connections (loose cables cause signal issues)
- Verify you’re using the correct input source on your monitor
Fix using graphics control panel:
- Open NVIDIA/AMD control panel
- Change scaling mode from “Aspect ratio” to “Full-screen”
- Or use “No scaling” and adjust monitor controls instead
Problem: Desktop Extends Beyond Screen Edges (Overscan)
Overscan is when content gets cut off at screen edges:
- Open your graphics control panel
- Find “Adjust desktop size and position”
- Look for an overscan or underscan slider
- Reduce the slider percentage until content fits
- Alternatively, disable overscan in your TV/monitor settings if using a TV as monitor
According to Intel’s display troubleshooting guide, overscan issues primarily affect displays originally designed for TV broadcast rather than computer use.
Use ClearType to Improve Text Clarity After Adjustments
After changing desktop size or scaling, text might look less crisp. ClearType calibration fixes this.
To run ClearType tuner:
- Type “ClearType” in Windows search
- Select “Adjust ClearType text”
- Check “Turn on ClearType”
- Click Next
- Follow the wizard, choosing the clearest text sample at each step
- Complete all screens to optimize for your display
This takes less than two minutes and noticeably improves text rendering at non-native resolutions or scaled settings.
Keyboard Shortcuts for Quick Display Adjustments
These shortcuts save time when frequently switching configurations:
| Shortcut | Function |
|---|---|
| Windows + P | Switch display modes (PC screen only, Duplicate, Extend, Second screen only) |
| Windows + Ctrl + Shift + B | Restart graphics driver (fixes black screen/glitches) |
| Ctrl + Alt + Arrow | Rotate display orientation (may be disabled by default) |
| Windows + I | Open Settings directly |
The Windows + P shortcut is especially useful when connecting to projectors or switching between docked and undocked laptop configurations.
Reset Display Settings to Default
If you’ve made changes that caused problems and want to start fresh:
Complete display reset method:
- Boot into Safe Mode (hold Shift while clicking Restart, then Troubleshoot > Advanced options > Startup Settings > Restart > press 4 or F4)
- Open Device Manager in Safe Mode
- Expand “Display adapters”
- Right-click your graphics card
- Select “Uninstall device”
- Check “Delete the driver software for this device”
- Restart normally
- Windows will reinstall default drivers
- Reconfigure your preferred settings
This nuclear option removes all custom configurations and third-party software changes.
Best Practices for Optimal Display Configuration
Follow these guidelines to maintain proper desktop size and position:
Match native resolution. Always use your monitor’s native resolution for the sharpest image. Check your monitor’s manual or specifications if you’re unsure what this is.
Use appropriate scaling. Don’t compensate for small text by lowering resolution. Instead, increase scaling percentage to keep resolution high while making content readable.
Update drivers regularly. Graphics driver updates often fix display bugs and add support for new monitors. Check quarterly for updates from NVIDIA, AMD, or Intel.
Check cable quality. A bad HDMI or DisplayPort cable limits available resolutions and refresh rates. If you can’t access higher settings, try a different certified cable.
Document your settings. Before making changes, screenshot your current configuration. This makes reverting easier if something goes wrong.
Test before committing. Windows gives you 15 seconds to confirm display changes before auto-reverting. Don’t click away during this window unless the display looks correct.
Monitor and Update Your Graphics Drivers
Outdated drivers cause most persistent display configuration problems.
To check and update drivers:
- Press Windows + X and select Device Manager
- Expand “Display adapters”
- Right-click your graphics card
- Select “Update driver”
- Choose “Search automatically for drivers”
Better method using manufacturer sites:
- NVIDIA: Visit nvidia.com/download and enter your GPU model
- AMD: Go to amd.com/support and select your graphics card
- Intel: Use intel.com/content/www/us/en/download-center for integrated graphics
Download and install the latest driver package. This ensures you have all the newest display management features and bug fixes.
Display Configuration for Gaming and Productivity
Different use cases need different configurations.
For gaming:
- Native resolution for competitive advantage
- Lower scaling (100%) for maximum screen space
- Highest refresh rate your monitor supports
- GPU scaling off to reduce input lag
- Full-screen mode in games for best performance
For productivity:
- Native resolution maintained
- 125-150% scaling for comfortable extended reading
- Multiple monitors arranged ergonomically
- Text-heavy displays rotated to portrait orientation
- Night light or blue light filter for evening work
For content creation:
- Native resolution absolutely required
- 100% scaling to see true pixel dimensions
- Color calibration using monitor controls
- Multiple displays for timeline/preview separation
- Wide gamut color mode if monitor supports it
Summary
Adjusting desktop size and position fixes most display appearance problems. Start with Windows display settings to change resolution and scaling. Use your monitor’s physical controls to center and size the image. Access graphics control panels for advanced options like custom resolutions and GPU scaling. For multiple monitors, arrange them in Windows settings to match your physical setup.
The key is matching your monitor’s native resolution while using Windows scaling to control size. This keeps images sharp while making content readable. Update graphics drivers regularly to prevent configuration problems from occurring.
Most issues resolve with the basic Windows settings adjustments. Save the advanced methods for specific problems like non-standard displays, older games, or multi-monitor complications.
Frequently Asked Questions
Why does my desktop look blurry after adjusting the size?
Blurriness happens when you’re not using your monitor’s native resolution or when scaling creates artifacts. Set your resolution to the recommended option in display settings. Enable “Let Windows try to fix apps so they’re not blurry” in advanced scaling settings. Run ClearType tuner to optimize text rendering for your current configuration. If using a TV as a monitor, disable image processing features like motion smoothing or dynamic contrast.
How do I fix desktop position when content is cut off at the edges?
Use your monitor’s physical menu buttons to access position controls. Navigate to the display or image settings and adjust horizontal and vertical position until content fits. Alternatively, open your graphics control panel and change scaling from full-screen to aspect ratio, or adjust the underscan slider. For TVs being used as monitors, look for a “PC mode” or disable overscan in the TV settings menu.
What’s the difference between changing resolution and changing scaling?
Resolution changes the number of pixels displayed, affecting both size and sharpness. Lower resolutions make everything larger but blurrier. Scaling changes the size of interface elements without changing pixel count, keeping images sharp. For example, 1920×1080 at 150% scaling shows the same number of pixels as 1920×1080 at 100%, but text and icons appear 50% larger while maintaining clarity.
Can I use different scaling on each monitor in a multi-monitor setup?
Yes. Windows allows independent scaling for each display. Click each monitor individually in display settings and set its own scaling percentage. This is useful when mixing a 4K monitor with a 1080p display, or using a laptop screen alongside an external monitor. Some older applications may not handle per-monitor scaling well and might appear blurry on one display.
Why do my display settings reset after every restart?
This usually indicates a graphics driver issue or software conflict. Update your graphics drivers from the manufacturer website, not through Windows Update. Disable fast startup in power options. Check if third-party display management software is overriding your settings. Create a custom resolution in your graphics control panel, which often persists better than Windows settings. As a last resort, use Display Driver Uninstaller in Safe Mode to completely remove and reinstall graphics drivers.

- How to Uninstall Apps from the Start Menu in Windows 11/10 (2026 Guide) - April 2, 2026
- How to Fix Overscan on Windows 11/10: Stop Your Screen Getting Cut Off (2026) - April 1, 2026
- How to Disable Lock Screen on Windows 11/10 in 2026 - April 1, 2026