Connecting devices seems simple until you’re standing in a meeting room with a cable in your hand and nothing works. This guide walks you through every connection method, fixes common problems, and gets your screen displaying fast.
Most connections use HDMI cables (plug and play), but you might need VGA, DisplayPort, USB-C, or wireless options depending on your devices. Check your ports first, match the cable, connect it, then select the right input source.
Let’s break down exactly how to make these connections work.
Your Connection Ports
Before grabbing any cable, look at what ports you actually have.
Common Port Types
HDMI (High-Definition Multimedia Interface)
- Rectangular port with one angled corner
- Carries video and audio together
- Most common on devices made after 2010
- Different sizes: standard, mini, and micro
VGA (Video Graphics Array)
- Blue trapezoid port with 15 pins
- Video only (needs separate audio cable)
- Found on older projectors and PCs
- Analog signal, lower quality than digital options
DisplayPort
- Rectangular with one angled corner
- Higher bandwidth than HDMI
- Common on newer computers and monitors
- Supports daisy-chaining multiple displays
USB-C
- Small oval port
- Single cable for video, audio, and power
- Standard on modern laptops and tablets
- Requires compatible devices (check specs)
DVI (Digital Visual Interface)
- White or black rectangular port with many pins
- Digital video signal
- Found on older graphics cards and monitors
- No audio transmission
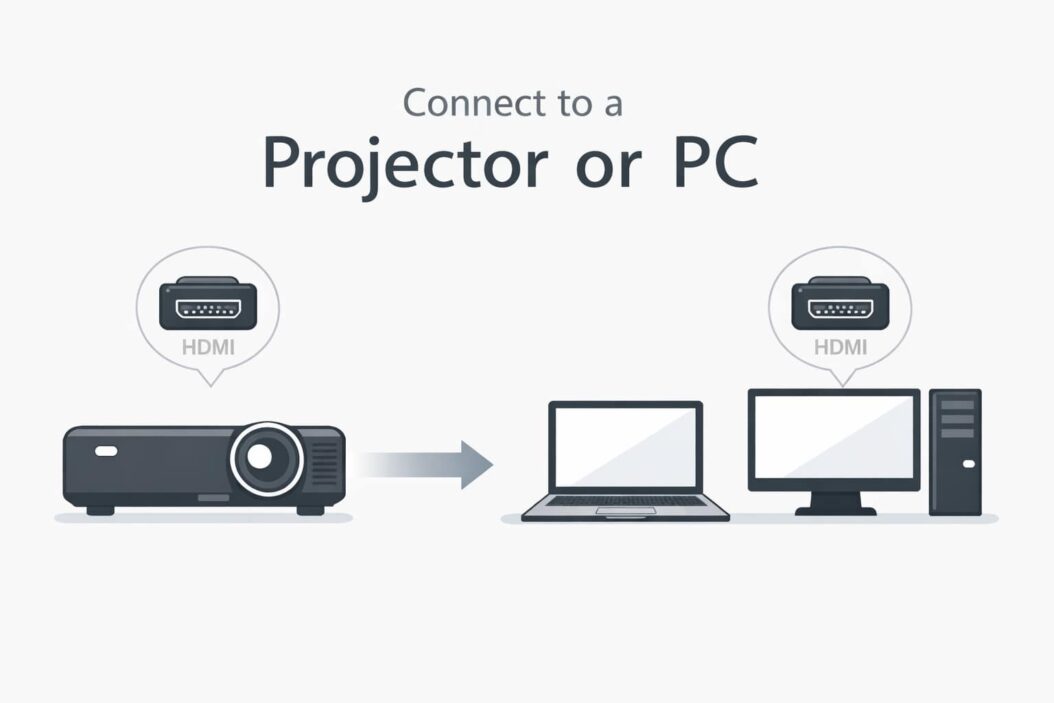
Connecting a Laptop to a Projector
This is the most common connection scenario for presentations and meetings.
Method 1: Wired HDMI Connection
- Locate the HDMI port on your laptop (usually on the side)
- Find the HDMI port on the projector (typically on the back or side panel)
- Connect the HDMI cable firmly into both ports
- Turn on the projector and select HDMI as the input source (use the Input or Source button on the remote)
- Your laptop should detect automatically within 5-10 seconds
If nothing appears:
Windows users press Windows + P to open projection options:
- PC screen only
- Duplicate (same on both screens)
- Extend (separate workspace)
- Second screen only
Mac users press Command + F1 or go to System Preferences > Displays > Arrangement.
Method 2: VGA Connection (Older Equipment)
- Connect the VGA cable to both devices (screws on connector tighten for stability)
- Plug in a separate 3.5mm audio cable if you need sound
- Turn on projector and select VGA input
- Adjust display settings same as HDMI method above
- You may need to adjust resolution manually (right-click desktop > Display settings > Resolution)
Method 3: Wireless Connection
Modern projectors often support wireless connections. Here’s how to connect to a projector or PC wirelessly using different systems.
For Windows (Miracast):
- Press
Windows + K - Select your projector from the list
- Enter PIN if prompted
- Choose display mode
For Mac (AirPlay):
- Click the AirPlay icon in menu bar
- Select your compatible projector
- Enter code if required
For dedicated wireless adapters:
- Plug adapter into projector’s HDMI port
- Install software on your laptop (if required)
- Connect to the wireless network created by adapter
- Follow on-screen pairing instructions
According to CNET’s display connectivity guide, wireless connections introduce 20-100ms of latency, which matters for gaming but works fine for presentations.
Connecting Two PCs Together
Linking two computers lets you share screens, transfer files, or extend your workspace.
Using HDMI or DisplayPort (One PC as Display)
This only works if one PC has video input capability (rare on standard PCs).
- Verify the receiving PC has video input (not just output)
- Connect cable between computers
- Switch the receiving PC to input mode (usually through function key or software)
Reality check: Most desktop PCs only have video outputs. This method typically doesn’t work unless you have specialized capture cards.
Better Option: Network Connection for Screen Sharing
Windows built-in method:
- On the PC you want to view, go to Settings > System > Projecting to this PC
- Set “Available everywhere” or “Available everywhere on secure networks”
- On the other PC, press
Windows + K - Select the first PC from the list
- Screen appears with minimal setup
Using Remote Desktop:
- Enable Remote Desktop on the host PC (Settings > System > Remote Desktop)
- Note the PC name shown
- On the second PC, search for “Remote Desktop Connection”
- Enter the host PC name
- Log in with credentials
Physical File Sharing Connection
Direct Ethernet cable (fastest method):
- Connect both PCs with an Ethernet cable
- On PC 1: Control Panel > Network and Sharing > Change adapter settings
- Right-click Ethernet > Properties > Internet Protocol Version 4
- Set IP address: 192.168.1.1, Subnet: 255.255.255.0
- On PC 2: Same process but use IP: 192.168.1.2
- Both PCs can now share files through network folders
Connecting Desktop PC to External Monitor
Expanding your desktop workspace improves productivity significantly.
Step-by-Step Monitor Connection
- Power off both devices (prevents potential port damage)
- Choose your cable based on available ports (HDMI, DisplayPort, DVI, or VGA)
- Connect cable to graphics card port (not motherboard port if you have dedicated graphics)
- Connect other end to monitor
- Power on monitor first, then PC
- Windows detects automatically in most cases
Configuring Multiple Monitors
Once connected:
- Right-click desktop > Display settings
- Scroll to “Multiple displays” section
- Choose your setup:
- Extend: Creates one continuous desktop across screens
- Duplicate: Shows same content on both
- Show only on 1 or 2: Uses single display
- Click “Identify” to see which monitor is which number
- Drag monitor icons to match physical arrangement
- Set primary display (where taskbar appears)
Resolution and Scaling
Setting correct resolution:
- Each monitor has a native resolution (check manual or manufacturer site)
- In Display settings, click each monitor and set recommended resolution
- Apply and confirm changes within 15 seconds
Scaling for different sized monitors:
- Select each display individually
- Adjust “Scale and layout” percentage
- 100% = no scaling, 125% or 150% = larger text and icons
USB-C Connections (Modern Standard)
USB-C simplifies connections but requires compatible devices.
Requirements for USB-C Video
Not all USB-C ports support video. Check for these indicators:
- DisplayPort icon next to port
- Thunderbolt 3 or 4 logo
- Specs mention “DP Alt Mode” or “video output”
Connecting Via USB-C
- Verify both devices support video over USB-C
- Use a high-quality USB-C cable (cheap cables often lack video pins)
- Connect devices directly
- Display appears within seconds if compatible
USB-C to HDMI/DisplayPort Adapters
When your source has USB-C but display has HDMI:
- Purchase USB-C to HDMI adapter (ensure it supports your resolution needs)
- Plug adapter into USB-C port
- Connect standard HDMI cable from adapter to display
- Select input source on display
Look for adapters supporting 4K at 60Hz if you need high resolution. Budget adapters often max out at 4K 30Hz or 1080p 60Hz.
Troubleshooting Common Connection Problems
No Signal or Black Screen
Check these first:
- Cable firmly seated on both ends
- Display powered on
- Correct input source selected
- Cable not damaged (try different cable)
Windows specific fixes:
- Press
Windows + Pand cycle through display modes - Update graphics drivers (Device Manager > Display adapters > Update driver)
- Try different port if available
Mac specific fixes:
- Detect displays manually: System Preferences > Displays > Press Option + “Detect Displays”
- Reset NVRAM: Restart and hold Command + Option + P + R until you hear startup sound twice
Poor Image Quality or Wrong Resolution
- Right-click desktop > Display settings
- Click the external display
- Set to recommended (native) resolution
- Adjust scaling if text appears too small
For VGA connections, auto-adjust using monitor’s built-in button.
Audio Not Working Through HDMI
HDMI carries audio, but your system might not default to it:
Windows:
- Right-click volume icon > Sounds
- Playback tab
- Select HDMI/DisplayPort output
- Set as default device
Mac:
- System Preferences > Sound
- Output tab
- Select HDMI device
Flickering or Intermittent Connection
Common causes and fixes:
- Cable quality: Replace with certified cable
- Port contamination: Clean ports with compressed air
- Loose connection: Secure cable, use locking screws on VGA
- Graphics driver: Update to latest version
- Refresh rate mismatch: Set both displays to same refresh rate in display settings
Projector Shows “No Signal”
- Verify projector is on (not in standby mode)
- Cycle through input sources using remote
- Try turning laptop display off then on (
Windows + P) - Restart laptop with projector connected
- Check if projector requires specific input mode activation
Connection Quality Comparison
| Connection Type | Max Resolution | Audio Support | Cable Length Limit | Best For |
|---|---|---|---|---|
| HDMI 2.1 | 10K at 120Hz | Yes | 15 feet | Gaming, home theater |
| HDMI 2.0 | 4K at 60Hz | Yes | 25 feet | Most connections |
| DisplayPort 1.4 | 8K at 60Hz | Yes | 6 feet | High-end monitors |
| USB-C (DP Alt) | 4K at 60Hz | Yes | 6 feet | Laptops, mobile |
| VGA | 1920×1200 | No | 15 feet | Legacy equipment |
Adapters and Converters: When You Need Them
Sometimes your ports don’t match. Here’s what works.
Active vs Passive Adapters
Passive adapters (cheaper, simpler):
- Convert between similar signals
- Examples: HDMI to DVI, DisplayPort to HDMI
- No external power needed
- Limited resolution support
Active adapters (more expensive, powered):
- Convert between different signal types
- Examples: USB-C to VGA, HDMI to DisplayPort
- Often need USB power
- Support higher resolutions
Common Adapter Scenarios
MacBook to projector: USB-C to HDMI adapter (Apple or certified third-party)
Older laptop to new monitor: VGA to HDMI converter (active, powered)
Tablet to display: USB-C to HDMI or micro-HDMI to HDMI
Quality matters here: Cheap adapters fail frequently. Invest in verified brands for reliable connections.
Advanced Connection Scenarios
Daisy-Chaining Multiple Monitors
DisplayPort supports connecting monitors in series:
- Verify monitors support MST (Multi-Stream Transport)
- Connect first monitor to PC via DisplayPort
- Connect second monitor to DisplayPort Out on first monitor
- Enable MST in each monitor’s menu
- Configure in display settings
Limitation: Total bandwidth is shared. Three 1080p monitors work fine. Two 4K monitors might be limited.
KVM Switches for Multiple Computers
KVM (Keyboard, Video, Mouse) switches let you control multiple computers with one set of peripherals:
- Connect each PC to KVM using provided cables
- Connect monitor, keyboard, mouse to KVM
- Switch between computers using button or keyboard shortcut
- All peripherals switch together
Useful for home offices with work and personal computers.
Using Graphics Docking Stations
For laptops with limited ports:
- Connect docking station to laptop (usually USB-C or Thunderbolt)
- Plug monitors into dock (multiple HDMI, DisplayPort outputs)
- Single cable connection provides video, USB, network, and charging
- Instant workspace when you dock
Platform-Specific Tips
Windows 10/11 Display Management
Keyboard shortcuts:
Windows + P: Quick projection menuWindows + Shift + Left/Right Arrow: Move windows between monitorsWindows + Home: Minimize all except active window
Advanced settings:
- Settings > System > Display > Advanced display
- Shows current refresh rate and bit depth
- Useful for troubleshooting performance
macOS Display Features
Sidecar (iPad as second display):
- iPad and Mac on same Apple ID
- Click AirPlay icon in menu bar
- Select iPad
- Works wired or wireless
Target Display Mode (older iMacs):
- Turn iMac into display for MacBook
- Press Command + F2 on iMac keyboard
- Only works on 2009-2014 iMacs
Linux Connection Tips
Most modern Linux distributions auto-detect displays:
- Settings > Displays (or similar)
- Arrange monitors visually
- Apply configuration
Command line option (useful for fixing boot display issues):
xrandr --output HDMI-1 --auto
For persistent configuration, edit /etc/X11/xorg.conf or use display manager tools.
Wireless Presentation Systems
Beyond basic wireless projection, specialized systems offer more features.
Common Systems
Barco ClickShare: Plug USB button into laptop, press button, screen mirrors
Microsoft Wireless Display Adapter: Miracast-based, plugs into HDMI port
Apple TV: AirPlay for Mac/iOS devices, connects to HDMI displays
Chromecast: Cast from Chrome browser, Android devices, works cross-platform
Setting Up Wireless Presentation
General process:
- Plug receiver into display (usually HDMI)
- Power the receiver (USB or wall adapter)
- Connect sender device (app, button, or built-in wireless)
- Display appears with 1-3 second delay
Network configuration matters. Some systems create their own WiFi network, others use existing network infrastructure.
Best Practices for Reliable Connections
Follow these guidelines to avoid connection headaches:
Before meetings or presentations:
- Test connection 10 minutes early
- Bring backup adapters for your laptop
- Know the keyboard shortcut for display switching
- Have cables accessible (not buried in bag)
Cable management:
- Don’t bend cables sharply near connectors
- Secure cables to prevent tripping and disconnection
- Replace damaged cables immediately
- Label cables for quick identification
Driver maintenance:
- Update graphics drivers quarterly
- Keep operating system current
- Install manufacturer software for monitors if available
Documentation:
- Photograph your connection setup for reference
- Note resolution and refresh rate settings that work
- Keep adapter compatibility list for your devices
Mobile Device Connections
Phones and tablets connect to displays too.
Android to Display
Wired connection:
- USB-C to HDMI adapter (phone must support video output)
- Connect adapter to phone
- HDMI cable to display
- Enable “Desktop mode” in settings (Samsung DeX, Motorola Ready For)
Wireless connection:
- Use Chromecast built into smart TVs or dongle
- Open app with cast button
- Select display
- Content streams wirelessly
iPhone/iPad to Display
Wired (Lightning):
- Lightning to HDMI adapter
- Connect adapter to device
- HDMI cable to display
- Screen mirrors automatically
Wireless (AirPlay):
- Swipe down from top right (or up from bottom on older devices)
- Tap Screen Mirroring
- Select Apple TV or AirPlay-compatible display
- Enter code if prompted
Limitations with Mobile
Mobile connections have restrictions:
- Some apps block screen mirroring (Netflix, HBO, etc.)
- Resolution limited by device capabilities
- Wireless methods consume more battery
- Not all phones support video over USB-C (check specifications)
Conclusion
Connecting devices comes down to matching ports, using quality cables, and knowing where to adjust settings when things don’t work automatically.
Start with these basics:
- Identify your ports before buying cables
- HDMI works for most modern connections
- Press Windows + P or Command + F1 when display doesn’t appear
- Update graphics drivers when troubleshooting
Remember:
- Wireless is convenient but wired is more reliable
- Not all USB-C ports support video
- Adapters solve port mismatches but quality matters
- Test presentation setups before the meeting starts
The connection process gets faster with practice. After a few times, you’ll plug in cables and adjust settings without thinking about it.
Frequently Asked Questions
Why won’t my laptop detect the second monitor?
First, verify the cable works (try different device or port). Press Windows + P and select “Extend” or “Duplicate”. Update graphics drivers through Device Manager. On Mac, go to System Preferences > Displays and Option-click “Detect Displays”. If still nothing, the cable, port, or display might be faulty.
Can I connect a laptop to a desktop to use the desktop as a monitor?
Standard desktop PCs only have video outputs, not inputs, so this doesn’t work directly. Your options are: use Remote Desktop or screen sharing software over network, buy a capture card for the desktop, or use third-party software like Spacedesk which creates a virtual connection over WiFi.
What’s the difference between extending and duplicating displays?
Duplicate shows identical content on both screens, useful for presentations when you want the audience to see exactly what you see. Extend creates one large workspace across both screens, letting you drag windows between them, which is better for productivity with two monitors at a desk.
Why is my display blurry or text hard to read?
You’re probably not using the native resolution. Right-click desktop > Display settings > select the display > change to the recommended resolution (usually the highest number). If text is too small at native resolution, increase scaling percentage instead of lowering resolution. Also check that you’re using a digital connection (HDMI, DisplayPort) rather than analog VGA.
Do I need to buy expensive HDMI cables?
No. HDMI is digital, so either the signal works or it doesn’t. Any certified HDMI cable under 6 feet works identically regardless of price. For longer runs (over 15 feet), quality matters more to prevent signal degradation. Avoid ultra-cheap unbranded cables that might not be built to specification, but don’t waste money on gold-plated premium cables either.

- How to Uninstall Apps from the Start Menu in Windows 11/10 (2026 Guide) - April 2, 2026
- How to Fix Overscan on Windows 11/10: Stop Your Screen Getting Cut Off (2026) - April 1, 2026
- How to Disable Lock Screen on Windows 11/10 in 2026 - April 1, 2026