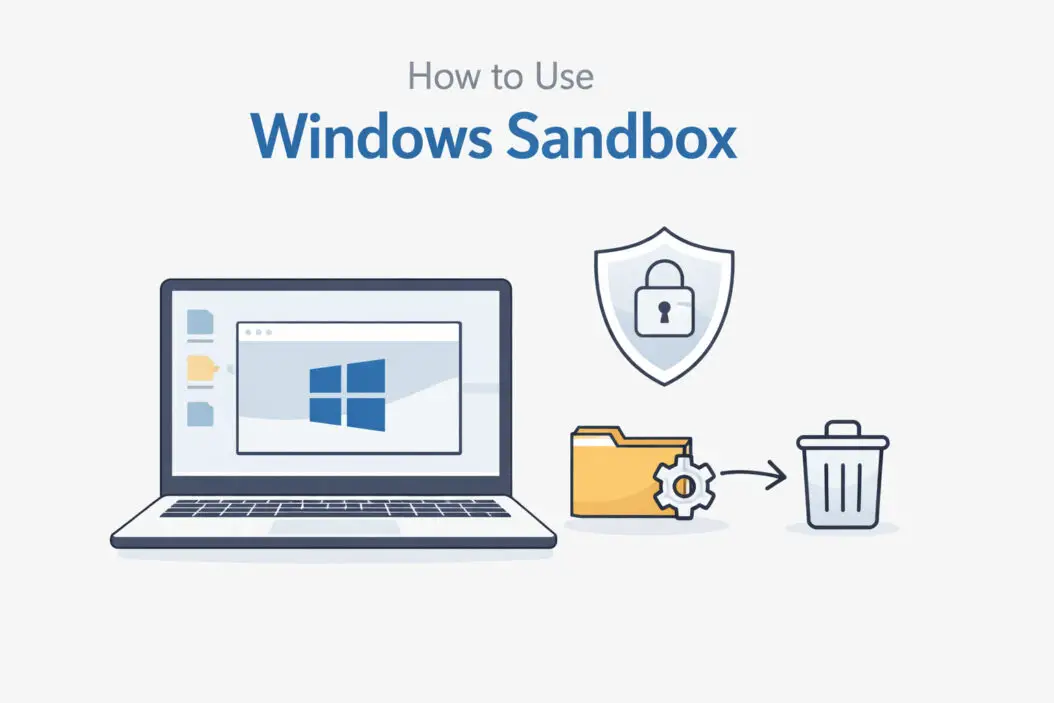
Windows Sandbox lets you test suspicious files, unknown software, and risky websites without putting your main computer at risk. It’s a lightweight virtual machine built into Windows that creates a completely isolated environment. When you close the Sandbox, everything inside gets deleted automatically, leaving your actual system untouched.
This guide shows you exactly how to enable, use, and customize Windows Sandbox for everyday tasks.
What Is Windows Sandbox and Why Should You Use It?
Windows Sandbox is a temporary desktop environment where you can run untrusted software safely. Think of it as a disposable computer inside your computer. Every time you open it, you get a fresh Windows installation. Every time you close it, everything disappears.
Key benefits:
- Test downloaded programs before installing them on your real system
- Open suspicious email attachments without risk
- Browse potentially dangerous websites safely
- Try software configurations without affecting your main setup
- No complex setup or licensing needed
Unlike traditional virtual machines, Windows Sandbox doesn’t require downloading ISO files, creating virtual hard drives, or managing separate installations. It uses your existing Windows installation and shares your hardware efficiently.
System Requirements for Windows Sandbox
Before you start, verify your computer meets these requirements:
Operating system: Windows 10 Pro, Enterprise, or Education (build 18305 or later), or Windows 11 Pro, Enterprise, or Education. Windows Home editions don’t support Sandbox.
Hardware specifications:
- Processor: AMD64 architecture with virtualization capabilities
- RAM: Minimum 4 GB (8 GB recommended)
- Storage: 1 GB free space (SSD recommended for better performance)
- Virtualization: Enabled in BIOS/UEFI
Check your Windows edition:
Press Windows key + R, type winver, and press Enter. The window shows your Windows edition and build number.
How to Enable Virtualization in BIOS
Virtualization must be enabled in your computer’s BIOS before Windows Sandbox works. Most modern computers support this, but it’s often disabled by default.
Steps to enable virtualization:
- Restart your computer
- Press the BIOS key during startup (usually F2, F10, Delete, or Esc; check your screen for the exact key)
- Navigate to Advanced settings or CPU Configuration
- Find the virtualization option (labeled as Intel VT-x, Intel Virtualization Technology, AMD-V, or SVM Mode)
- Change the setting to Enabled
- Save changes and exit (usually F10)
Different manufacturers use different terms. On Intel processors, look for “Intel Virtualization Technology” or “VT-x”. On AMD processors, find “SVM Mode” or “AMD-V”.
If you can’t find the virtualization option, consult your computer manufacturer’s documentation or search for your specific model online.
Enabling Windows Sandbox Step by Step
Once virtualization is active, enabling Windows Sandbox takes just a few clicks.
Method 1: Using Windows Features
- Press Windows key and type “Windows Features”
- Click “Turn Windows features on or off”
- Scroll down and find “Windows Sandbox”
- Check the box next to Windows Sandbox
- Click OK
- Wait for Windows to install the feature (this takes 2-5 minutes)
- Restart your computer when prompted
Method 2: Using PowerShell
For faster installation, use PowerShell:
- Right-click the Start button
- Select “Windows PowerShell (Admin)” or “Terminal (Admin)”
- Type this command:
Enable-WindowsOptionalFeature -FeatureName "Containers-DisposableClientVM" -All -Online - Press Enter
- Type Y when asked to restart
After restart, Windows Sandbox appears in your Start menu.
Starting and Using Windows Sandbox for the First Time
Launch Windows Sandbox:
Click Start, type “Windows Sandbox”, and click the app. A new window opens showing a clean Windows desktop. This process takes 10-30 seconds depending on your system speed.
The Sandbox window looks like a regular Windows desktop, but it’s completely separate from your main system. You can resize this window, maximize it, or run it side-by-side with your regular desktop.
Basic usage:
Your Sandbox starts with no programs installed except default Windows apps. You can install software, download files, change settings, and do anything you’d do on a regular computer. None of these changes affect your actual system.
Copy files into Sandbox:
Simply drag and drop files from your host computer into the Sandbox window. Windows copies the files into the isolated environment.
Alternatively, use copy and paste. Copy a file on your host computer (Ctrl+C), click inside the Sandbox, and paste (Ctrl+V).
Network access:
Windows Sandbox has internet access by default. It shares your host computer’s network connection. This lets you download files directly inside the Sandbox or test web-based applications.
Testing Suspicious Files Safely
This is where Windows Sandbox truly shines. Here’s how to test unknown software without risk:
Testing downloaded programs:
- Download the suspicious file to your regular computer
- Open Windows Sandbox
- Drag the downloaded file into the Sandbox window
- Run the file inside the Sandbox
- Observe its behavior
Watch for warning signs like unexpected system changes, multiple processes starting, or attempts to access sensitive areas. If the program behaves badly, simply close Windows Sandbox. Everything gets deleted, including any malware.
Testing browser extensions or scripts:
- Open Windows Sandbox
- Launch Microsoft Edge (built into Sandbox)
- Install the extension or run the script
- Test its functionality
- Close Sandbox when finished
Important security note:
While Windows Sandbox provides strong isolation, it’s not completely foolproof. Sophisticated malware could potentially exploit vulnerabilities to escape the Sandbox. For extremely dangerous files, consider using dedicated malware analysis tools or services. Microsoft provides detailed security documentation about Windows Sandbox architecture.
Customizing Windows Sandbox with Configuration Files
Windows Sandbox configuration files let you customize how the Sandbox starts. You can map folders, enable or disable networking, and control other settings.
Creating a configuration file:
- Open Notepad
- Create your configuration using XML format
- Save the file with a
.wsbextension (not.txt) - Double-click the
.wsbfile to launch Sandbox with your custom settings
Basic configuration example:
<Configuration>
  <MappedFolders>
    <MappedFolder>
      <HostFolder>C:\TestFiles</HostFolder>
      <ReadOnly>true</ReadOnly>
    </MappedFolder>
  </MappedFolders>
  <Networking>Enable</Networking>
</Configuration>
This configuration maps a folder from your host computer into the Sandbox and enables networking.
Configuration options explained:
| Option | Values | Purpose |
|---|---|---|
| MappedFolders | Folder paths | Share specific folders between host and Sandbox |
| ReadOnly | true/false | Control whether Sandbox can modify shared folders |
| Networking | Enable/Disable | Turn internet access on or off |
| LogonCommand | Command path | Run a program automatically when Sandbox starts |
| vGPU | Enable/Disable | Enable GPU acceleration for better performance |
| MemoryInMB | Number | Allocate specific RAM amount to Sandbox |
Advanced example with multiple settings:
<Configuration>
  <MappedFolders>
    <MappedFolder>
      <HostFolder>C:\SharedTools</HostFolder>
      <ReadOnly>false</ReadOnly>
    </MappedFolder>
  </MappedFolders>
  <LogonCommand>
    <Command>explorer.exe C:\Users\WDAGUtilityAccount\Desktop\SharedTools</Command>
  </LogonCommand>
  <Networking>Disable</Networking>
  <vGPU>Enable</vGPU>
  <MemoryInMB>4096</MemoryInMB>
</Configuration>
This creates a Sandbox with 4GB RAM, GPU acceleration, no internet, a shared folder with write access, and automatically opens that folder on startup.
Save commonly used configurations as separate .wsb files. Create one for testing software (internet enabled), another for analyzing malware (internet disabled), and others for specific tasks.
Practical Uses for Windows Sandbox
Software development and testing:
Developers use Sandbox to test installations, verify uninstallers work correctly, and check software behavior on clean systems. Instead of maintaining multiple test machines, they can quickly spin up fresh environments.
Browser testing:
Test how websites behave with different browser configurations without installing multiple browsers on your main system. Try potentially risky browser extensions before committing to them.
Training and demonstrations:
IT trainers use Sandbox to demonstrate software without worrying about system changes. Each demonstration starts fresh without cleanup time between sessions.
Temporary high-risk tasks:
Open email attachments from unknown senders, test registry tweaks, or try system modifications you’re uncertain about. If something goes wrong, close the Sandbox and start over.
Isolating work environments:
Create a separate environment for specific clients or projects. Access their web portals, download their files, and work in complete isolation from your other activities.
Transferring Files Between Host and Sandbox
You have several methods to move files in and out of Windows Sandbox.
Drag and drop (easiest method):
Grab any file from your host computer and drag it into the Sandbox window. Windows automatically copies it. This works both directions, but remember: files copied out before closing Sandbox must be saved to mapped folders or they’ll disappear.
Shared folders (recommended for projects):
Set up mapped folders in your configuration file. This creates a two-way connection between a host folder and the Sandbox. Save files to this shared location to keep them after closing Sandbox.
Network sharing:
If both your host and Sandbox are on the same network, you can access network shares from inside the Sandbox. This works well for accessing company file servers or NAS devices.
Cloud storage:
Use OneDrive, Google Drive, Dropbox, or other cloud services. Upload files from inside Sandbox, close Sandbox, then download them on your host computer. This method is slower but works when other options aren’t available.
Important reminder:
Everything inside Windows Sandbox gets deleted when you close it, except files saved to:
- Mapped folders
- Network locations
- Cloud storage uploaded before closing
Always save important files before closing Sandbox.
Troubleshooting Common Windows Sandbox Issues
Error: “Windows Sandbox failed to start, Error 0x80070002”
This typically means required files are missing. Try these fixes:
- Open Services (press Windows + R, type
services.msc) - Find “Windows Defender Advanced Threat Protection Service”
- Right-click and select Start
- Try launching Sandbox again
If that doesn’t work, run this PowerShell command as administrator: Disable-WindowsOptionalFeature -FeatureName "Containers-DisposableClientVM" -Online, restart, then re-enable the feature.
Sandbox is extremely slow:
Performance issues usually relate to insufficient resources. Solutions:
- Close unnecessary programs on your host computer
- Allocate more RAM through a configuration file
- Enable vGPU if you have a dedicated graphics card
- Ensure your system has at least 8GB total RAM (4GB minimum)
- Use an SSD instead of HDD for better performance
Cannot enable Windows Sandbox (greyed out option):
This happens when virtualization isn’t enabled or isn’t supported. Verify:
- Your Windows edition supports Sandbox (Pro, Enterprise, or Education)
- Virtualization is enabled in BIOS
- Your processor supports hardware virtualization
- Hyper-V is not causing conflicts
Run this command in PowerShell to check virtualization status: Get-ComputerInfo -property "HyperV*"
Files won’t copy into Sandbox:
Check these potential causes:
- The file is locked or in use on the host system
- Antivirus is blocking the transfer
- The file is too large (though Sandbox handles large files well)
- Network mapped drives aren’t accessible the same way
Try copying to your local drive first, then drag into Sandbox.
Sandbox loses internet connection:
Network issues in Sandbox usually mirror host computer network problems. Solutions:
- Check your host computer’s internet connection
- Verify Networking is set to Enable in your configuration file
- Restart Windows Sandbox
- Check Windows Firewall settings aren’t blocking Sandbox
The Windows Sandbox documentation from Microsoft offers additional troubleshooting guidance for complex scenarios.
Windows Sandbox vs Other Virtualization Options
How Sandbox compares to VirtualBox or VMware:
Windows Sandbox uses your existing Windows installation, while traditional virtual machines require downloading OS images and configuring virtual hardware. Sandbox starts in seconds; VMs take minutes. Sandbox resets automatically; VMs persist until you delete them.
Use Sandbox for quick, temporary tasks. Use traditional VMs when you need persistence, different operating systems, or specific configurations that must survive restarts.
Sandbox vs Hyper-V:
Hyper-V is Microsoft’s full virtualization platform. It’s more powerful and flexible than Sandbox but requires more setup. Sandbox is actually built on Hyper-V technology but simplified for ease of use.
Choose Sandbox for simple testing. Choose Hyper-V for complex, multi-VM environments or when running non-Windows operating systems.
Performance comparison:
| Feature | Windows Sandbox | VirtualBox/VMware | Hyper-V |
|---|---|---|---|
| Startup time | 10-30 seconds | 1-3 minutes | 1-2 minutes |
| Setup complexity | Click and run | Moderate | Complex |
| Persistence | None (resets on close) | Full | Full |
| Resource usage | Lightweight | Moderate to Heavy | Moderate |
| OS options | Windows only | Any OS | Any OS |
Security Best Practices When Using Windows Sandbox
Windows Sandbox provides strong isolation, but following security best practices maximizes protection.
Don’t run Sandbox as administrator unless necessary:
Launch Windows Sandbox normally. Avoid right-clicking and selecting “Run as administrator” unless your specific task requires it. Administrative privileges could potentially give malware more escape routes.
Disable networking for malware analysis:
When examining suspicious files, create a configuration file with networking disabled. This prevents malware from communicating with command-and-control servers or downloading additional payloads.
Use read-only mapped folders:
When sharing folders between host and Sandbox, set them to read-only unless you specifically need write access. This prevents malware from modifying files on your host system.
Keep Windows updated:
Windows Sandbox inherits security updates from your main Windows installation. Regular updates patch potential vulnerabilities that sophisticated malware might exploit.
Don’t paste sensitive data into Sandbox:
Avoid entering passwords, credit card numbers, or sensitive information inside Sandbox when testing untrusted software. Even though Sandbox is isolated, keyloggers could potentially capture this information.
Close Sandbox immediately after use:
Don’t leave Sandbox running indefinitely. Close it as soon as you finish testing to ensure complete cleanup.
Conclusion
Windows Sandbox transforms how you handle risky computing tasks. Instead of crossing your fingers when opening unknown files or testing new software, you get a completely safe environment that resets with one click.
Enable it once through Windows Features, and you have permanent access to disposable Windows environments. Drag suspicious files in, test them thoroughly, and close the window knowing nothing touched your actual system.
For everyday users, it’s peace of mind when downloading software. For IT professionals, it’s an essential testing tool. For developers, it’s a quick way to verify installations on clean systems.
Frequently Asked Questions
Can I use Windows Sandbox on Windows 10 Home?
No, Windows Sandbox only works on Windows 10 Pro, Enterprise, and Education editions, or any edition of Windows 11 Pro and above. Windows Home editions lack the underlying virtualization features Sandbox requires. If you have Windows Home, consider upgrading to Pro or using free alternatives like VirtualBox, though they require more setup.
Does Windows Sandbox slow down my computer?
Windows Sandbox uses system resources while running, similar to any other program. On computers with 8GB+ RAM and modern processors, performance impact is minimal. You might notice slight slowdowns on systems with only 4GB RAM. Close Sandbox when not using it to free up resources. The Sandbox itself only consumes resources while active, not when closed.
Are files in Windows Sandbox completely safe to open?
Windows Sandbox provides strong isolation that protects your main system from most threats. However, no security measure is 100% foolproof. Theoretical vulnerabilities could potentially allow escape, though no widespread exploits currently exist. For extremely dangerous malware analysis, security professionals use additional precautions. For typical users testing normal software or opening suspicious attachments, Sandbox provides excellent protection.
Can I save my work from Windows Sandbox?
Everything inside Windows Sandbox gets deleted when you close it unless you save files to mapped folders, network locations, or cloud storage before closing. Set up shared folders through configuration files to easily transfer files between Sandbox and your host computer. Copy important work to these shared locations before closing Sandbox, or upload files to cloud storage services.
How much disk space does Windows Sandbox use?
Windows Sandbox itself requires approximately 1GB of disk space for the feature installation. While running, it creates a temporary virtual hard disk that grows as needed but typically stays under 10GB for normal use. This temporary disk gets deleted completely when you close Sandbox, freeing all space it consumed. Unlike traditional virtual machines that permanently occupy 20-40GB, Sandbox’s storage footprint is minimal.
